Congratulations! You have made it to the final part of the vSphere Upgrade Series, Part 6: Upgrading vSphere Networking. To recap, I kicked off this series by reviewing our Upgrade prerequisites & compatibility, gathering our data, and Preparing to Upgrade. Next we continued by upgrading vCenter Server and migrating vSphere Update Manager (VUM) from vSphere 6.0 Update3 to 6.7. Continuing on from there we walked through preparing VUM with an Upgrade Baseline to remediate the vSphere ESXi hosts to vSphere 6.7. After the hosts were upgraded to vSphere 6.7 we moved on to upgrading VMware Tools and VM Compatibility followed by upgrading VMFS datastores.
Virtual networking comes in as Step 6 in the overall vSphere Upgrade process. Because vSphere 6.7 is not compatible with vSphere 5.5 components, one requirement is making sure that the vSphere Distributed Switch (VDS) has been upgraded to at least a 6.x version during your upgrade journey. What I mean here is that since there is no upgrade path from 5.5 to 6.7 directly, the upgrade from 5.5 will bring you to 6.x before moving to 6.7. After getting up to vSphere 6.x and before upgrading to vSphere 6.7, you must update the VDS to a 6.x version. If this is not completed prior to upgrading your upgrade may fail.
When creating or updating a vSphere distributed switch in vSphere 6.7 you have 3 options or versions to move to.
vSphere 6.0
vSphere 6.5
vSphere 6.6
Most updates to networking have been within ESXi itself, but some features require upgrading VDS as outlined above. When upgrading to VDS version 6.0 or 6.5 it’s quite simple and can be done with no disruption. However, when upgrading to VDS version 6.6 there are some considerations to take, KB52621 has considerations to review to prevent most issues.
Upgrading vSphere Networking
In my lab I will be upgrading a vSphere Distributed Switch (VDS) from version 6.0 to 6.6.
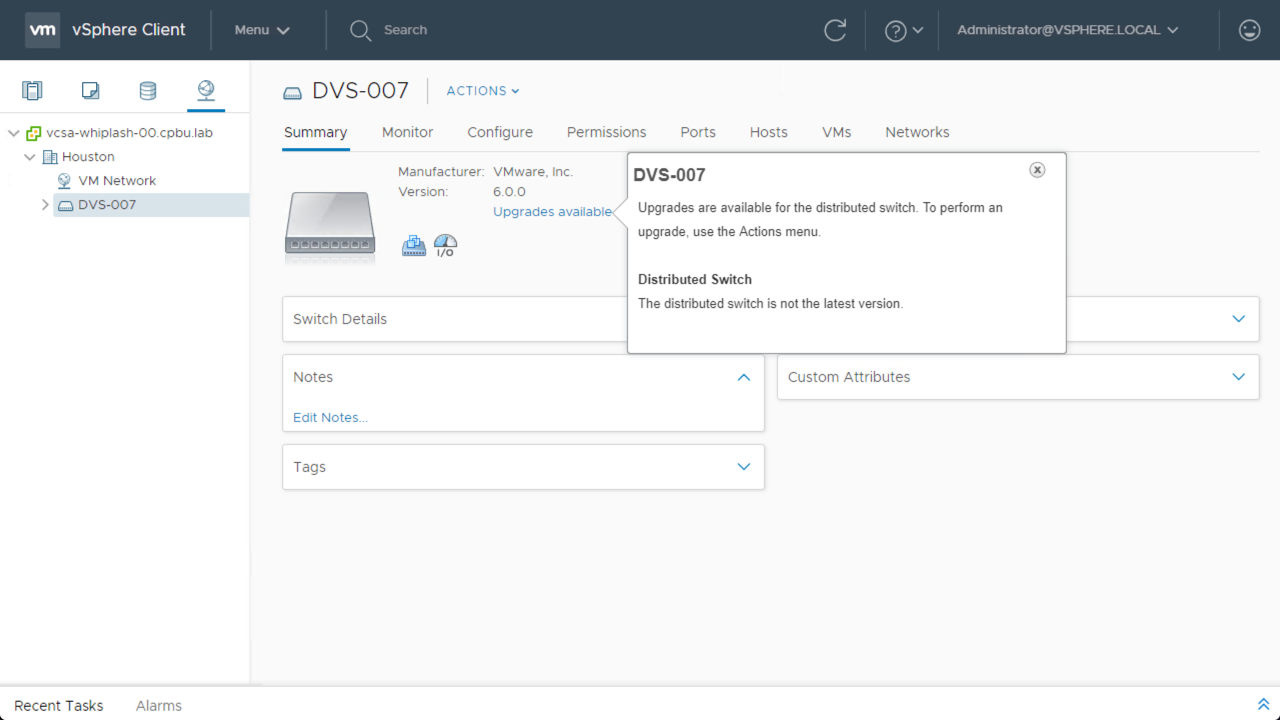
Step 1: First we will review what version the current VDS is running by viewing the Summary tab on the Networking screen. Once reviewed we will move to upgrading.
Step 2: Here we click on the Upgrades Available link and can see an upgrade is needed.
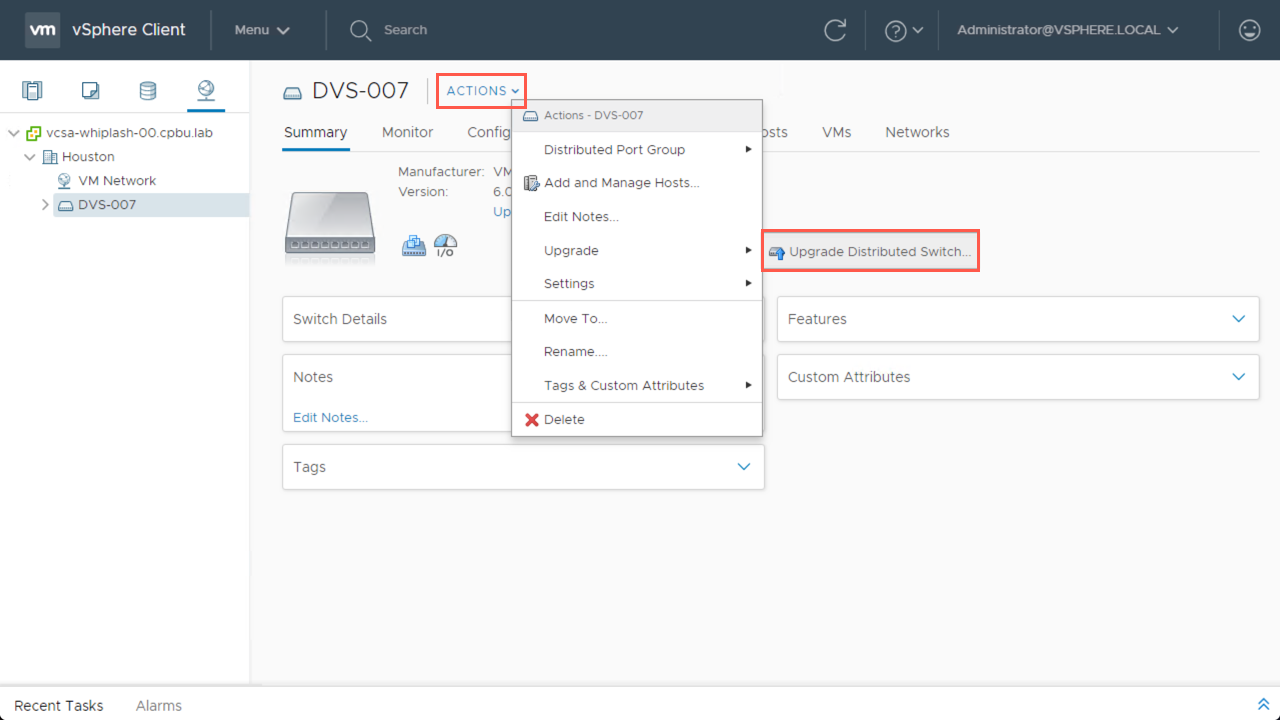
Step 3: Click on the Actions menu then browse to Upgrade, and choose Upgrade Distributed Switch
Step 4: On the upgrade wizard, review the version choices by click on the “i” for more info. From here you can see the benefits that come with each VDS version. Once a selection is made, click Next to continue.
Step 5: Once the switch upgrade completes, you can see the new version shown on the Summary tab of the Networking screen. The VDS upgrade is now finished.
Conclusion
Thats a wrap! From beginning to end of a vSphere Upgrade, component to component, screen by screen. I hope that this series has helped take some of the unknowns or complexity away from your vSphere Upgrade Journey. My job is to educate as well as help make things easier to understand and digest. If these blogs have helped in anyway, please leave a comment.
For review, please follow the below links to each part of the vSphere Upgrade Series: