Traditionally, whenever a VM was provisioned from an image template, and that image template happened to have multiple disks attached to it, vRealize Automation didn’t quite acknowledge those disks as individual entities, this was actually evident with the 2nd day operations, where pretty much, you were only able to address the boot-disk.
Also, whenever you added an additional disk with an “Add Disk”, operation, you didn’t get too much details about the additional volume and its relation with other objects, such as, which VM is this volume attached to and its properties.
So what is changing? well with the latest vRealize Automation Cloud Release (and expect to see it at vRealize Automation 8.4 GA)
You will be able to apply “Resize Disk” Action, independently on any disk that was created from a template image with multiple disks (of course also with disks added with “Add Disk” operation).
So let’s see it with a basic example, I created a multi-disk image template named “Ubuntu18-mdisk” with my boot-disk (20GB) and two companion disks, Data Storage (3GB) and Backup Storage (3GB).
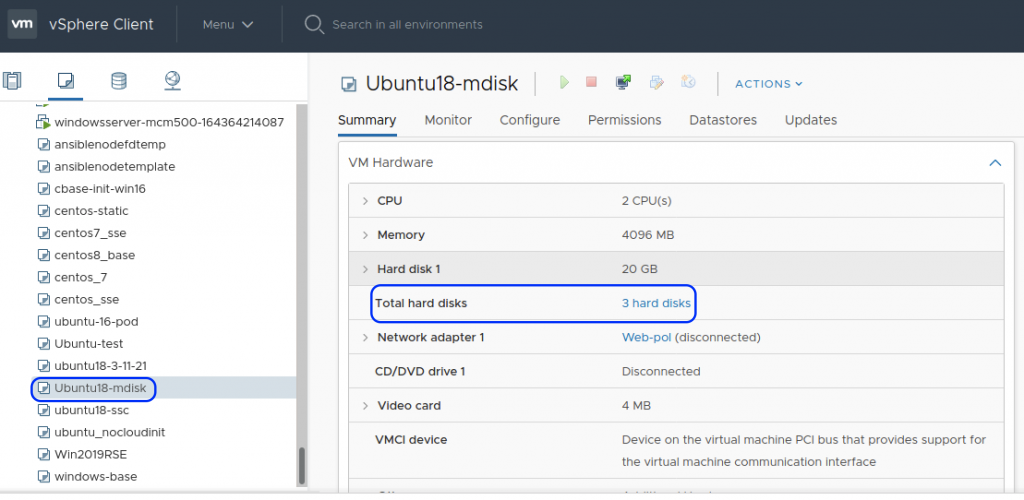
This image template is exposed to vRealize Automation so I can consume it via Cloud Templates:

After successfully instancing the Cloud Template, we could verify all the way down to the actual deployed VM at vSphere level, that indeed, the additional disks from the image template Disk2: Data Storage (3GB) and Disk3: Backup Storage (3GB) where deployed
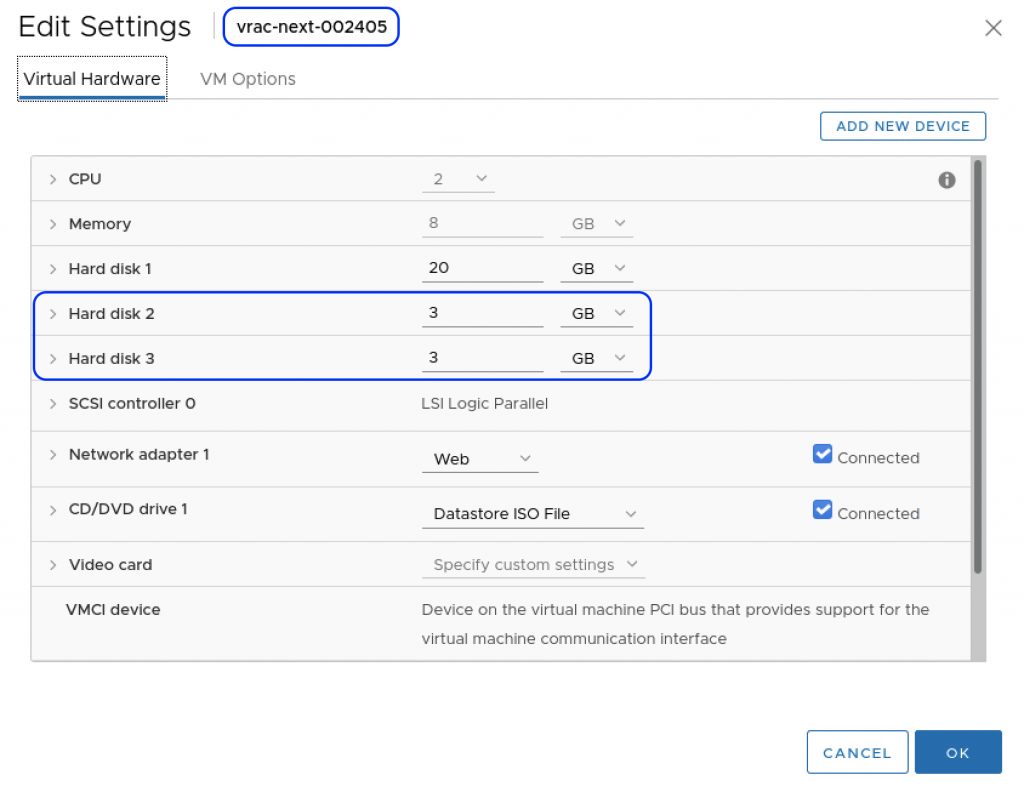
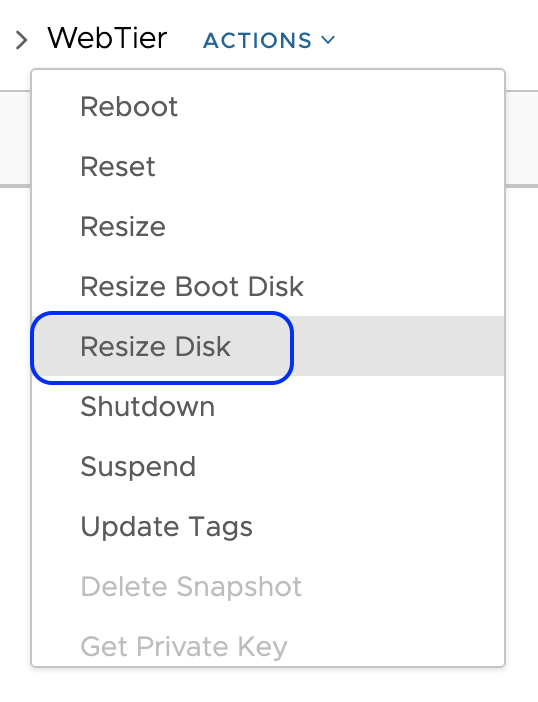
but more importantly, if you inspect the entitled 2nd Day Actions you will discover that besides the well known “Resize Boot Disk” , you now have access to the “Resize Disk” Action ,
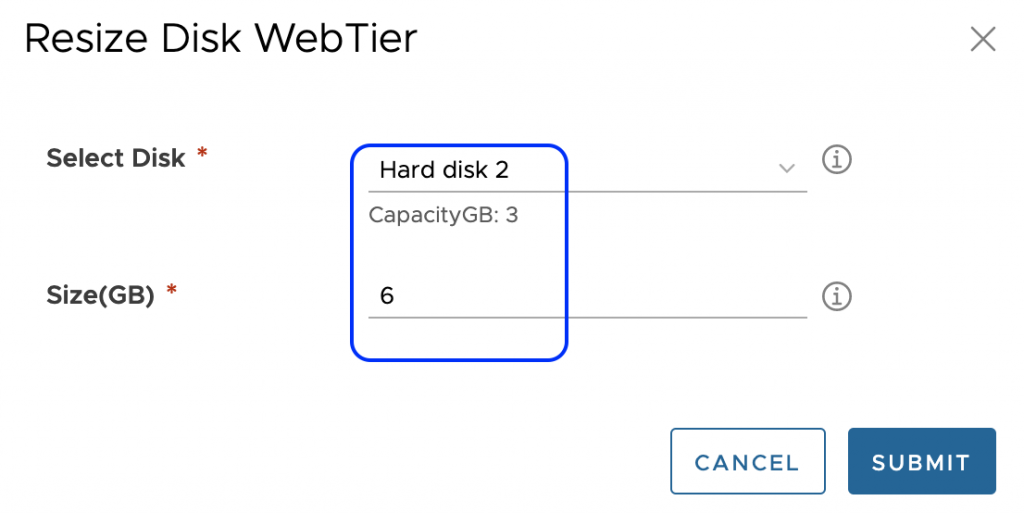
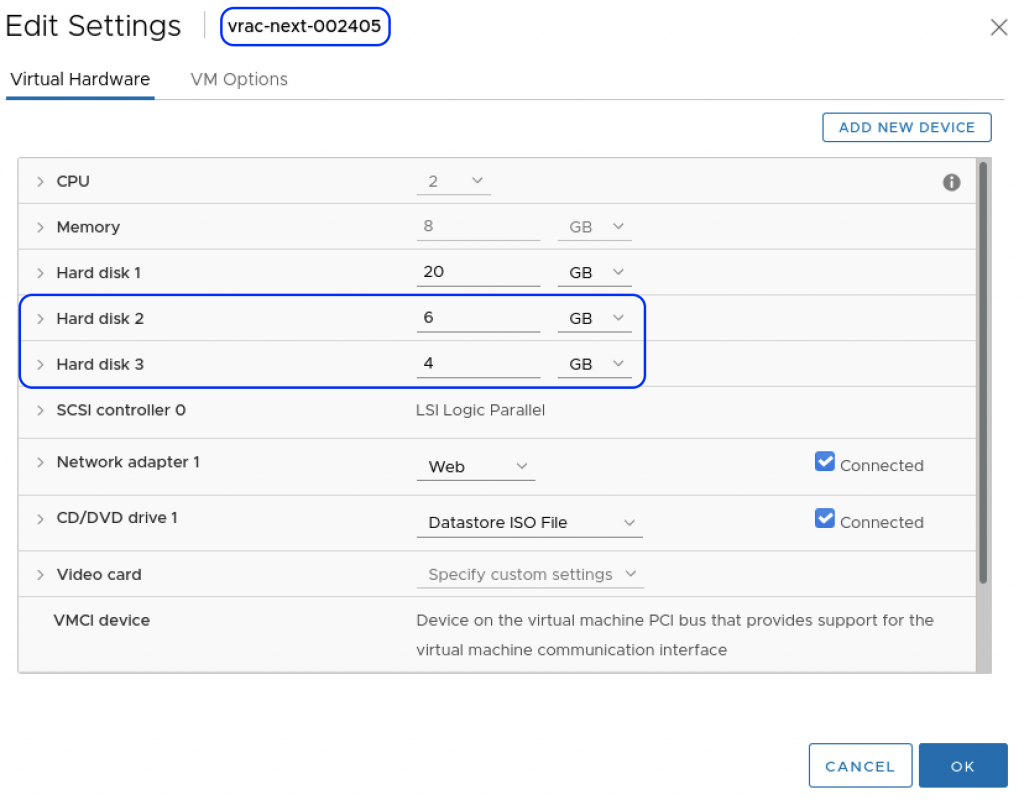
which will bring a pop up window, where you could select the additional disks that came, as part of the original template and apply a new size settings individually, e.g. let’s make Disk 2 grow to 6GB
and Disk 3 just a little bigger (4GB)
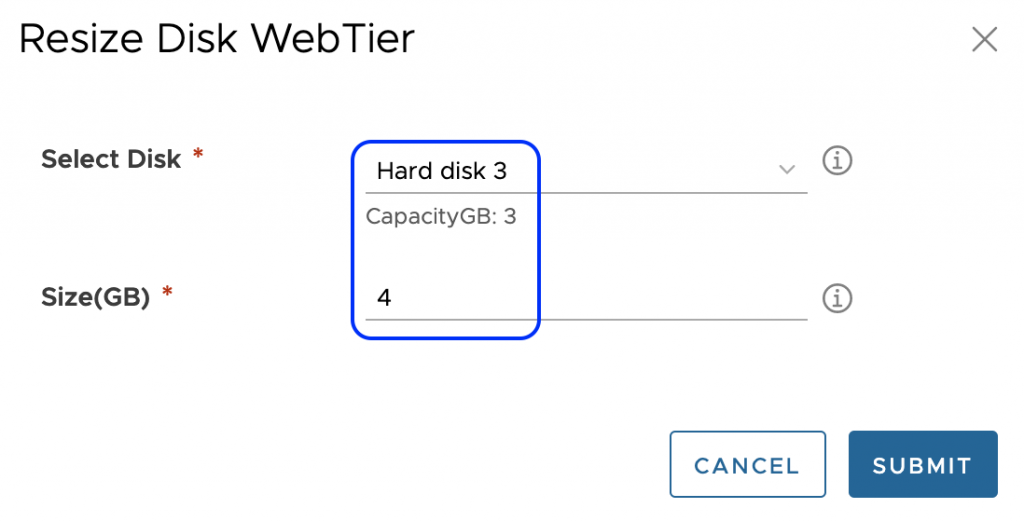
please note, at both cases, I was able to select the disks at the pull down menu, if I had previously added any additional extra disk beyond the image templates disks, example, by calling a “Add Disk” 2nd Day Action, I would be able to see it also listed here and apply a resize operation as well, BTW, worth mention that the resize operation does not support downsizing of the disk.
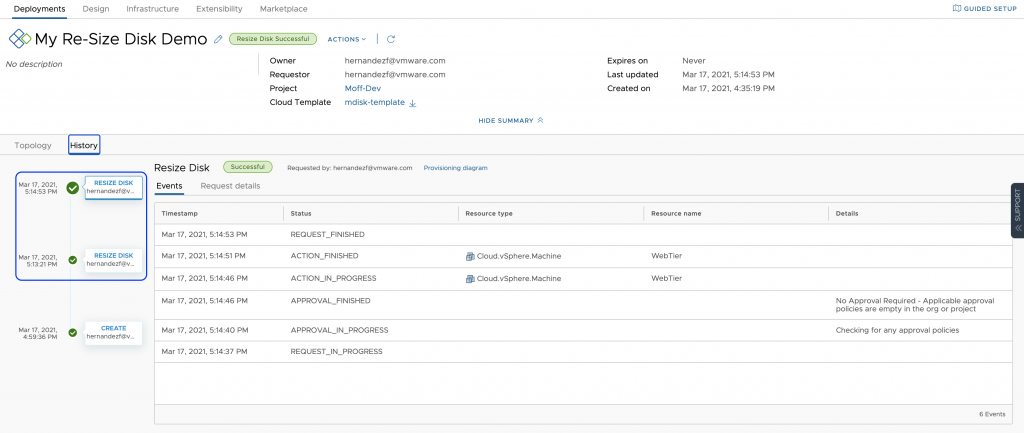
Now, we could confirm that both operations were completed successfully at vRealize Automation History.
And effectively changed for the VM
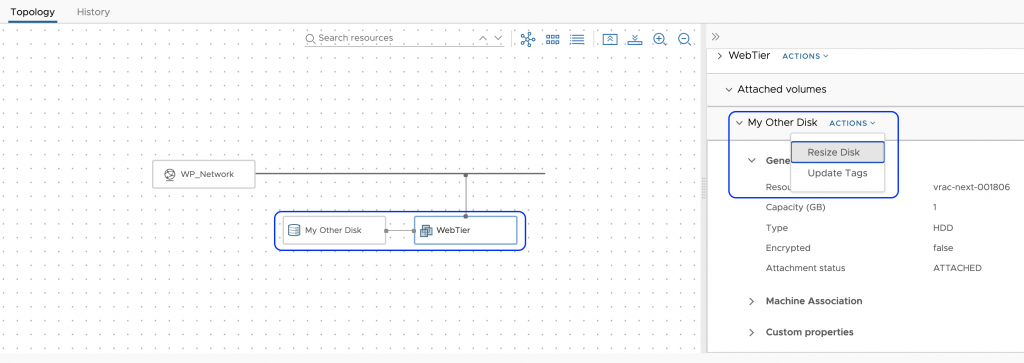
Additionally, whenever a new disk is added by calling the “Add Disk” Action, the deployment topology will include a visual representation of the newly added disk and which VM is attached to, but more importantly it will be displayed at “Attached volumes” section where you could find all the general details and custom properties of the added/attached disks, and of course, easy access to the “Resize Disk” Operation described some lines above.
Conclusion:
vRealize Automation keeps evolving and providing more granular Out-Of-the-Box capabilities when it comes to 2nd Day operations, which are as important (may be more) as Day 1 operations, and all this with easy of use.
Related Links:
vRealize Automation Cloud Assembly’s new feature Secure Properties
vRealize Automation Cloud and CloudHealth Pricing Integration


