
Alain Geenrits, Blue Medora
In a previous blog post I showed you how you can create your own custom applications groups in VMware vRealize Operations (vROps) to monitor your resources at different tiers. When you manage a large infrastructure, the number of objects and corresponding metrics in vROps will grow rapidly. Think of all of the virtual machines, datastores, operating systems and more in your environment. When you add management packs to extend the dynamic monitoring and alerts of vRealize Operations to more parts of your infrastructure, this number will grow rapidly. With management packs from Blue Medora for databases like Microsoft SQL Server, Oracle DB or MySQL, for example, you can add database clusters, database hosts and databases to the vROps environment. Not only that, but metrics like transactions per second, locks, index fragmentation and more are tracked. If you manage a virtual desktop environment with our Citrix XenDesktop management pack, the number of objects you manage can grow even larger.
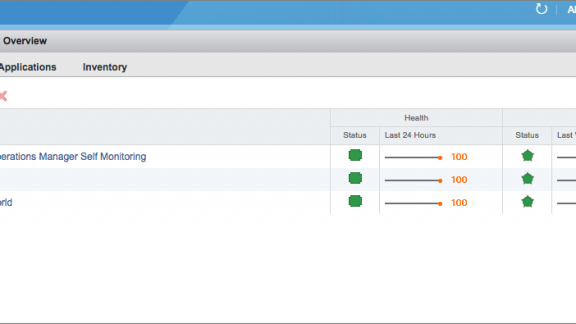
So to create an automated management system you need some way to organize objects so that you can quickly gain insights. Custom groups come to the rescue! When you click Environment in vROps, and then Custom Groups, you will see the overview in Figure 1.

Figure 1 – Custom Groups overview
Three special groups have already been pre-installed for you: vROps Self Monitoring, Universe and vSphere World. I will not describe each of them in detail here, you can find more info in the online help. vROps Self Monitoring is a group of objects and metrics that make up the monitoring platform itself. Universe is the group of all your monitored elements and vSphere World is obviously all objects of the VMware environment like virtual machines.
You can create groups yourself and add any objects in the vROps database that you want monitored. The Health, Risk and Efficiency badges will be calculated for every group and the groups will appear in the inventory list to use in views and widgets. The custom groups are also very important because you can assign a different policy to each one. This means you can have different alerts and capacity calculations between your production and test/dev environments. So how do you create a group? Click the green ‘+’ in the Custom Groups screen and you’ll see the dialog in Figure 2.
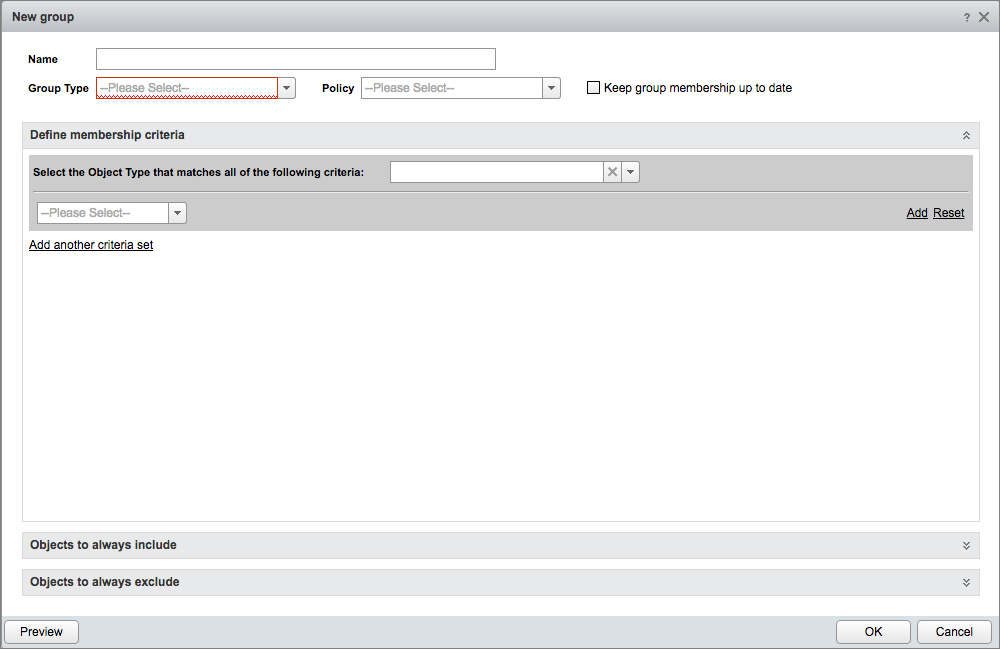
Figure 2 – Custom Groups create form
You obviously need to specify a name, then you choose a group type. The choices you have for your own groups are only there for organizational purposes; they have no impact on the group, so this just organizes your groups for the Custom Groups home screen. You can choose Department, Environment, Location, Function, Security Zone or Service Level Objectives. You will see some additional reserved types when you use EPOps agents. Folders that you’ve created in vCenter will also show up as groups. The Policy drop down contains all the policies in your library. Select a policy for your group. The Keep group membership up to date box is very important. Here you choose if you create a static group or a group that is updated automatically with your membership criteria. This is where all the power of custom groups lies! You can, for example, create a group of all virtual machines that are powered on and have OS type Windows. When you power on a Windows VM it will be automatically added to the group and the policy will be applied!
The membership criteria have been extended in vRealize Operations 6.x and allow for some pretty nifty constructs. First you need to select the Object Type you want to build a membership criteria for. This includes all the object types defined by management packs as well, so you can use a SQL database or a virtual machine or something else. Next you define what type of property you are going to use in the selection: Metrics, Relationships, Properties or Object Name:
- Metrics will show you a selection box with all the metrics collected for the object type you choose. It will also tell you what type of value it expects and you can select a logical operator like IS, IS NOT, or CONTAINS.
- Relationships is very powerful. It allows you to select objects based on the relationship tree. Note that parent or child select objects one level away, while descendant or ancestor selects objects more levels away in the tree. If you select one you can select a logical operator for an object name in a certain selection tree. Again these selection trees are also created by management packs, so yours might contain NetApp Clusters, for example. The input fields open with the relevant dynamic selection enabled.
- Properties allow you to select object properties.
- Object Name allows you to use the object name
You can use Add to combine logical AND a criteria or you can Reset your criteria. If you click Add another criteria set you add criteria that are logical OR together with the previous set. Remember when you are building a selection you can always click Preview to get a list of objects that correspond to your selection. It is a great debugging tool.
On top of all that you can specify individual objects to always include or exclude in the lists at the bottom. Obviously these selections are not dynamic.
Let’s show an example. We want to make a group of all NetApp Volumes that have more than 25% capacity free at the storage level, not the VMware level. Figure 3 shows the criteria:
 Figure 3 – Criteria for NetApp Volumes with more than 25% capacity free.
If you click Preview you will see a list of volumes that match this criterium in my environment, 26 in total:
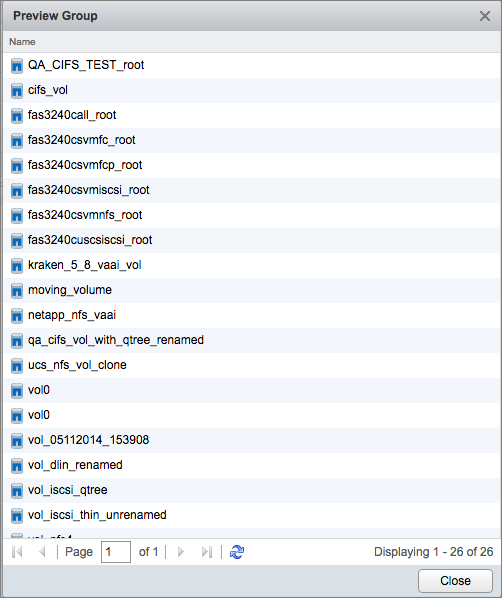
Figure 4 – Preview NetApp Volumes with more than 25% capacity
In the next step I click Add at the end of the line to AND another criterium. I want to see only the volumes on a certain NetApp aggregate as in Figure 5.
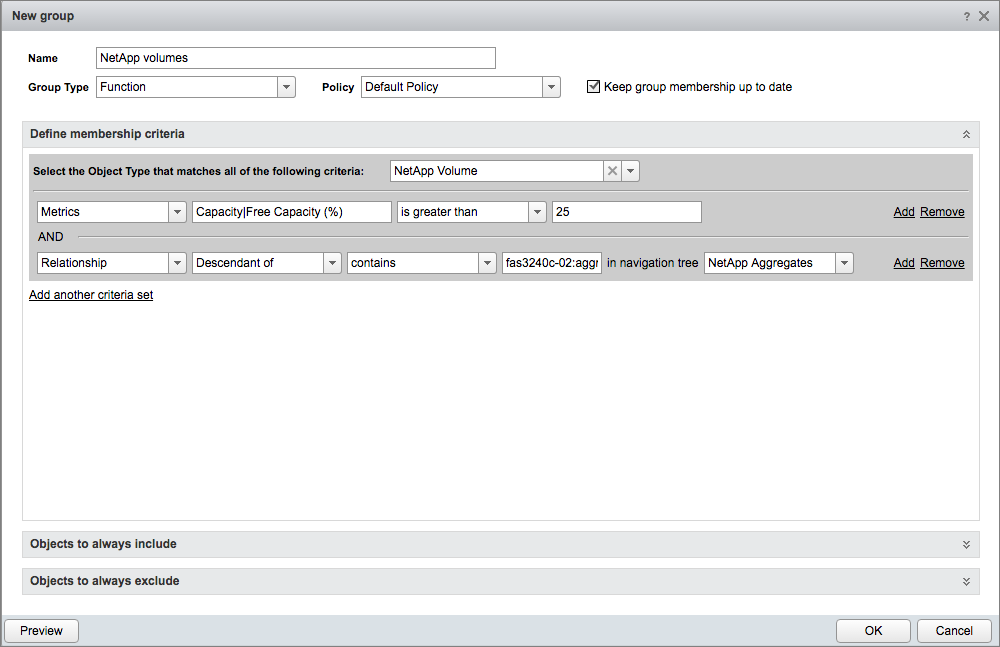
Figure 5 – Add criterium to select volumes on a certain NetApp aggregate
Now Preview will show me less objects, 11 in my case. When you click OK the group is added to your list and badges are calculated. If a volume goes low on disk space it will disappear from my group automatically if I enabled dynamic membership.
I hope this blog post has given you ideas on how to organize your vRealize Operations environment quickly and dynamically. I had one customer, for example, where we had to define some pretty complex criteria on object names with object exclusions to separate out production and test/dev clusters in their environment since they had no naming convention. Let me know what you come up with!