We always say: the fastest way to realize value from your Workspace ONE and Horizon investments is through end-user adoption. Organizations that combine a well-curated end-user onboarding experience with an effective communication, promotion, and enablement strategy are twice as likely to consider their digital workspace projects fully successful. So why leave success to chance?
End-user adoption is increasingly considered an IT organization responsibility. Creating an adoption strategy, however, can be daunting, especially for IT teams that need more resources and don’t have marketing and communication support. To help customers with end-user adoption, we have created a wide range of tools and resources, such as the Adoption Kits and the Adoption Kit Wizard. The Wizard is a fantastic web app that lets you create a range of professional-looking marketing and enablement assets. Up to now, the Wizard has had three modules: a banner, an enrollment guide, and an FAQ creator.
We are now excited to announce a new component: the Adoption Kit Wizard Planner.
This module allows customers to create a strategy to accelerate the adoption of Workspace ONE and Horizon in just a few clicks.
Creating an adoption strategy is now easy, thanks to the Planner. In the new Planner tool, we have included all the steps our best-in-class customers implement in their adoption strategies: priority activity recommendations, timing guidance, and best practices. We believe this tool will save your team days of work! How does the Planner work?
Step 1: Set up your plan
The Planner lets you create a complete end-user adoption strategy in four easy steps, by customizing our default template. To begin with Step 1, navigate to the Adoption Kit Wizard website and select “Your Planner.” Set up your plan by choosing a title, for example, “Workspace ONE Employee Adoption Plan.” Then add your company logo and select header and banner colors to match your organization’s brand guidelines. The Wizard makes this easy by supporting any HEX, RGB, or HSL color code. You can review the template by clicking “View example.”

The plan is centered around five categories of activities:
- Plan. This category includes all the preliminary activities involved in launching a successful adoption campaign.
- Communicate. Communication is a critical component of an adoption campaign. This category of activities guides you in identifying your communication requirements and determining what you will communicate to your employees, how often, and which channels you will use.
- Enable. Enablement is the other key ingredient of an adoption campaign. Use this category to select activities that help your organization close the skill gap — with training options for IT support staff and end users — and determine how your enablement will be delivered and distributed.
- Promote. Within this category, you will select activities aimed at creating a range of promotional assets to increase the visibility of the project and drive engagement.
- Support. These activities aim to create and operationalize the right level of support for users during launch, such as enrolling their devices, onboarding, and getting started with the new tools. It can also work in the longer term, for your employees’ day-to-day activities.
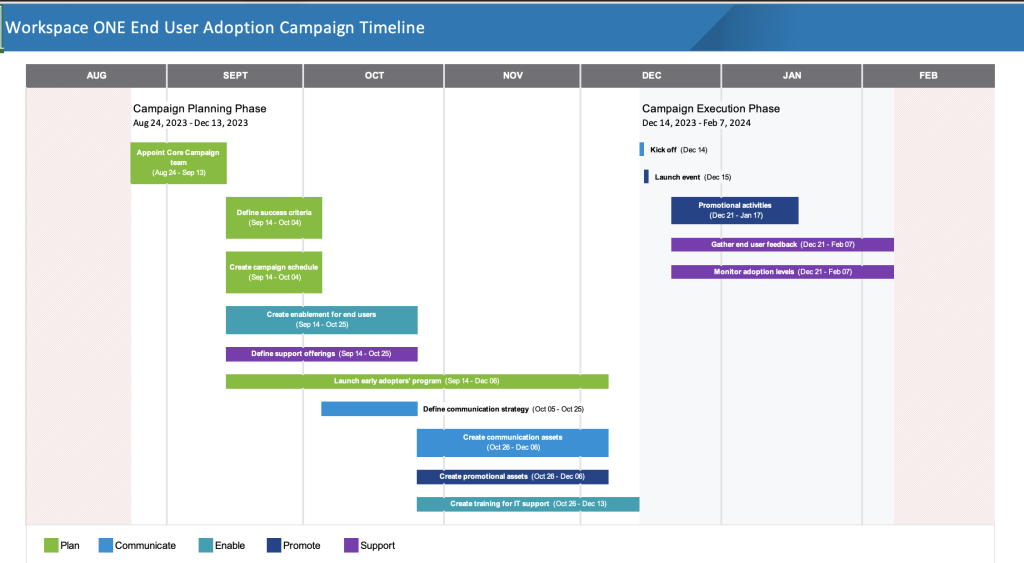
Each category is color-coded to stand out quickly in the graphic representation of your plan and they are fully customizable. For each category, there is a list of activities that can be selected. If you wish, you can create and add custom activities, too.
Step 2: Planner timeframe
Step 2 sets the timeframe for your adoption campaign. The research that we have carried out shows that most organizations take between one to three months to prepare an end-user adoption campaign, and about the same time to execute it. This is why our Planner is designed for a maximum six-month timeframe. If you run a longer, more complex adoption program, you can still design it with the Planner and then export it to your project management tool to expand it flexibly.

Step 3: Planner activities details
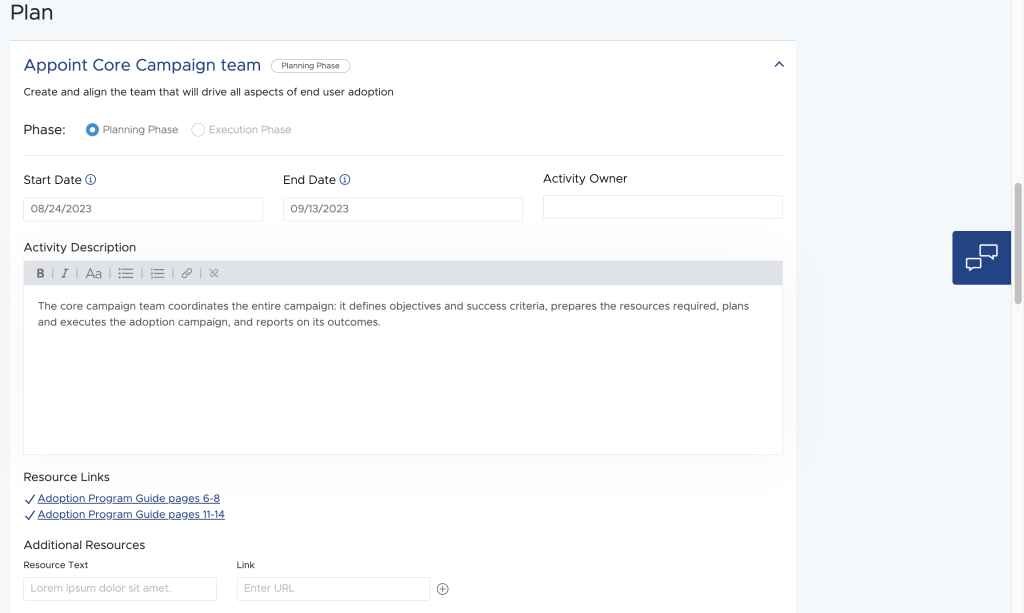
In Step 3, you get to work on the details of your selected activities. The Planner provides a default description and links to resources – templates, best practices, and more — that will support you with that specific task. You can edit and modify each aspect of an activity and assign it to someone.

Step 4: Review and export
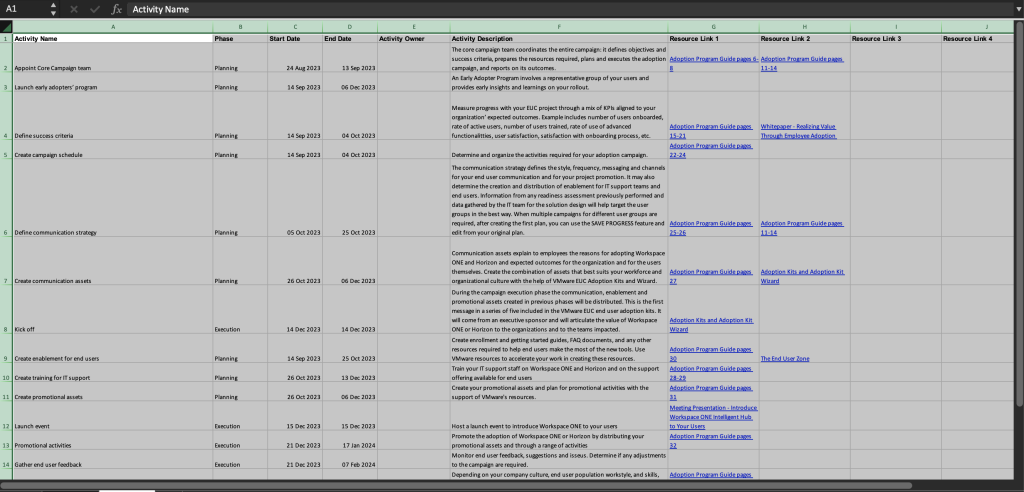
In Step 4, once you have reviewed all activities, you can finalize your plan. If you are happy with it, you can download an Excel file containing a graphic representation of the plan and a table detailing all your activities.

At any moment, you can save your plan and get a URL that enables you to resume your work later or use it as a template for a new campaign.

Once your plan is finalized, it is time to use the other three modules of the Adoption Kit Wizard — the Banner, the Enrollment Guides, and the FAQ document generator — to quickly create a range of communication, promotion, and enablement assets!
We hope you enjoy using the Adoption Wizard Kit Planner, and we’d love to have your comments and feedback at useradoption@vmware.com


