VMware Cloud Director enables Kubernetes-as-a-Service using Container Service Extension(CSE). Providers can offer production-ready Tanzu Kubernetes Grid-based Kubernetes clusters using Container Service Extension. The Container Service extension supports VMware Cloud Director with Multi-tenancy at the core, keeping Cloud Providers user personas in consideration. Developers in customer organizations can install and configure Tanzu packages into Tanzu Kubernetes clusters. This blog describes how customer organization’s Kubernetes administrators, or users (User Personas) can install User-managed Packages using Tanzu CLI into CSE Managed Tanzu Kubernetes clusters. Table 1 describes supported User-Managed packages and their use cases on Tanzu Kubernetes Cluster. Table 2 describes pre-installed core packages on Tanzu Kubernetes Cluster provisioned by CSE within the customer organization.
| User Managed Package Name | Function | Dependency | Install Location |
|---|---|---|---|
| Cert-management | Certificate management | required by Contour, Harbor, Prometheus, Grafana | Workload cluster or Shared Services Cluster |
| Contour | Ingress control | required by Harbor, Grafana | Workload or Shared Services Cluster |
| Harbor Registry | Container registry | n/a | Shared Services Cluster |
| Prometheus | Monitoring | required by Prometheus | Workload Cluster |
| Grafana | Monitoring | n/a | Workload Cluster |
| Fluent-bit | Log forwarding | n/a | Workload Cluster |
| Package | Package Namespace | Description |
|---|---|---|
| antrea | tkg-system | Enables pod networking and enforces network policies for Kubernetes clusters. If Antrea is selected as the CNI provider, this package is installed in every cluster |
| core-dns | tkg-system | Provides DNS Service, installed in every cluster |
| vcd-csi | tkg-system | Provides the VMware Cloud Director- Cloud Storage Interface. This package is installed in every cluster |
| vcd-cpi | tkg-system | Provides the VMware Cloud Director- Cloud Provider Interface. This package is installed in every cluster |
The installation of the Tanzu Package is a 3 steps process that will be described in this article. However, before we deep dive into this, it is assumed that the user role following these steps have desired rights to create the Kubernetes cluster on VMware Cloud Director and has installed kubectl on the local machine to manage the tanzu Kubernetes cluster. Additionally, it is important to note that this blog post describes Tanzu Packages for Tanzu Kubernetes Grid version 1.4.0, VMware Cloud Director 10.3.2, and CSE release 3.1.2.
This should be applicable for other Tanzu Kubernetes Grid versions as long as the TKG OVA version, used in step 1, matches with the package repository configured in step 2.
- Create and Prepare Tanzu Kubernetes Cluster
- Prepare Local Environment with Tanzu CLI and Tanzu Packages
- Install User Packages
1. Create and Prepare Tanzu Kubernetes Cluster
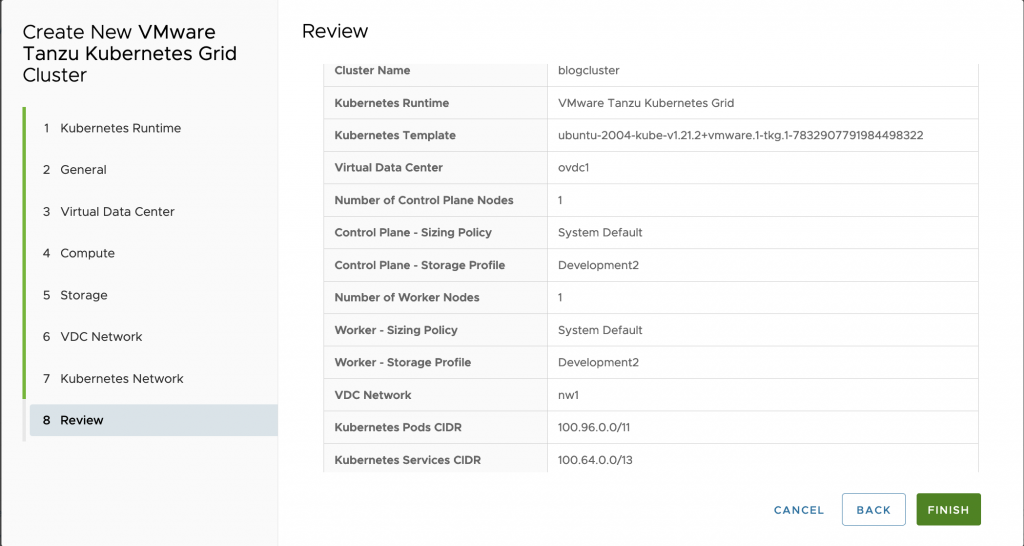
Create Tanzu Kubernetes cluster using VMware Cloud Director’s Kubernetes Container UI plug-in. The diagram showcases the summary of Tanzu Kubernetes Cluster.

Alternatively, create Tanzu Kubernetes cluster using YAML specification with vcd cli, as shown in snippet.
|
1 2 3 4 5 6 7 8 9 10 11 12 13 14 15 16 17 18 19 20 21 22 23 24 25 26 27 28 29 30 31 32 33 34 35 36 37 38 39 |
$vi tkgm.yaml apiVersion: cse.vmware.com/v2.0 kind: TKGm metadata: name: <span style="background-color: rgba(0, 0, 0, 0.2); font-size: inherit; color: initial;">myk8scluster6</span> orgName: organization_name site: https://vcd_site_fqdn virtualDataCenterName: org_virtual_data_center_name spec: distribution: templateName: ubuntu-2004-kube-v1.21.2+vmware.1-tkg.1-7832907791984498322 settings: network: expose: true pods: cidr_blocks: - 100.96.0.0/11 services: cidr_blocks: - 100.64.0.0/13 ovdcNetwork: ovdc_network_name rollbackOnFailure: true sshKey: null topology: controlPlane: count: 1 cpu: null memory: null sizingClass: Large_sizing_policy_name storageProfile: Gold_storage_profile_name workers: count: 2 cpu: null memory: null sizingClass: Medium_sizing_policy_name storageProfile: Silver_storage_profile $ vcd cse cluster apply tkgm.yaml |
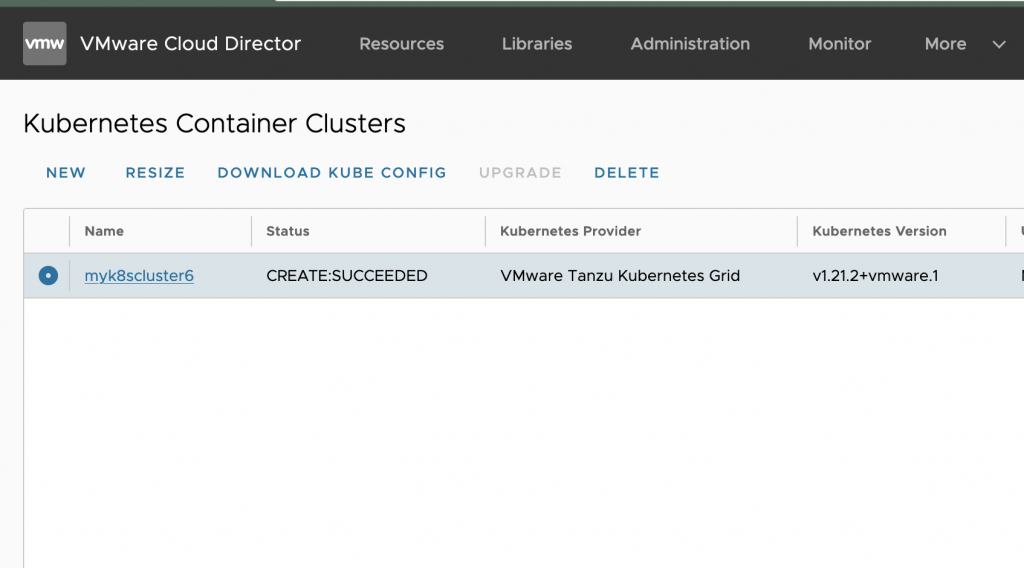
After the cluster creation is successful, it should be like the Figure 2 screen.

Download kubeconfig from the VMware Cloud Director Customer portal. As shown in figure 2, click on ‘download kubeconfig’ to get the configuration file.
This file can be used as the kubectl current context by configuring the KUBECONFIG environment variable as follow:
|
1 2 3 4 5 |
# PowerShell $ENV:KUBECONFIG="C:\Users\Administrator\Downloads\kubeconfig-mycluster6.txt" # Bash export KUBECONFIG=/root/kubeconfig-mycluster6.txt |
Alternatively, the kubeconfig file can be retrieved using the cse-cli:
|
1 |
$ vcd cse cluster config mycluster6 > ~/.kube/config |
All the subsequent commands documented in this article assumes that the kubeconfig pointing to your cluster has been properly setup. Run the following command to list the cluster nodes and confirm kubeconfig is working:
|
1 |
kubectl get nodes |
Create Default Storage Class
Most of the packages that use a persistent volume claim expect a default storage class. This file shows an example CSI storage class. You’ll have to create your own that reflects your environment, make sure the annotation storageclass.kubernetes.io/is-default-class is set to true.
|
1 |
kubectl apply -f storage-class.yaml |
Verify the CPI plugin used on the TKG cluster, and verify the version is 1.1.0. The Steps to update the CPI plugin are described here.
Install kapp-controller:
Tanzu Kubernetes Grid uses kapp-controller, it is a package manager that handles the lifecycle of packages. It needs to be installed first by applying the kapp-controller.yaml file attached below.
More details are in the VMware documentation.
|
1 |
kubectl apply -f kapp-controller.yaml |
Once the kapp-controller is installed, packages can be installed in the Tanzu Kubernetes Grid cluster through the Tanzu CLI.
2. Prepare Local Environment with Tanzu CLI and packages
Install Tanzu CLI 1.4 on the same local machine by following the VMware documentation. The Tanzu CLI package plugin uses the kubectl current context so make sure the right context is configured before running tanzu CLI commands.
Install Tanzu CLI plugin for packages
Once the Tanzu CLI has been installed, if not already done, make sure the package plugin is installed or install it as follow:
|
1 |
tanzu plugin install --local cli package |
Add VMware Repositories
After the Tanzu CLI and its package plugin are installed, it is necessary to add repositories, one for the user-managed packages and one for the core packages.
The URL for these repositories reflects the version of TKG that is being used for user-managed packages. For core packages it relates to the TKG version and Kubernetes version. These versions must match the OVA version that has been used to deploy the cluster at step 1.
| TKG Version | Tanzu Standard Repository | Core Repository (per Kubernetes version) |
| 1.4.0 | v1.4.0 | v1.19.12_vmware.1-tkg.1 v1.20.8_vmware.1-tkg.2 v1.21.2_vmware.1-tkg.1 |
| 1.4.1 | v1.4.1 | v1.21.2_vmware.1-tkg.2 v1.20.8_vmware.1-tkg.3 v1.19.12_vmware.1-tkg.2 |
| 1.4.2 | v1.4.2 | v1.21.8_vmware.1-tkg.2 v1.19.16_vmware.1-tkg.1 v1.20.14_vmware.1-tkg.2 |
| 1.5.2 | v1.5.2 | v1.22.5_vmware.1-tkg.4 v1.20.14_vmware.1-tkg.5 v1.21.8_vmware.1-tkg.5 |
The repositories are added by running the following commands, note the tag (after the colon) that needs to reflect the TKG version and Kubernetes version the cluster has been deployed with.
In our example, we used the OVA for Kubernetes 1.21 from TKG 1.4.0 that translates in the following commands:
|
1 2 3 |
tanzu package repository add tanzu-standard --namespace tanzu-package-repo-global --create-namespace --url projects.registry.vmware.com/tkg/packages/standard/repo:v1.4.0 tanzu package repository add tanzu-core --namespace tkg-system --create-namespace --url projects.registry.vmware.com/tkg/packages/core/repo:v1.21.2_vmware.1-tkg.1 |
List and install the packages
Once the synchronization task is completed, all the available packages can be listed as follow:
|
1 |
tanzu package available list -A |
For a specific package, the list of available version can be found as follow:
example with Harbor package
|
1 |
tanzu package available list harbor.tanzu.vmware.com -A |
3. Install User-Managed packages
All the examples in the following steps use the versions of the package for TKG 1.4.0. For other TKG version, you might need to use other packages versions. The namespaces used to install the packages reflect the standard namespaces naming convention from Tanzu Kubernetes Grid.
Package Data Values
Some User-Managed packages require a data-values.yaml to be provided that will contain configuration information related to your environment.
Please review VMware documentation to understand how to retrieve the data-values template.
Install Cert-Manager
Cert-manager provides a way to easily generates new certificates and is required by most of the other packages. Use the following command to install cert-manager.
More details in the VMware documentation.
|
1 |
tanzu package install cert-manager --namespace cert-manager --create-namespace --package-name cert-manager.tanzu.vmware.com --version 1.1.0+vmware.1-tkg.2 |
Install Contour
The Contour package is used by Harbor and Grafana.
Once the contour-data-values.yaml file has been created (this sample can be used as is) use the following command to install Contour.
More details in the VMware documentation.
|
1 |
tanzu package install contour --namespace tanzu-system-contour --create-namespace --package-name contour.tanzu.vmware.com --version 1.17.1+vmware.1-tkg.1 --values-file contour-data-values.yaml |
|
1 2 3 4 5 6 7 8 9 10 11 12 13 14 15 16 17 18 19 20 21 22 23 24 25 26 27 28 |
# Sample of the file contour-data-values.yaml namespace: tanzu-system-ingress contour: configFileContents: {} useProxyProtocol: false replicas: 2 pspNames: "vmware-system-restricted" logLevel: info envoy: service: type: LoadBalancer annotations: {} nodePorts: http: null https: null externalTrafficPolicy: Cluster disableWait: false hostPorts: enable: true http: 80 https: 443 hostNetwork: false terminationGracePeriodSeconds: 300 logLevel: info pspNames: null certificates: duration: 8760h renewBefore: 360h |
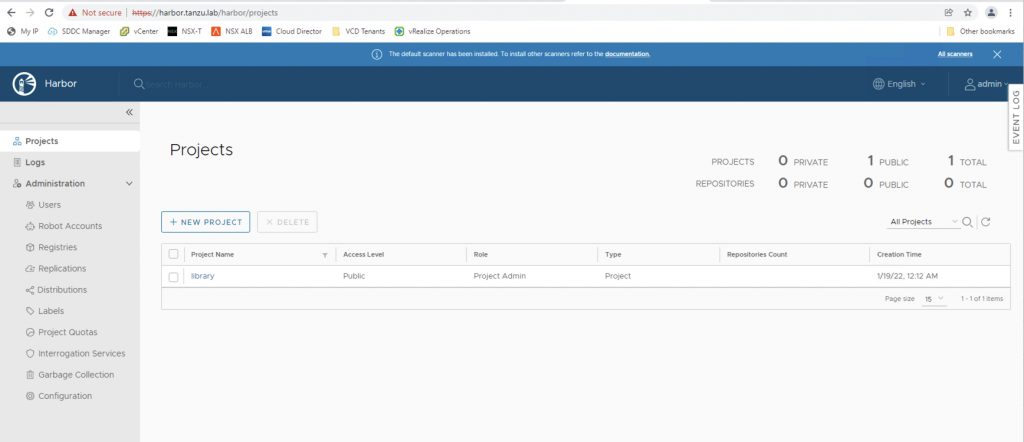
Install Harbor
Once the harbor-data-values.yaml file has been created (this sample needs to be tweaked with at least a different hostname and different password and secret) use the following command to install Contour.
More details are in the VMware documentation.
|
1 |
tanzu package install harbor --namespace tanzu-system-registry --create-namespace --package-name harbor.tanzu.vmware.com --version 2.2.3+vmware.1-tkg.1 --values-file harbor-data-values.yaml |
|
1 2 3 4 5 6 7 8 9 10 11 12 13 14 15 16 17 18 19 20 21 22 23 24 25 26 27 28 29 30 31 32 33 34 35 36 37 38 39 40 41 42 43 44 45 46 47 48 49 50 51 52 53 54 55 56 57 58 59 60 61 62 63 64 65 66 67 68 69 70 71 72 73 74 75 76 77 78 79 80 81 82 83 84 85 |
# Sample of the file harbor-data-values.yaml namespace: tanzu-system-registry hostname: harbor.tanzu.lab port: https: 443 logLevel: info tlsCertificate: tls.crt: tls.key: ca.crt: enableContourHttpProxy: true harborAdminPassword: VMware1! secretKey: vNrsg4KQeQYOQi1J database: password: 6D4E9CENc7KUvhSX core: replicas: 1 secret: lfi4oeZ8lNqaTD5O xsrfKey: TPXlSXBGqDs98VJY4veNiawO6bA0qlgQ jobservice: replicas: 1 secret: DwF6fxLfZHnWeQfl registry: replicas: 1 secret: 5uefzEyT0rr3yuCn notary: enabled: true trivy: enabled: true replicas: 1 gitHubToken: "" skipUpdate: false persistence: persistentVolumeClaim: registry: existingClaim: "" storageClass: "" subPath: "" accessMode: ReadWriteOnce size: 10Gi jobservice: existingClaim: "" storageClass: "" subPath: "" accessMode: ReadWriteOnce size: 1Gi database: existingClaim: "" storageClass: "" subPath: "" accessMode: ReadWriteOnce size: 1Gi redis: existingClaim: "" storageClass: "" subPath: "" accessMode: ReadWriteOnce size: 1Gi trivy: existingClaim: "" storageClass: "" subPath: "" accessMode: ReadWriteOnce size: 5Gi imageChartStorage: disableredirect: false type: filesystem filesystem: rootdirectory: /storage proxy: httpProxy: httpsProxy: noProxy: 127.0.0.1,localhost,.local,.internal pspNames: null metrics: enabled: false core: path: /metrics port: 8001 registry: path: /metrics port: 8001 exporter: path: /metrics port: 8001 |
In TKG 1.4, there is a known issue with Harbor that requires to apply this KB to fix the harbor-notary-signer pod that fails to start.
|
1 2 3 4 5 6 7 8 9 10 11 12 |
# Content of overlay-notary-signer-image-fix.yaml file #@ load("@ytt:overlay", "overlay") #@overlay/match by=overlay.and_op(overlay.subset({"kind": "Deployment"}), overlay.subset({"metadata": {"name": "harbor-notary-signer"}})) --- spec: template: spec: containers: #@overlay/match by="name",expects="0+" - name: notary-signer image: projects.registry.vmware.com/tkg/harbor/notary-signer-photon@sha256:4dfbf3777c26c615acfb466b98033c0406766692e9c32f3bb08873a0295e24d1 |
|
1 2 3 |
kubectl --namespace tanzu-system-registry create secret generic harbor-notary-singer-image-overlay -o yaml --dry-run=client --from-file=overlay-notary-signer-image-fix.yaml | kubectl apply -f - kubectl --namespace tanzu-system-registry annotate packageinstalls harbor ext.packaging.carvel.dev/ytt-paths-from-secret-name.0=harbor-notary-singer-image-overlay |
Create DNS record
When Harbor is deployed using Contour as ingress, it is required to create a DNS record that maps the external IP address of the Envoy load balancer service to the hostname of Harbor (specified in the harbor-data-values.yaml file).
This command output the external ip address:
|
1 2 3 4 |
$ kubectl -n tanzu-system-ingress get svc NAME TYPE CLUSTER-IP EXTERNAL-IP PORT(S) AGE contour ClusterIP 100.66.207.167 <none> 8001/TCP 11m envoy LoadBalancer 100.67.12.12 172.16.x.x 80:31850/TCP,443:32135/TCP 11m |
Use the external IP address assigned to the envoy service and create a DNS record accordingly.
In our example, this PowerShell command creates it.
|
1 |
Add-DnsServerResourceRecordA -Name "harbor" -ZoneName "tanzu.lab" -IPv4Address "172.16.x.x" |

Observability
Metric Server
The metric server is required for the successful operation of Prometheus, Grafana, and Fluent-bit packages. Use the following command to install the metrics server on the Tanzu Kubernetes cluster.
|
1 |
tanzu package install metrics-server --namespace tkg-system --create-namespace --package-name metrics-server.tanzu.vmware.com --version 0.4.0+vmware.1-tkg.1 |
Prometheus
Tanzu Kubernetes Grid includes signed binaries for Prometheus that you can deploy on Tanzu Kubernetes clusters to monitor cluster health and services.
While the installation can be customized, the default configuration should be enough for most of the cases.
More details in the VMware documentation.
|
1 |
tanzu package install prometheus --namespace tanzu-system-monitoring --create-namespace --package-name prometheus.tanzu.vmware.com --version 2.27.0+vmware.1-tkg.1 |
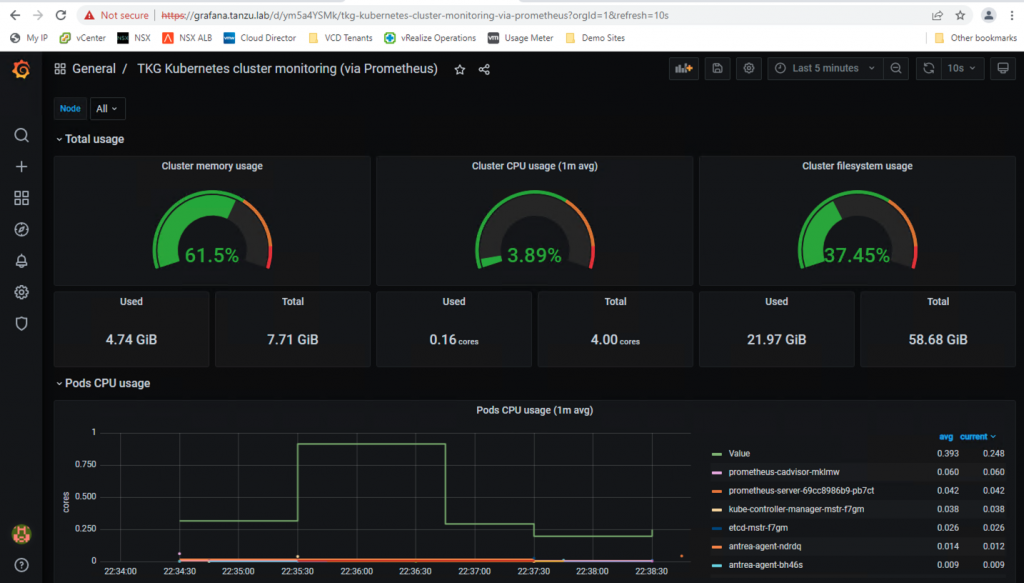
Grafana
Grafana allows you to visualize and analyze metrics data collected by Prometheus on your clusters. It comes with out-of-the-box TKG Kubernetes cluster monitoring dashboards.
Once the grafana-data-values.yaml has been created (this sample needs to be tweaked with at least a different virtual_host_fqdn and different admin_password) use the following command to install Grafana.
More details in the VMware documentation
|
1 |
tanzu package install grafana --namespace tanzu-system-dashboards --create-namespace --package-name grafana.tanzu.vmware.com --version 7.5.7+vmware.1-tkg.1 --values-file grafana-data-values.yaml |
|
1 2 3 4 5 6 7 8 9 10 11 12 13 14 15 16 17 18 19 20 21 22 23 24 25 26 27 28 29 30 31 32 33 34 35 36 37 38 39 40 41 42 43 44 45 46 47 48 49 50 51 52 53 54 55 56 57 58 59 60 61 62 63 64 65 66 67 68 69 70 71 72 |
# Sample of grafana-data-values.yaml file namespace: tanzu-system-dashboards grafana: deployment: replicas: 1 containers: resources: {} podAnnotations: {} podLabels: {} k8sSidecar: containers: resources: {} service: type: LoadBalancer port: 80 targetPort: 3000 labels: {} annotations: {} config: grafana_ini: | [analytics] check_for_updates = false [grafana_net] url = https://grafana.com [log] mode = console [paths] data = /var/lib/grafana/data logs = /var/log/grafana plugins = /var/lib/grafana/plugins provisioning = /etc/grafana/provisioning datasource_yaml: |- apiVersion: 1 datasources: - name: Prometheus type: prometheus url: prometheus-server.tanzu-system-monitoring.svc.cluster.local access: proxy isDefault: true dashboardProvider_yaml: |- apiVersion: 1 providers: - name: 'sidecarDashboardProvider' orgId: 1 folder: '' folderUid: '' type: file disableDeletion: false updateIntervalSeconds: 10 allowUiUpdates: false options: path: /tmp/dashboards foldersFromFilesStructure: true pvc: annotations: {} storageClassName: null accessMode: ReadWriteOnce storage: "2Gi" secret: type: "Opaque" admin_user: "YWRtaW4=" admin_password: "Vk13YXJlMSE=" ingress: enabled: true virtual_host_fqdn: "grafana.tanzu.lab" prefix: "/" servicePort: 80 tlsCertificate: tls.crt: tls.key: ca.crt: |
Create DNS record
Just like the Harbor case, a DNS record is required and should point to the same external IP address.
In our example, this PowerShell command creates it:
|
1 |
Add-DnsServerResourceRecordA -Name "grafana" -ZoneName "tanzu.lab" -IPv4Address "172.16.x.x" |

Managing Cluster and Package lifecycle
Please refer to the product interop matrix to select supported package versions. Please refer to the Tanzu CLI documentation for various operations such as install, update, delete of a Tanzu package.
Note: This blog post is co-authored with Sachi Bhatt


