Earlier this year, VMware NSX® Data Center for vSphere® reached its End of Support (EOS). This means that if a customer is still using this service, unfortunately they’re no longer eligible for customer support. The silver lining is that there’s no better time than now for customers to migrate their infrastructure to VMware NSX-T™ Data Center.
VMware customers have reached out to me and my fellow Technical Account Managers (TAMs) for guidance on NSX Data Center for vSphere to NSX-T Data Center migration scenarios. For customers skilled enough to handle their own migration, they can follow the migration guide in this article for the best practices they should keep in mind throughout the process.
We highly recommend that customers review their network and security environment before migrating. They can do so with the help of the NSX-V to NSX-T 3.x Migration Coordinator. Fixed network topologies and features are supported by the Migration Coordinator (MC) tool. If the customer network topology is not defined as fixed, the customer has the option to migrate using the user-defined topology feature in MC. From there, customers can select one of two modes when they choose user-defined topology: Complete Migration or Configuration Migration.
I prepared the following technical method of procedure (MOP) for an NSX Data Center for vSphere to NSX-T Data Center migration. I implemented this MOP successfully with one of my customers and shared the outcome with my TAM colleagues who have customers with similar migration requirements. This migration MOP covers the use case for NSX Data Center for vSphere (minimum version 6.4.6) to NSX-T Data Center 3.2 for a fixed network topology.
Migration guide: NSX Data Center for vSphere to NSX-T Data Center
Migration coordinator stages:
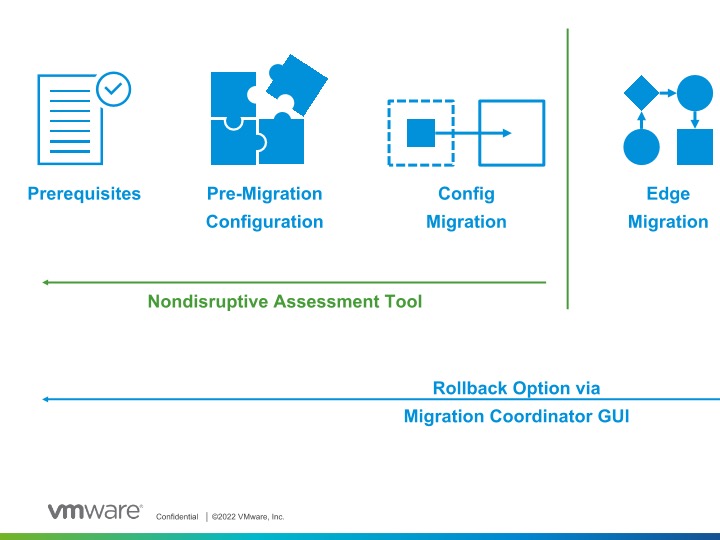
1. Prepare NSX-T Data Center infrastructure
a. Deploy a single NSX Manager appliance to create the NSX-T Data Center
b. Assure Share Storage is configured on the cluster, which is required for placing hosts on maintenance mode
c. Configure a compute manager in the NSX-T Data Center and add the VMware vCenter Server® as a compute source
d. Create an IP pool to provide IPs for the Edge Tunnel End Points (TEPs)
e. Deploy NSX Edge nodes
2. Start the migration coordinator service in the NSX Manager CLI
3. Import configuration from NSX Data Center for vSphere
a. Enter the details of your NSX Data Center for vSphere environment.
b. Begin the pre-check assessment after you retrieve the configurations.
- Check prerequisites
- Import vSphere Networking configurations
- Import configuration of NSX Data Center for vSphere
- Translate the imported configuration
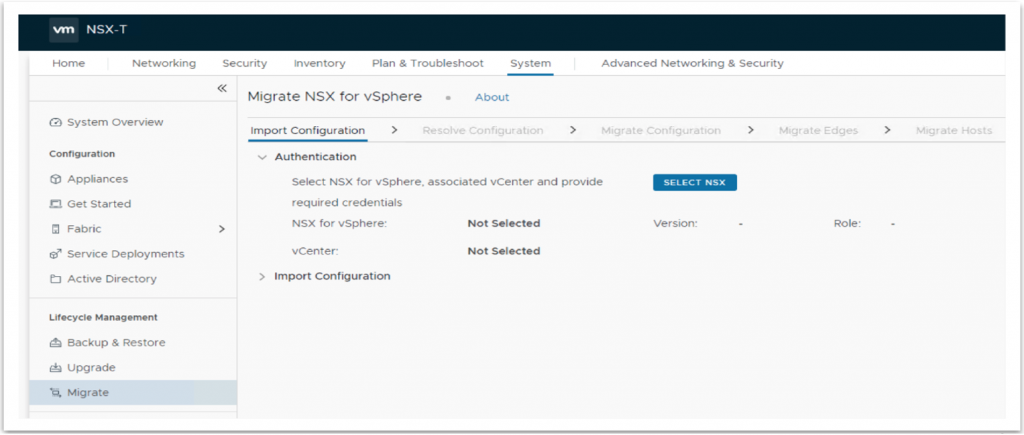
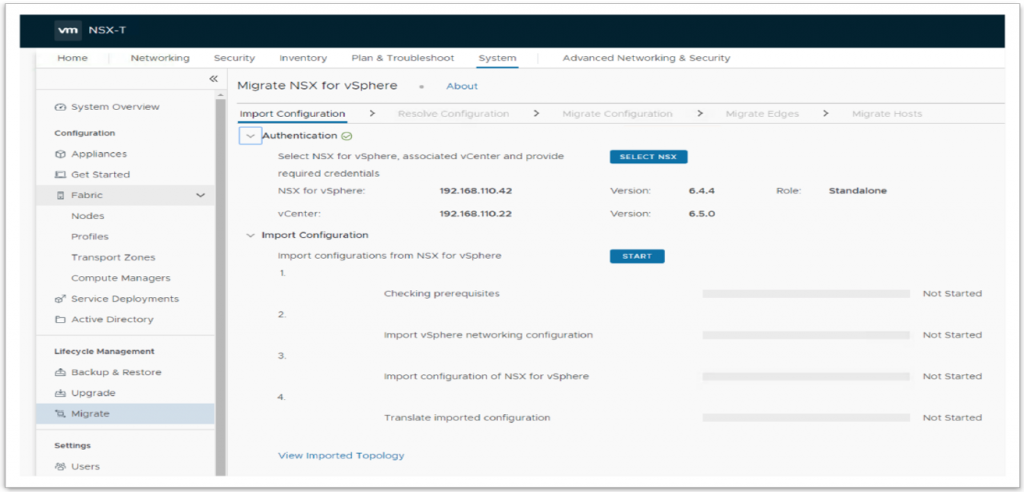
4. Resolve issues with the configuration
In this step, you need to select what you can migrate to the target environment. The Migration Coordinator tool will also provide its recommendations on what is and is not supported.
a. Review all the messages and reported configuration issues to identify blocking issues or other issues that require a change to the NSX Data Center for vSphere environment.
b. If you make any changes to the NSX Data Center for vSphere environment while a migration is in progress, you must restart the migration and import the configuration again.
c. Provide inputs to configuration issues that must be resolved before you migrate your NSX Data Center for vSphere environment to NSX-T Data Center. Multiple people can resolve issues in multiple phases.
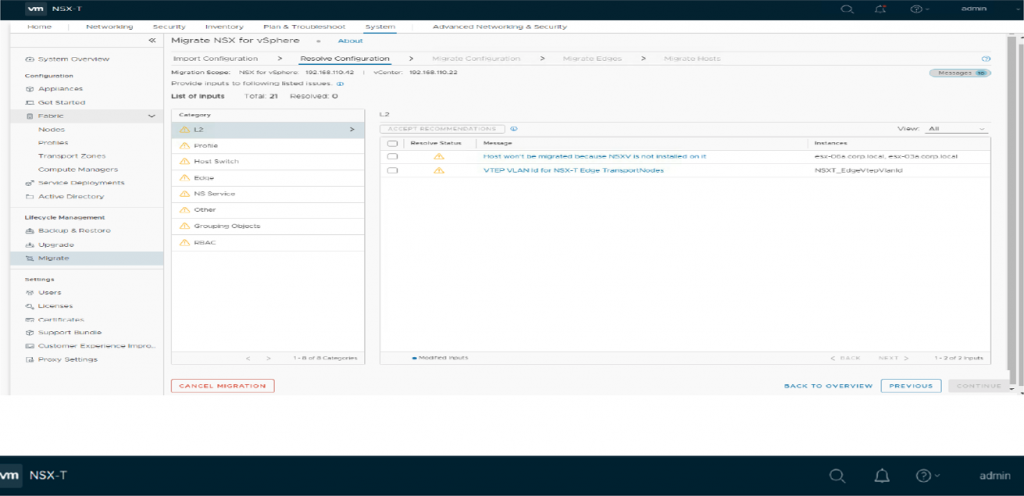
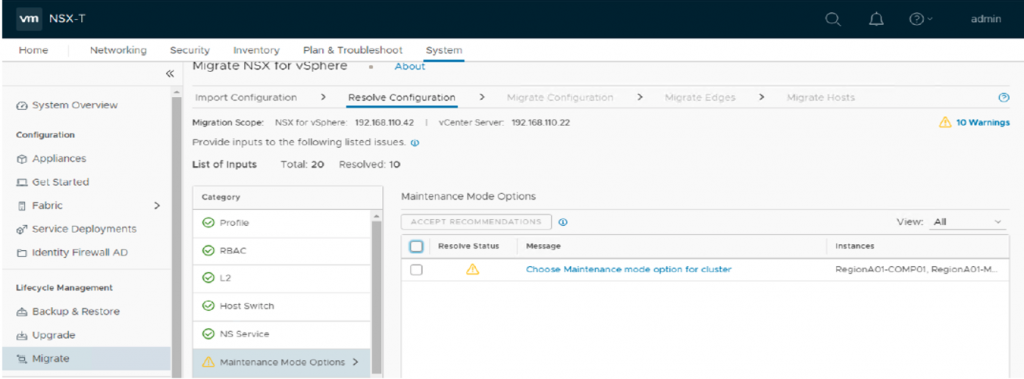
Selecting the highlighted message (as shown in the above screenshot) allows you to choose an automated or manual configuration of maintenance mode option for the cluster.
In automated maintenance mode, ESXi hosts automatically shift to maintenance mode and the VMs move automatically. We recommend this approach; however, in manual maintenance mode, the Migration Coordinator will place the ESXi host in maintenance mode but will wait for user intervention to migrate the VMs out of the host.
5. Migrate configuration
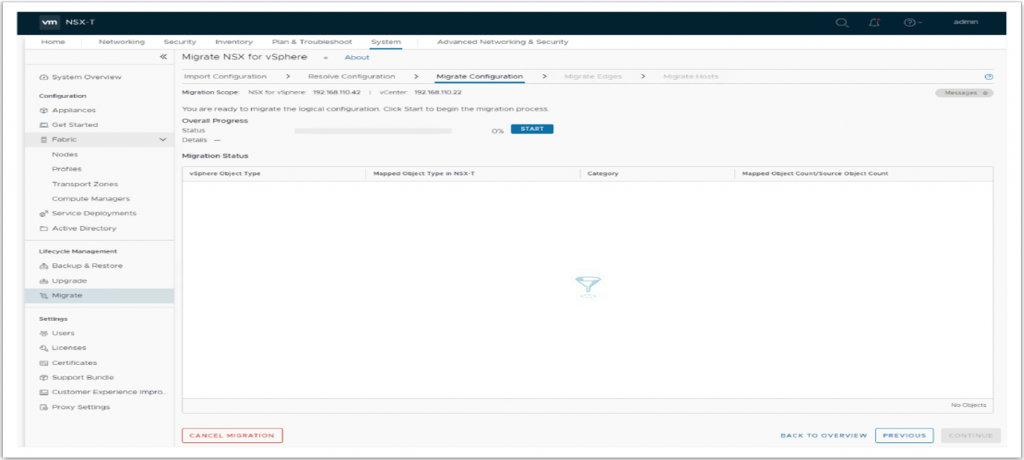
The actual migration of logical configuration from NSX Data Center for vSphere to NSX-T Data Center occurs in this step.
a. After you resolve all the configuration issues, you can now migrate the configuration to NSX-T Data Center. Configuration changes are made on NSX-T Data Center, but no changes are made to the NSX Data Center for vSphere environment yet.
6. Migrate NSX Data Center for vSphere edges
a. Resolve all configuration issues.
b. Back up NSX Data Center for vSphere since the most recent configuration changes
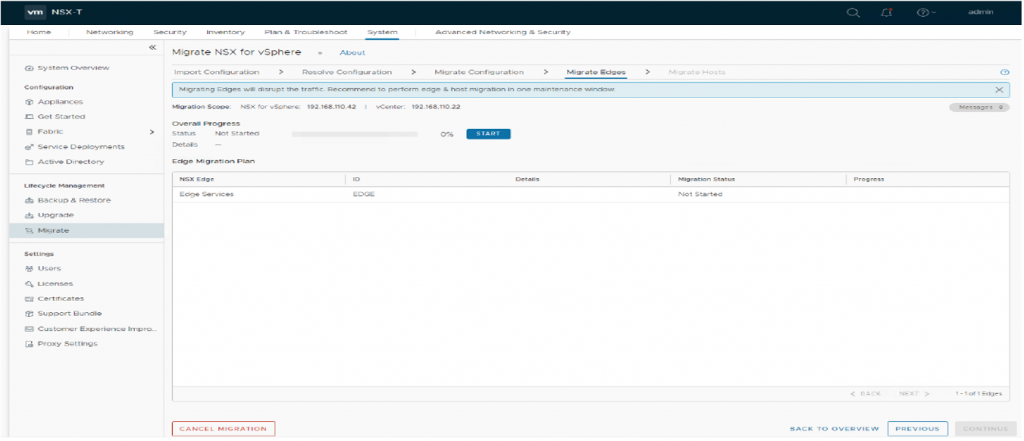
c. Migrate all the edges. Disconnect the uplinks on the NSX Data Center for vSphere ESGs internally and bring the uplinks on NSX-T Edge nodes online.
d. Verify that all the routing and services are working correctly in the NSX-T Data Center.
7. Migrate hosts
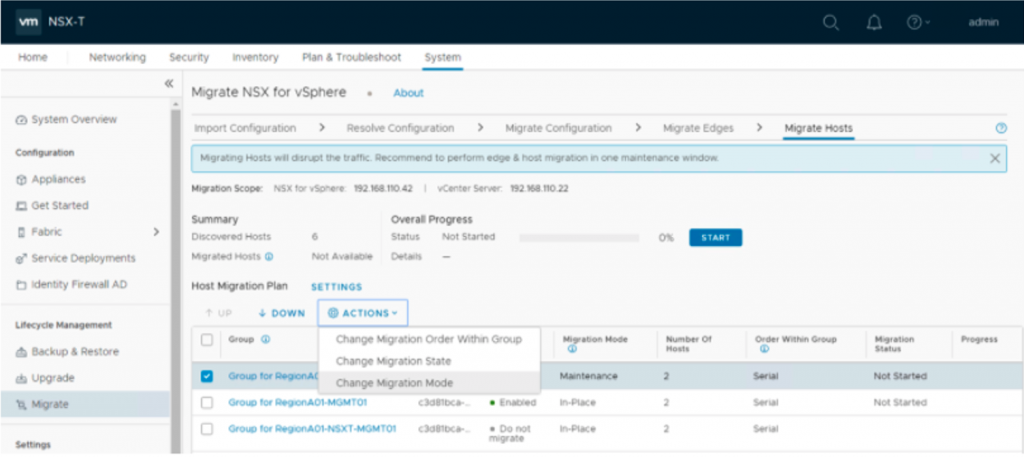
If you select in-place migration mode, there will be a traffic interruption for few seconds during this step. If you select maintenance migration mode, there will be no traffic interruption. It helps with the selection of migration to be in series or in parallel and helps in providing an option to pause the migration after each group.
a. Remove NSX Data Center for vSphere software from the ESXi hosts, and install NSX-T Data Center software. Connect VM interfaces to the new NSX-T Data Center segments.
b. Migrate a small cluster first and then proceed with a larger cluster migration
c. Select the cluster and in the Actions Menu, select Change Migration mode. Select maintenance mode.
Host migration with maintenance mode
- Enter maintenance mode and evacuate Host A (vMotion: Manual or DRS)
- Convert VIBs on Host A from NSX Data Center for vSphere to NSX-T Data Center. Exit maintenance mode on Host A
- Enter maintenance mode and evacuate Host B (vMotion: Manual or DRS)
- Convert VIBs on Host B from NSX Data Center for vSphere to NSX-T Data Center. Exit maintenance mode on Host B
- Rebalance workloads (vMotion: DRS or Manual).
8. Verification
a. Verify the migrated host and tunnel status
b. Verify the north-south routing with physical network
c. Verify all the logical segments
d. Verify east-west traffic
e. Verify all the security objects
f. Verify the DFW policies and associated objects
g. Run a connectivity test. Ping/traceroute from outside to NSX hosted network and ensure connectivity is as expected.
h. Check with the application/call center team to ensure that there are no reported problems or performance issues.
9. Finish migration
a. After you have verified the health of the newly set up NSX-T Data center environment, you can now proceed to finish the migration, which then clears the migration state. Finally, you can decommission/remove NSX Data Center for vSphere configurations.
b. Configure all other required parameters and settings in NSX-T Manager like certificates, VIDM, etc.
c. Register third-party guest introspection service and network introspection services with NSX-T Data Center.
NOTE: UI-driven rollback is supported even after migrating the Edges. Click on “ROLLBACK” if you are planning to roll back at this stage. Post this stage, we will enter the final stage of migration, from which the rollback of the hosts will be a manual task and that needs to be performed by deletion of NXS-T VIBs in the affected host and attaching them back to the NSX-V environment.
You can find a List of Supported Migration objects here.
Don’t have Technical Account Manager supporting your organization? Contact your VMware Account Manager to learn more about VMware Technical Account Management Services and how they can help you.


