

In today’s enterprise environments, deploying cloud infrastructure via consistent, version-controlled configurations is non-negotiable. While many view these capabilities strictly through the lens of automation and labor reduction, the deeper value lies in configuration integrity. The real goal is ensuring the environment continuously matches its desired state, which is exactly where Infrastructure as Code (IaC) comes into play. Within VMware Cloud Foundation, these IaC capabilities are native to the platform. They span full-stack operations: from host-level ESXi setups via vSphere Configuration Profiles, to guest-level provisioning using cloud-init, or right up to deploying upstream Kubernetes clusters using cloud-native tools. It is all natively embedded within VCF. Managing infrastructure as code provides a more reliable, secure, and less error-prone environment that can be spun up lightning-fast.
Don’t Use Post-Boot Scripts: The Right Way to Deploy VMs with cloud-init
I was reminded of this need the other day, when I was speaking with one of our customers who was finding ways to automate virtual machine deployments. Like many teams, they were stuck in a traditional workflow: deploying a VM, bringing it onto the network, and then running a complex web of post-deployment scripts or configuration management tools. When I showed them that they could execute the entire configuration natively during the initial VM build using cloud-init, their surprise was immediate. They aren’t alone, though. Despite native cloud-init support being introduced back in vSphere 7.0 (optimized via the GuestInfo transport engine), it remains one of the most underutilized features in the VMware ecosystem. Many administrators simply don’t realize it’s there, choosing instead to rely on bloated golden images and fragile post-boot scripting networks.
This capability is a perfect example of how VMware Cloud Foundation (VCF) delivers Programmable Infrastructure and enables you to configure cloud environments as Infrastructure as Code. Whether you are an application engineer spinning up a Kubernetes cluster using kubectl, or a platform engineer deploying a fleet of virtual machines via cloud-init, the underlying VCF API treats your intent natively. The Support for cloud-init provides precisely the desired programmable characteristics: Your tools and declarative configurations are supported directly by the platform, transforming raw configuration files into automated infrastructure, becoming an inherent part of system builds.
For those who prefer to dive straight into the implementation, the GitHub repository with sample code is available here.
What is cloud-init?
cloud-init is the industry-standard, multi-distribution tool for cross-platform cloud instance initialization. It is an open-source utility baked into almost every modern cloud image (Ubuntu, CentOS/RHEL, Debian, Photon OS). It handles early initialization, allowing you to seamlessly configure hostnames, networks, SSH keys, users, and packages during the very first boot cycle.
The Requirement
To inject configurations into a virtual machine during its initial build on vSphere, cloud-init uses the native VMware GuestInfo datasource. Instead of relying on an external HTTP endpoint, VMware Tools (open-vm-tools) acts as the secure, internal bridge. It queries the hypervisor and passes configuration properties directly from the guestinfo configuration parameters down into the guest operating system kernel via a secure backend RPC channel.
To make this handshake work, we must supply two distinct cloud-init configuration files:
- meta-data: Handles the VM’s identity, specifying its static network routing configuration, IP allocation, and unique instance-id.
- user-data: Handles everything else, beginning with the magic #cloud-config line. This is where you declare your custom automated tasks, including creating administrative users, writing configuration files to disk, and executing automated shell commands via runcmd.
Config Integrity & Security: Why GuestInfo Injection is the Safe Way
Every automated provisioning system has to answer the same uncomfortable question: If the configuration contains secrets, how do we get them to the VM without exposing them?
Traditional approaches put the payload on the network. The VMware GuestInfo mechanism does not. That single architectural difference eliminates the most common class of provisioning-time attacks.
The Problem with Network-Based Provisioning
- The Network Boot & Scripting Risk (Plaintext on the Wire): Classic automated installations over HTTP/TFTP look clean on a diagram, but the configuration containing root passwords, SSH keys, or registry API access tokens often travels over the network as plaintext. Anyone on the same VLAN with a packet capture tool can read it. Even switching to HTTPS only shifts the problem: the configuration file still lives on a network-reachable web server with no native way to verify that the machine requesting the file is actually the specific VM you intended to provision.
- The HTTP Metadata Server Risk (SSRF Vulnerabilities): Many cloud-init architectures rely on an HTTP metadata endpoint that binds to a link-local loopback address (169.254.169.254) reachable only from the instance itself. While this keeps the data off the physical wire, it introduces a different exposure: the user-data remains readable at any time after boot by anyone or anything that can access that local URL.
- The Threat Vector: This local HTTP endpoint is a prime target for Server-Side Request Forgery (SSRF) attacks. If an application running on the VM has a vulnerability, an attacker can exploit it to fetch the metadata URL on their behalf, exposing the bootstrap credentials long after the provisioning phase is over. High-profile cloud breaches have been executed using this exact vector.
How GuestInfo Bypasses the Network Entirely
VMware’s GuestInfo mechanism side-steps the network layer entirely by using an isolated, host-to-guest communication channel:
The configuration files user-data.yaml and meta-data.yaml travels through a direct, memory-mapped communication channel between the hypervisor and the guest. It never crosses a physical or virtual network interface, it never appears in a packet capture, and it is entirely invisible to network-layer security tools.
Shrinking the Attack Surface
By shifting from a network delivery model to GuestInfo injection, you fundamentally eliminate several major attack vectors at once:
- Zero Network Sniffing: There is nothing to capture on the wire, on a switch port, or at a network tap. The data simply does not exist on the network.
- Immunity to SSRF: There is no HTTP metadata endpoint inside the guest for an attacker to target. An application vulnerability that allows an attacker to make outbound HTTP requests cannot be weaponized to steal provisioning credentials, because there is no URL to request.
- No Broadcast Exposure: GuestInfo keys are strictly bound to a specific VM’s configuration file (.vmx). No other VM running on the same ESXi host can read them, and there is no shared central service that all VMs query.
- No Persistent Post-Boot Endpoint: Unlike an HTTP metadata server that stays up indefinitely, GuestInfo keys are consumed by cloud-init on the very first boot. Once the data is processed and written to disk (SSH keys, config files, packages), cloud-init marks itself done via a semaphore. The original sensitive payload is not re-read or left exposed on subsequent reboots.
Example
The objective is to transform a bare, unconfigured Linux VM into a fully operational developer sandbox on first boot. Instead of logging into a console to configure things manually, everything happens automatically using cloud-init.
In this example, we configure:
- Static IP & Network (meta-data.yaml): Sets the system hostname (e.g., photon-holodeck) and assigns a fixed IP address (10.160.205.49/21) to eth0. This bypasses DHCP to ensure the VM is reachable at a predictable address. It also configures the default network gateway and corporate DNS servers so external repositories and internal mirrors resolve correctly.
- Administrative Credentials (user-data.yaml): Enables SSH password authentication globally so you can connect via a remote terminal. It sets a secure root password and configures it so you aren’t forced to change it on your very first login.
- Precise Time Synchronization (ntp): Connects the guest VM to internal corporate time servers before running any scripts. This is critical because automated package managers rely on secure HTTPS connections; if the system clock drifts, SSL certificate checks will fail and break your build.
- Developer Packages & Runtimes (runcmd): Automatically refreshes the OS package repositories and installs your essential tools. This includes core utilities (git, curl), development runtimes (openjdk21, nodejs, powershell), build tools (apache-maven), a native C compilation toolchain (gcc, make), and the OpenSSH server daemon for remote IDE connections.
to meet the requirements we have created meta-data.yaml and user-data.yaml. Check out the configuration files below-
meta-data.yaml
user-data.yaml
The meta-data.yaml file serves as the blueprint for your guest’s network identity, while the user-data.yaml allows you to automate high-level tasks like injecting SSH keys for private GitHub repositories, authenticating against internal NPM registries, and executing bulk package installations on first boot. Ultimately, this builds a ready-to-go developer sandbox machine. You can strip down these files as appropriate for your environments.
Let’s First Do It via the vSphere UI
Before diving into PowerCLI sample code, it is helpful to look at how to execute this process manually using the vSphere Client.
Step 1: Deploy the Base OVF/OVA Template
- Open the vSphere Client, right-click your target cluster or folder, and choose Deploy OVF Template.
- Select your target cloud-init-enabled Linux OVF (such as an Ubuntu cloud OVF or Photon OS template) from your Content Library or local file path.
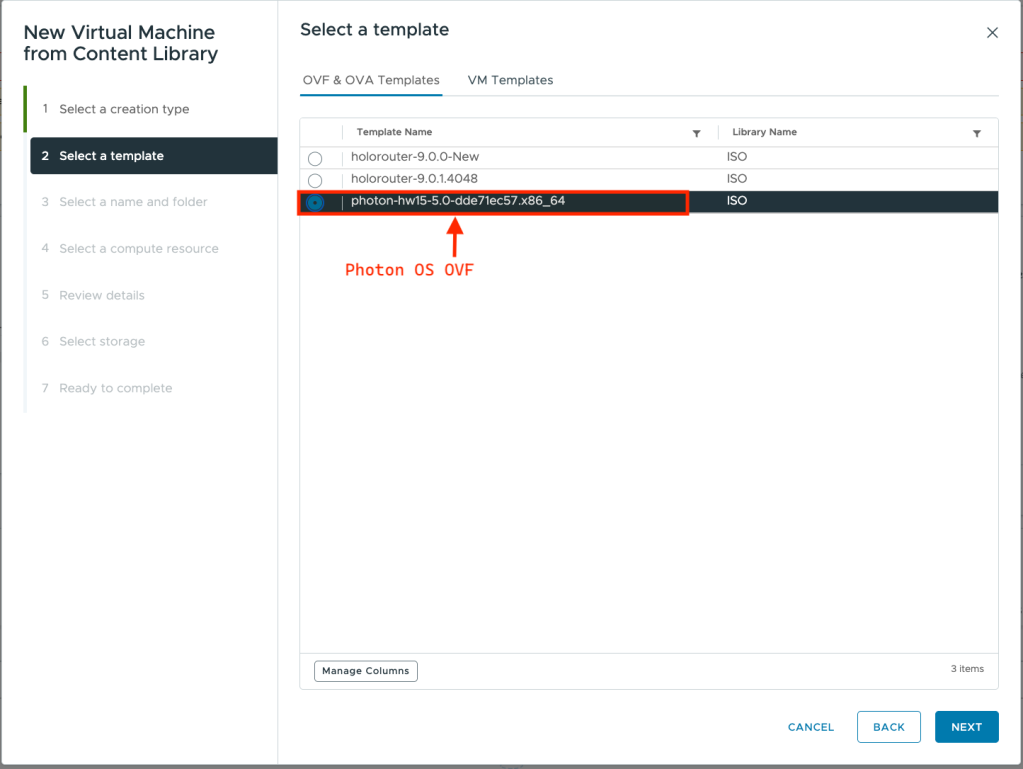
- Walk through the standard wizard: name the VM, select its target compute resource, choose thin-provisioned storage, and map its logical interface to your desired target Port Group network.
- Review your settings and click Finish. Do not power on the virtual machine yet.
Step 2: Prepare Your Config Files (The “Why base64?” Factor)
Before we can paste our meta-data and user-data files into the vSphere UI, we have to convert them into base64 strings.
Why base64?
The VMware advanced configuration engine (which manages the .vmx configuration file) treats every configuration property strictly as a flat, single-line string.
Your structured cloud-init configurations rely heavily on multi-line YAML formatting, text indentation, hyphens, and colons. If you try to paste raw YAML text into the vSphere parameter fields, the VMware text parser will break on the very first line break or colon.
Base64 encoding solves this. It collapses your entire multi-line YAML file into a single, continuous, newline-free string of safe ASCII characters. The companion .encoding = base64 key tells cloud-init to decode that text block back into proper YAML format before reading it inside the guest operating system.
Run the following commands on your workstation to convert your files in base64:
Convert meta-data.yaml to base64:
Bash

Convert user-data.yaml to base64:
Bash
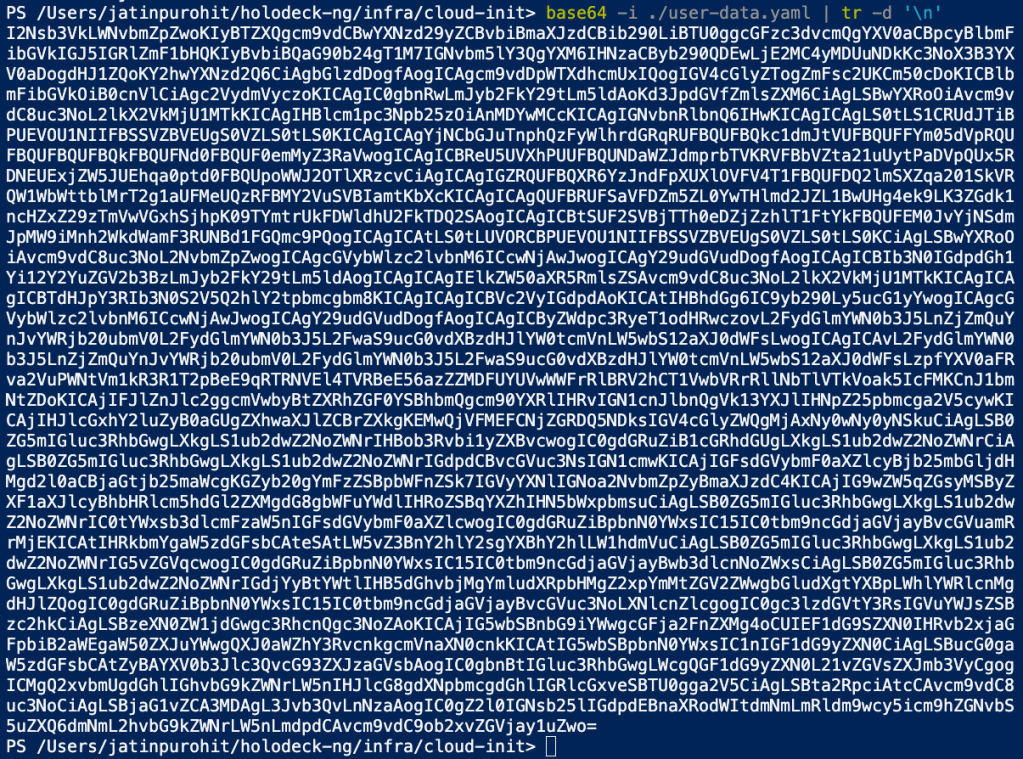
Copy the resulting continuous string from each command to your clipboard.
Step 3: Inject Configuration Keys into the VM
- In the vSphere Client, right-click your newly deployed, powered-off VM and choose Edit Settings.
- Navigate to the Advanced Parameters
- Click Add Configuration Params and create the following four parameters
| Configuration Key Name | Value |
| guestinfo.userdata | (Paste your long, encoded user-data string) |
| guestinfo.userdata.encoding | base64 |
| guestinfo.metadata | (Paste your long, encoded meta-data string) |
| guestinfo.metadata.encoding | base64 |
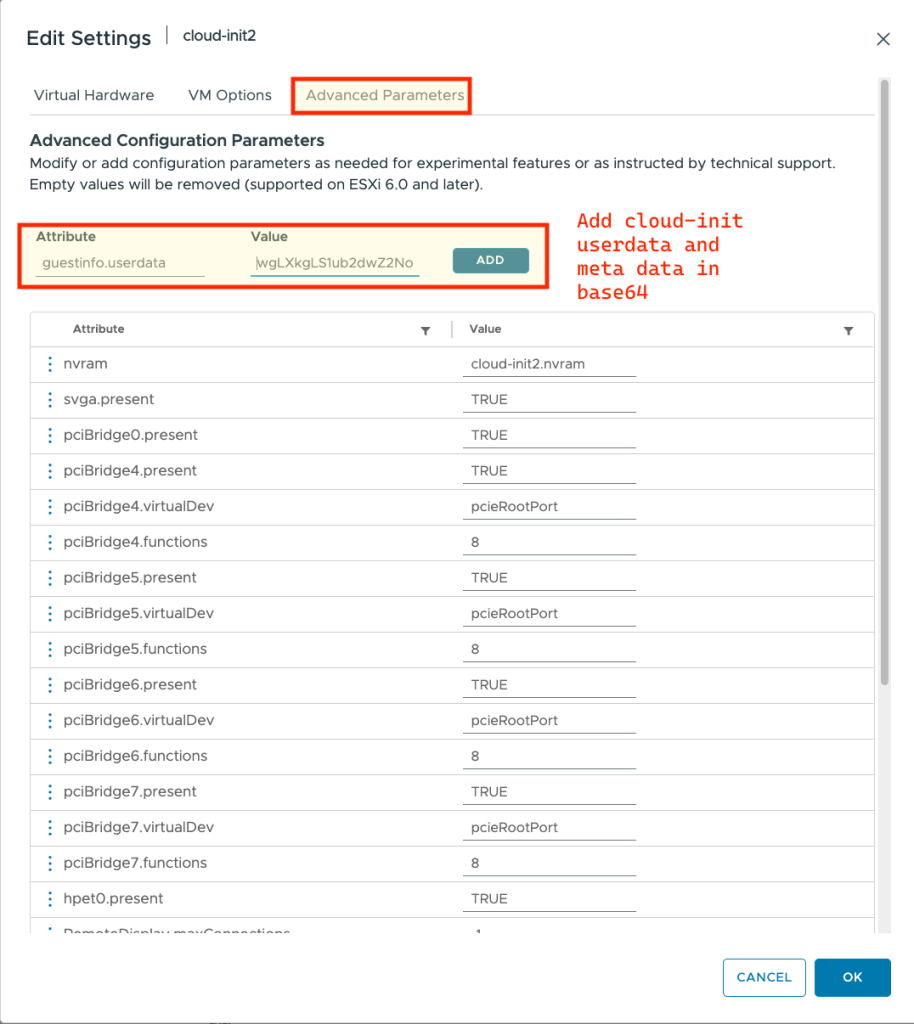
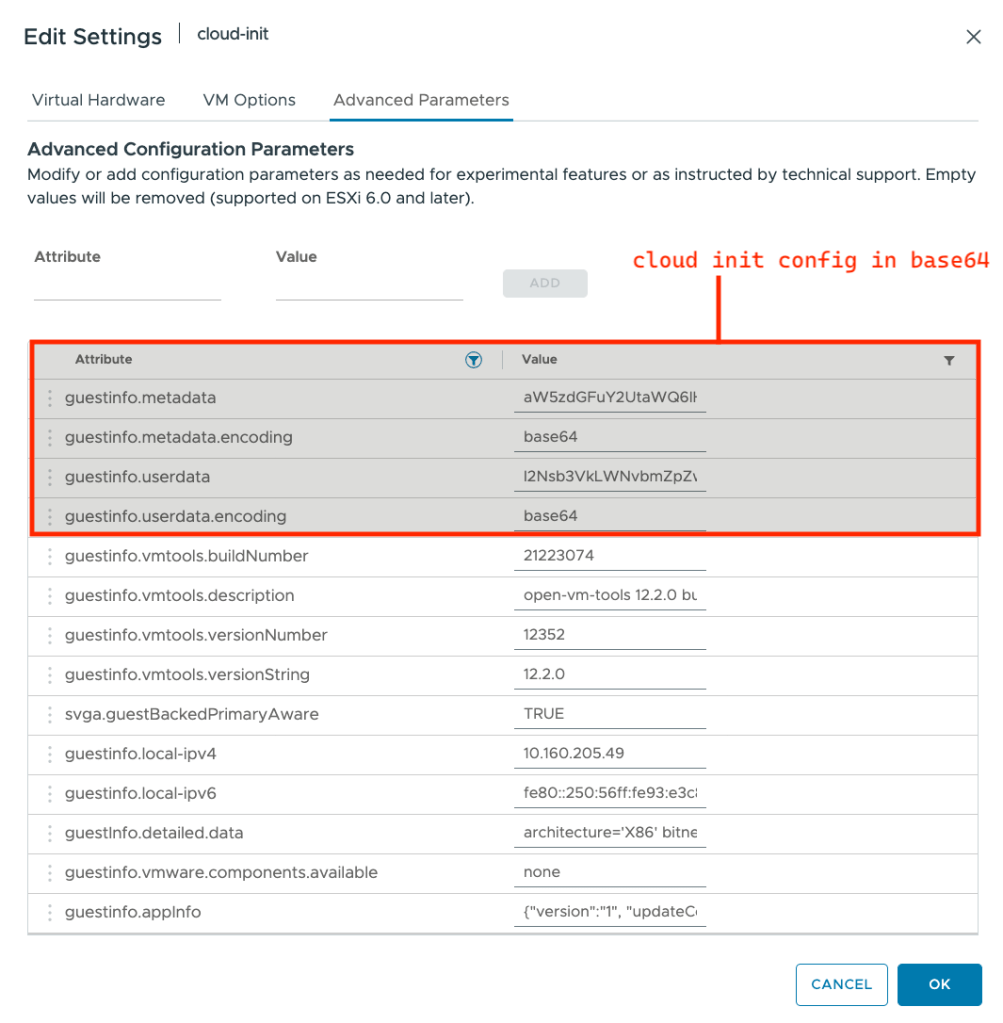
- Click OK to close the configuration editor, This is how your VM configuration should look like.
Step 4: Power On and Automate
Right-click your VM and click Power On.
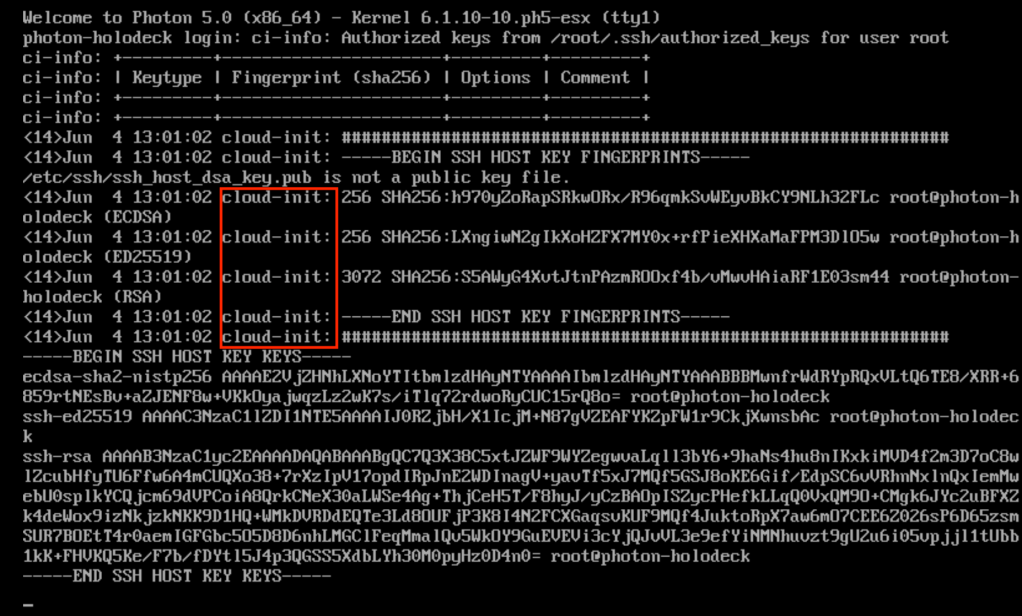
As the virtual machine goes through its initial power cycle, VMware Tools instantly presents those four guestinfo string properties directly to the guest OS. The cloud-init will automatically intercept them, decode the base64 payload, apply your static networking parameters, spin up your applications, and completely configure your system before presenting you with a login screen.
Automating Using PowerCLI
To step up to true cloud-like automation, we can pass these exact same configurations programmatically. Please find the sample PowerCLI script here at github.
Breaking Down the Script
1. Accept EULA and Map Networks Using Get-OvfConfiguration
This is the most important pre-deploy step. The OVF template has a structured configuration object with typed properties. Before you can deploy, two things must be set:
- EULA Acceptance: The Photon OS OVF embeds a license agreement. Without $ovfConfig.EULAs.Accept.Value = $true, New-VM throws EulaParams.all_EULA_accepted: false and aborts.
- Network Mapping: An OVF declares its own internal network names (e.g., “VM Network”). These must be mapped to an actual portgroup in your vSphere environment. The loop below uses PSObject.Properties.Name rather than Get-Member because PowerCLI’s OVF config objects are dynamic, and standard note-property filters can occasionally miss dynamic types.
PowerShell
2. Deploy VM from OVF Template
This deploys the OVF in a single call that handles EULA, network mapping, folder placement, and datastore selection all at once—meaning no post-deploy Move-VM or network adapter reconfiguration is required.
- -Location $folder places the VM directly in your targeted inventory folder.
- -DiskStorageFormat Thin provisions disk space on-demand rather than pre-allocating the full virtual disk upfront, saving datastore space.
3. Inject cloud-init Configuration via GuestInfo Advanced Properties
This is the programmatic bridge between your local YAML files and cloud-init:
- Path Resolution & Encoding: Using -Raw reads the entire file as one string while preserving newlines, and converting it to bytes allows us to output a continuous base64 line. The explicit -Encoding UTF8 flag on Get-Content prevents the inclusion of a Byte Order Mark (BOM) when running on Windows, ensuring cloud-init doesn’t misinterpret the formatting.
- New-AdvancedSetting: Sets each key as a VM advanced configuration parameter (stored directly in the .vmx file). -Force overwrites the key if it already exists, and -Confirm:$false suppresses interactive validation prompts.
Using Disconnect-VIServer closes the vCenter session cleanly. Without this, PowerCLI leaves sessions open until the PowerShell process exits, which can exhaust vCenter’s concurrent session limits if your provisioning loop runs repeatedly.
4. Monitor Cloud-Init Progress (Optional)
Since package installations take a few minutes to complete, you would like to have another script that monitors the cloud-init progress. The script leverages the posh-ssh module to establish the ssh session to monitor progress. The script periodically polls the SSH session and streams the output directly from /var/log/cloud-init-output.log straight to your developer terminal.
OVF vs. ISO for cloud-init
A common architectural question is whether this same mechanism can be used when booting a raw Linux operating system installer from an ISO file.
The short answer is no. The VMware GuestInfo datasource relies entirely on an active guest environment. It requires open-vm-tools to be installed and running inside the OS so it can query the GuestInfo RPC channel from the hypervisor.
During an ISO-based setup, the OS hasn’t been installed yet. There are no tools running, and cloud-init is not present. While you can trick an ISO installer into using cloud-init by building highly customized secondary boot images, it requires a complex configuration to bootstrap the initial environment.
With an OVF Template, everything is streamlined:
- The base OS, open-vm-tools, and cloud-init are already pre-baked into the image.
- The VM powers on $\rightarrow$ VMware Tools initializes $\rightarrow$ The GuestInfo RPC channel opens immediately.
- cloud-init intercepts guestinfo.userdata and guestinfo.metadata on that very first boot cycle.
- Your entire target configuration is applied automated and hands-off.
Summary
cloud-init on vSphere is one of the most underused capabilities in the VMware ecosystem. Most teams either click through the console manually for every new virtual machine or build thick golden images for every individual permutation of an operating system and tooling stack. Both of these approaches rapidly break down at scale.
The pattern shown here, declarative YAML configurations combined with GuestInfo injection, gives you a much more durable approach: a virtual machine whose entire desired state is expressed in version-controlled text files. It is deployable in minutes, completely identical every time, and fully debuggable from your workstation without ever touching a console.
The best part about this pattern is that it works universally for any modern Linux distribution that ships with cloud-init and open-vm-tools. Simply swap out the YAML content, and you can provision Ubuntu, Rocky Linux, or Debian using the exact same four-key GuestInfo approach on VMware Cloud Foundation.
Resources
VM Deployment using cloud-init – Sample Code on Github
Discover more from VMware Cloud Foundation (VCF) Blog
Subscribe to get the latest posts sent to your email.


