I am pleased to announce that we have just released Onyx for the Web Client! For those of you who already know what Onyx is, you are probably already doing a victory dance at your desk. Onyx has proved its popularity in the past, with the only hurdle being that it could only be used with the C# client. That is no longer the case– and as of today, you can download Onyx for the Web Client and be running in minutes!
Quick Navigation:
- What is Onyx?
- Why is Onyx important?
- How to Install Onyx
- How do I use it?
- Post-Onyx
- Where do I get it?
What is Onyx?
Onyx for the Web Client is a Fling which enables Developers and System Admins to gain access to example PowerCLI.Net code for actions taken in the vSphere Web Client. This Fling was the winning entry in last year’s 2014 Fling Contest it’s an update, of sorts, to the Onyx fling, as it allows for similar functionality in the web client.
The Onyx for the Web Client fling provides the ability to record actions taken in the vSphere Web Client and turn these actions into PowerCLI.Net code helping Developers and System Administrators by providing sample code which shows how an action was taken, and gives the basis for code to be re-used in better defined functions, or for sample code to be used in search engines to find the API documentation and information on how to use this area of the vSphere API.
Why is Onyx Important?
PowerCLI is a very robust automation tool, created for administrators to work within their virtual environments. Although PowerCLI has almost 500 cmdlets that support more than 10 products and technologies, we realize that there are situations within given environments and use-cases where there is not a specific cmdlet that will perform the actions required. In such cases, PowerCLI has the ability to allow administrators to work directly with the vSphere API, allowing them to create additional actions and commands that otherwise don’t exist in PowerCLI.
At this point, Onyx can then be used, allowing users to record actions performed in the vSphere Web Client, and output the underlying API calls. These can then be saved and edited, allowing users maximum flexibility without required a deep understanding of the vSphere API.
Up until vSphere 5.5, users could leverage the original Onyx fling with the C# client. When vSphere 5.5 was released, there was certain functionality that was only found in the vSphere Web Client, and therefore, users were unable to work with the vSphere API calls using Onyx, that were taking place (mainly around VSAN and Distributed Networks). Now, using this new fling, users will be able to work with all the Public vSphere API functionality placed in the Web Client.
What are the requirements?
Onyx for Webclient requires the vSphere Web Client Version 6.0.0 Build 2559277 as installed as part of vCenter for Windows or vCSA.
How do I install Onyx?
VMware VCSA
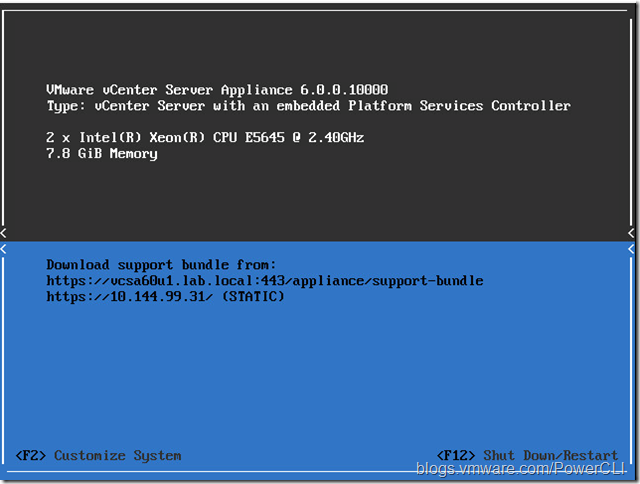
Open the VCSA Console
Login to the VCSA, and go to ‘Troubleshooting Mode Options’
Enable BASH Shell and Enable SSH. Both options should appear like the image below.
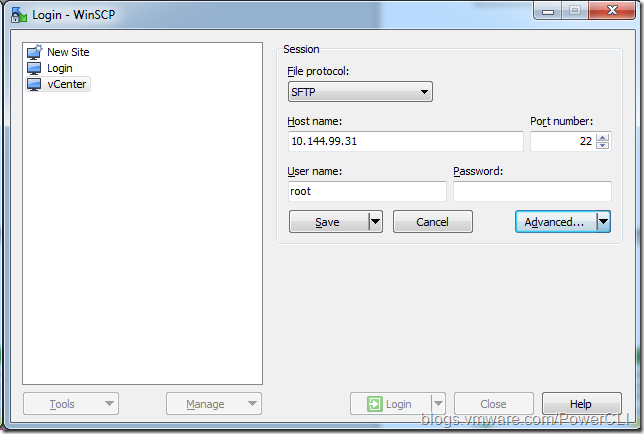
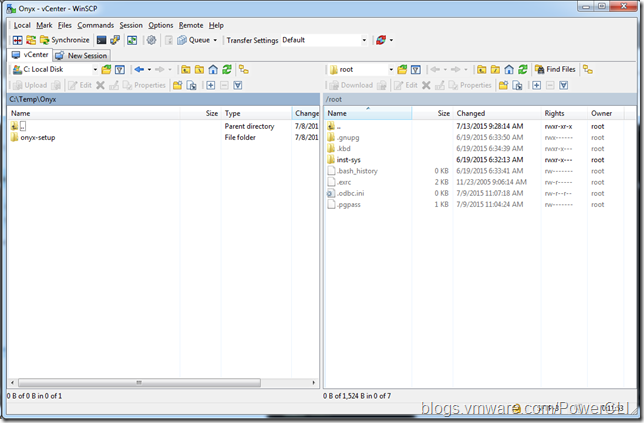
Use a tool such as WinSCP to login to the VCSA. Enter the Hostname & Credentials, then click ‘Advanced’.
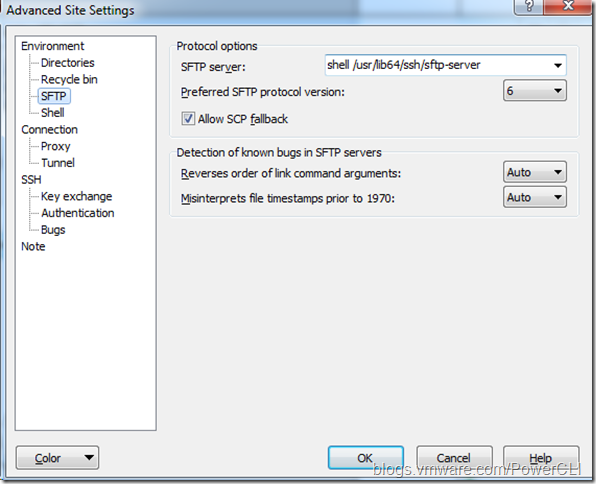
Select ‘SFTP’ and type the following in SFTP server: shell /usr/lib64/ssh/sftp-server
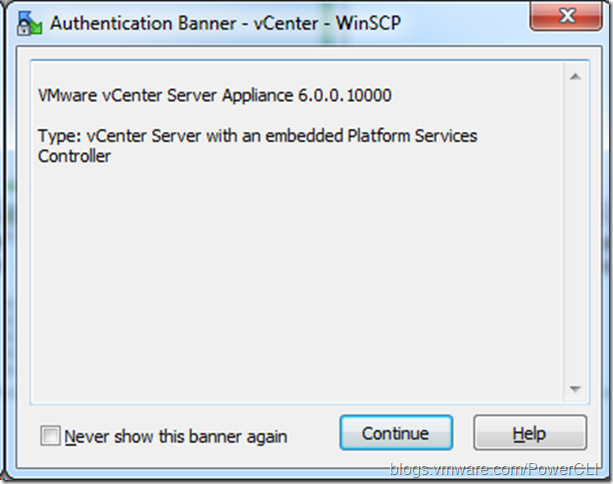
Login to vCenter. Continue past the Authentication Banner.
Unzip the Onyx setup folder and upload ‘onyx-setup’ to the /root/ folder.
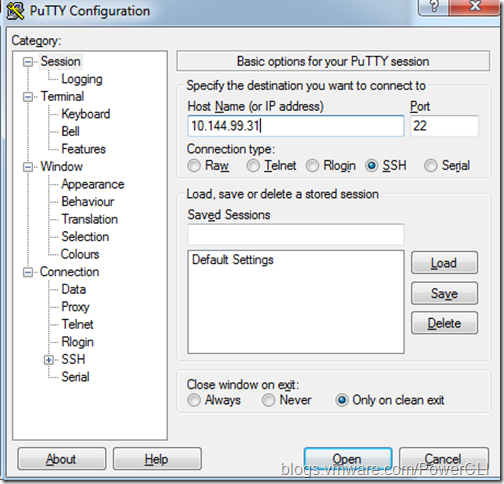
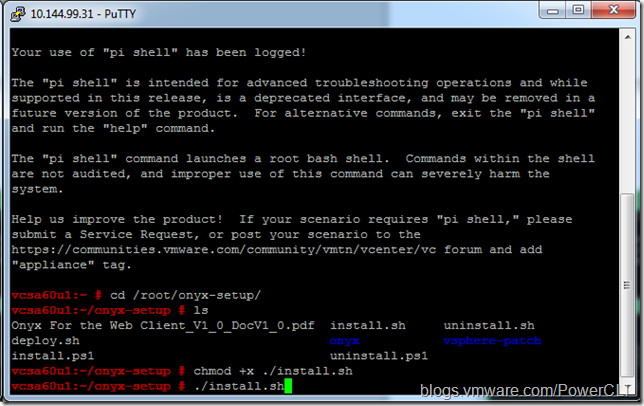
Open Putty and connect to vCenter
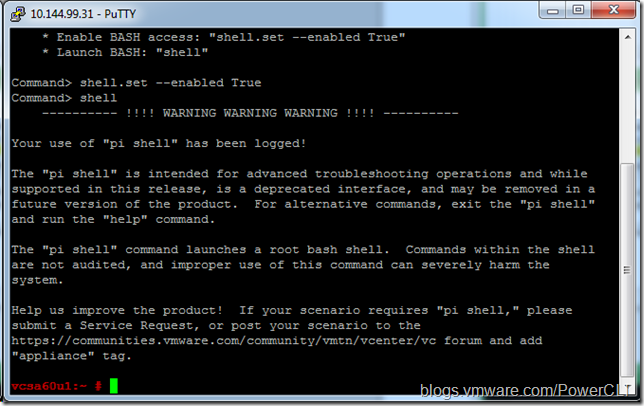
First, enable BASH access by typing: ‘shell.set –enabled true’
Launch BASH by typing: ‘shell’
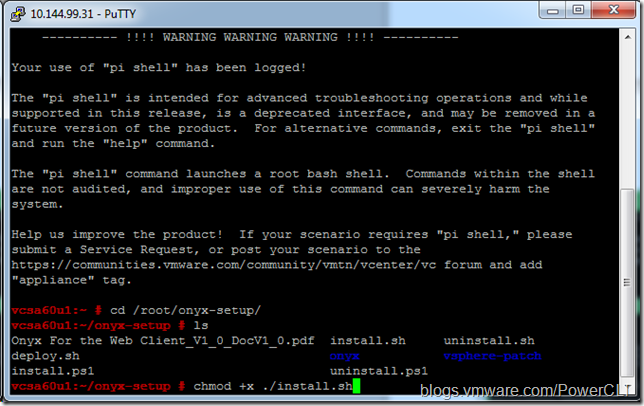
change directories to /root/onyx-setup/
type: ‘chmod +x ./install.sh’ to make the file executable.
run ./install.sh
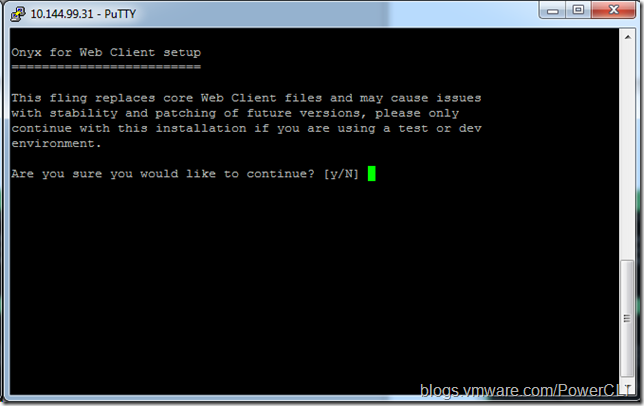
Type: ‘y’ to continue the installation.
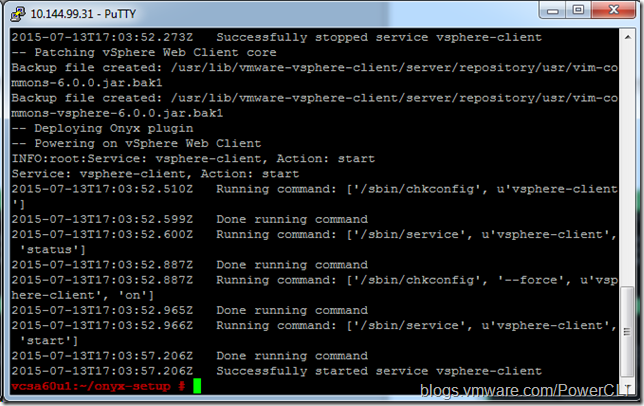
After the install script runs, the vsphere web client will restart. Once the restart has finished, you will be ready to use Onyx.
Windows vCenter Server
To install onyx on a Windows vCenter, unzip the Onyx installer.
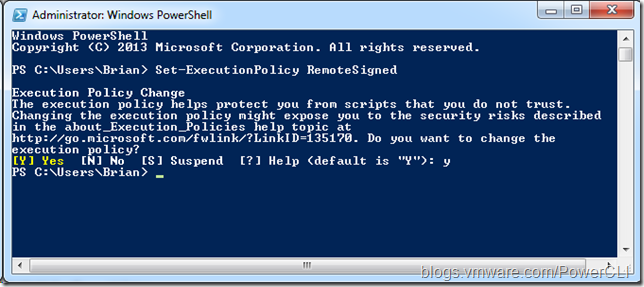
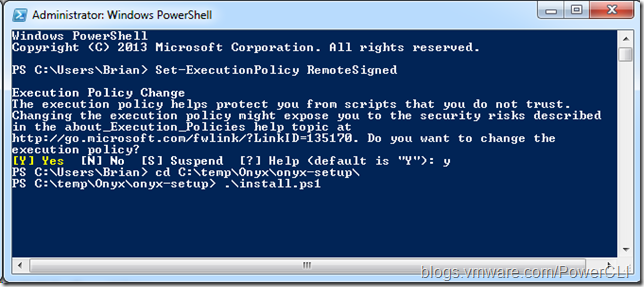
Right-click Powershell and select ‘Run as Administrator’
Type: ‘Set-ExecutionPolicy RemoteSigned’
Type: ‘y’
Run the install script. Change the directory to the unzipped install files.
run .\install.ps1
How Do I Use It?
Once Onyx is installed, you will see a few new icons. The Onyx icon is in the left-navigation pane, under ‘Inventories’ on the home screen, and in the top-right of the screen next to the search box.
There is a red RECORD button next to the Onyx icon. When you are ready to record an action, click the record button. It will turn into a STOP button. Do not click this until you are finished recording the action(s).
Perform the tasks in vCenter and click stop. Onyx has recorded your actions. Click the Onyx icon to see the code.
You will now see all of the recorded PowerCLI.NET code. You can search through it using the textbox and search button.
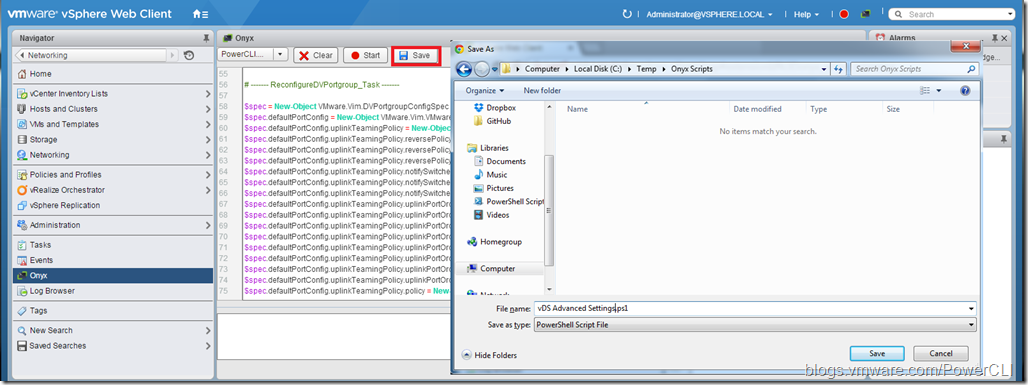
To work with the recorded code, click the SAVE button and save it to your local machine.
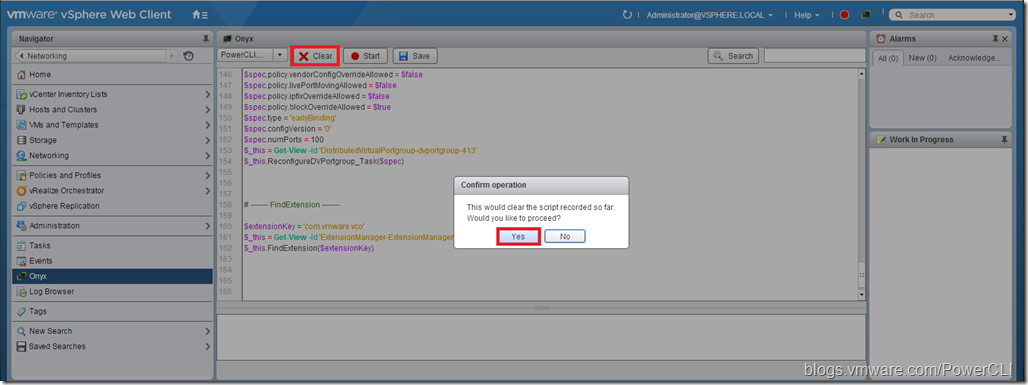
To start over or to erase the recorded code, click ‘Clear’ you will need to confirm this action. Select ‘Yes’.
Onyx is now clear, and you can start over.
Post-Onyx
Once you have your Onyx recording, you can use a PowerCLI editor of choice to tweak the code to your needs. Stay tuned for more posts on Onyx and what it can do for you.
Where to get Onyx
You can download the latest version of Onyx for Web Client from the VMware Flings site HERE: https://labs.vmware.com/flings/onyx-for-the-web-client
Make sure to download and read through the documentation to ensure proper installation.

