A common problem faced by platform operators is data management; specifically, the detrimental side effects that can manifest due to running out of disk space. For example, if debug logging is left enabled on an app and /var/logs fill the disk, containerd/etcd would now be unable to write their states to disk, causing the cluster to fail.
VMware Tanzu Mission Control makes it easy to avoid disk consumption issues by exposing the option to add data partitions to a cluster or nodepool. This gives operators the agility to deploy additional resources to ensure their platform needs can be met.
Let’s walk through the process of creating a new Tanzu Kubernetes cluster with additional partitions to protect directories that are critical to the operation of a Kubernetes cluster.
Create a cluster
Start by logging in to your Tanzu Mission Control instance and click on the Clusters view on the left menu, then click Create cluster.

Creating a cluster in Tanzu Mission Control
Select your desired management cluster, and in the following screen, select the desired provisioner.
Click Next. In step 2, provide the cluster name and add desired labels. Click Next to configure your cluster version and network settings, then add at least one allowed storage class as well as selecting the default storage class.

Configuring a cluster version and network settings in Tanzu Mission Control
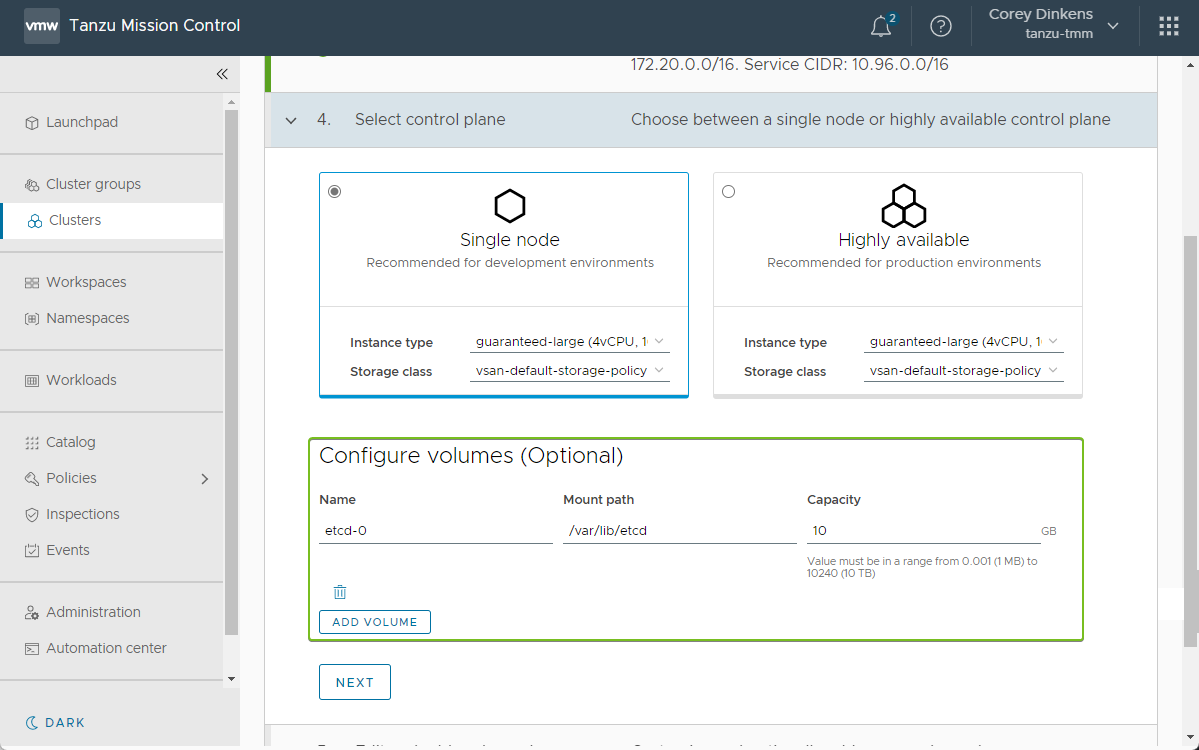
Select your deployment type then click Add volume. The name and mount path can be left as their defaults. We are going to increase the capacity to 10GB, however.

Setting a deployment type in Tanzu Mission Control
Click Next and expand the default-nodepool. Click Add volume, enter containerd-0 for the name, enter /var/lib/containerd for the mount path, then set the capacity to 10GB.

Making optional volume configurations in Tanzu Mission Control
Finally, click Create cluster and wait for the operation to complete. On the cluster creation screen at the top, you can see information about the cluster you just created and can see that the additional volume was added.

Confirming new cluster configurations in Tanzu Mission Control
Refresh the cluster view by hitting F5, then click on the Node pools tab and expand the default-nodepool to confirm you see the additional volumes here as well.

Viewing additional volumes in Tanzu Mission Control
I hope this has been useful in helping you to understand how configuring additional partitions can help ensure your Kubernetes clusters continue to operate when you experience unexpected storage spikes.
Try out the Tanzu Mission Control Hands-on-Lab for free, no sales rep required.
For additional information about Tanzu Mission Control, please view the solution brief.


