This tutorial will demonstrate how to set up a datastore in 3 easy steps, but first, what is Cloud Flex Storage?
VMware Cloud Flex Storage offers a new approach to help better align your cloud resources with your applications and data needs. With this scalable, elastic, and natively integrated storage service for VMware Cloud on AWS, fully managed by VMware, you can flexibly scale storage and compute independently of each other and pay only for the resources you use.
After getting this out of the way, we must activate the service. Please take a look at this helpful article on how to do that.
Going to VMware Cloud Flex Storage Client is easy when the service is active. Log in to VMware Cloud Services using your VMware account at https://console.cloud.vmware.com, then click the VMware Cloud Flex Storage tile. This will redirect us to the VMC Flex Storage client. From here, we need to follow these 3 easy steps to create a datastore.
Step 1: Select an SDDC
Click Create Datastore in the upper right corner on the summary page (you can also find this button on the Datastores page).
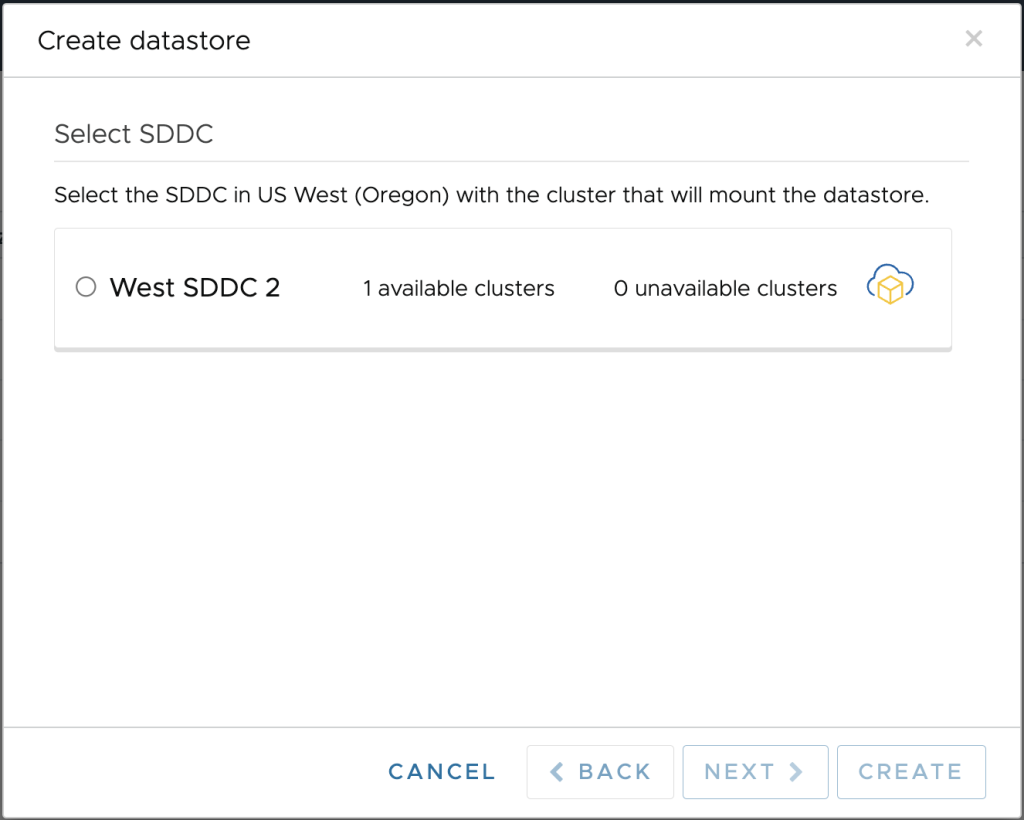
Then a dialog will pop up listing all SDDCs(screenshot 1). Some of them might be disabled. This means that they are considered invalid for datastore attachment.
Some of the reasons that an SDDC is considered invalid for attachment are:
- SDDC is in a different region
- SDDC is in a different AZ
- SDDC is used for protection or recovery
- SDDC is in a different management subnet
- SDDC is compliance hardened
- SDDC not yet linked
There is one more limitation to consider. As of the time of writing this article, the supported number of datastores per SDDC is one, meaning we can attach one datastore to one SDDC.
Now let’s select West SDDC2, click next and proceed to the next step of our tutorial.
screenshot 1

Step 2: Select a Cluster
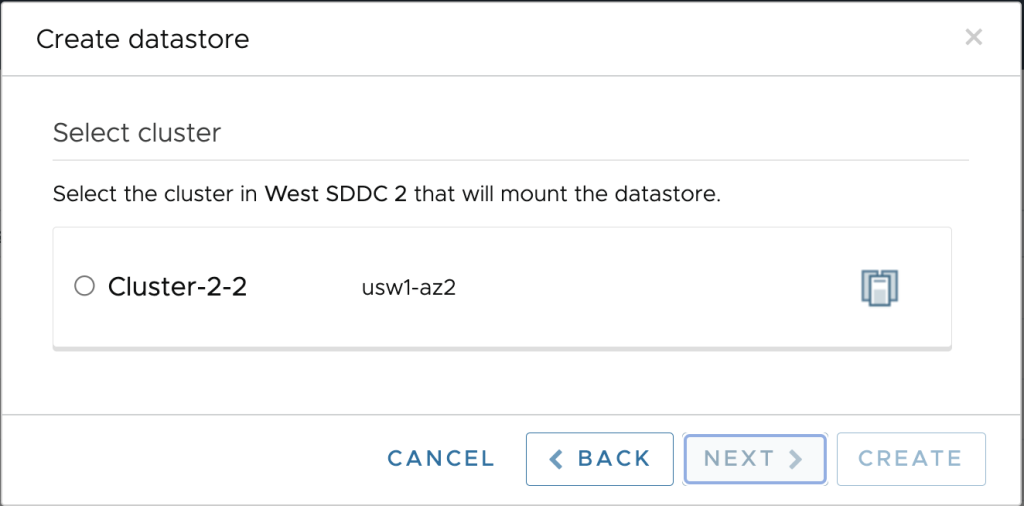
After selecting the SDDC, in our case West SDDC2, we are presented with a list of clusters (screenshot 2).
As of the time of writing this article, VMware Cloud Flex Storage supports one datastore per cluster, meaning we cannot mount multiple datastores to one cluster.
Let’s select Cluster-2-2 and click next.
screenshot 2

Step 3: Finalise the datastore creation
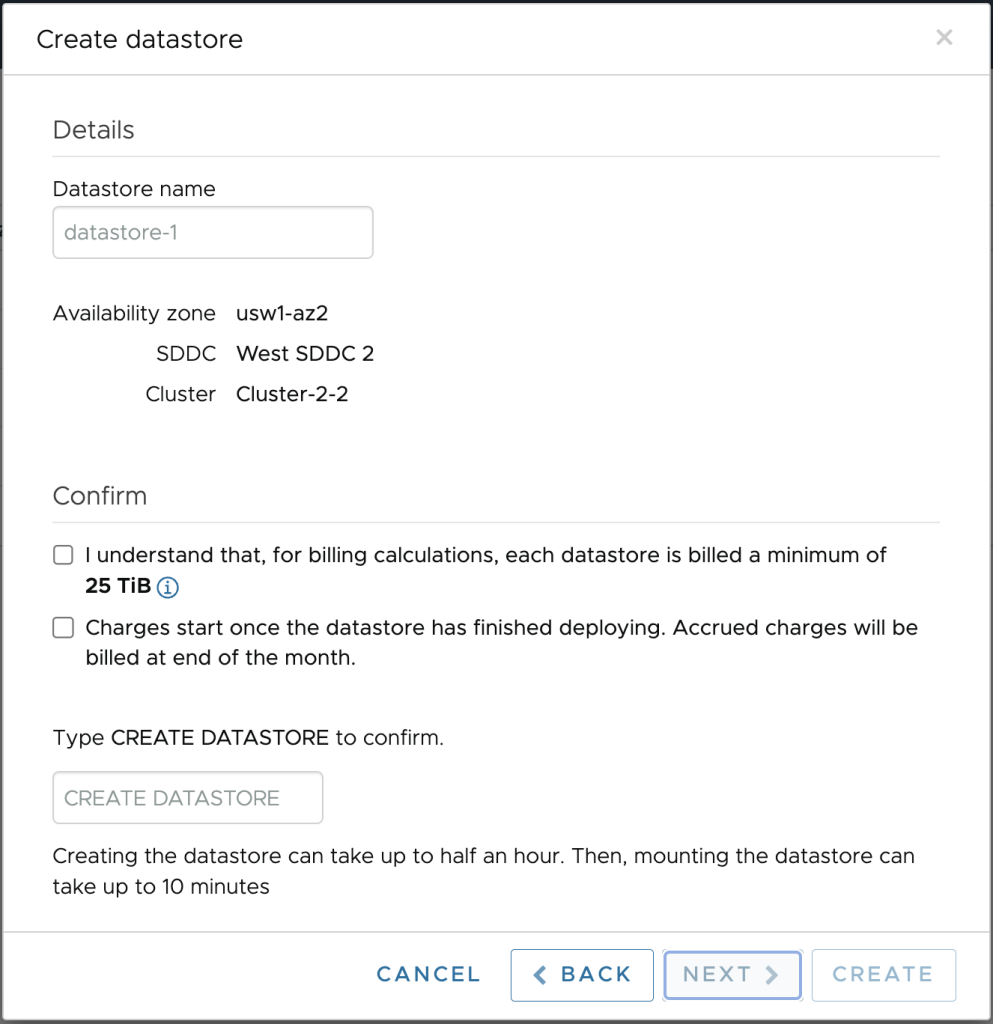
The final step is to set the datastore name (screenshot 3) and confirm the datastore creation. In this step, we will find information about where the datastore will be mounted (Availability zone, SDDC name, and selected cluster) and some billing information.
screenshot 3

And that’s it!
Our datastore will be created and mounted to the cluster in the selected SDDC. If we no longer need this datastore, we can easily unmount and delete it with a few clicks (stay tuned for more VMC Flex storage tutorials coming soon).
In conclusion, achieving this kind of flexibility with just a few clicks is impressive and can make your life easy when you want to scale up and down storage on demand.
Don’t forget to follow the VMware DR Community Team on Twitter @VMware_DR_team and send us any feedback.
