NSX-T is now the default networking stack when you deploy a new SDDC on VMware Cloud on AWS. Replacing NSX-V, the new policy will allow customers to take advantage of additional networking and security capabilities. Learn how to get started with the new NSX-T Policy API.
Today, when you deploy a new SDDC on VMware Cloud on AWS (VMC), NSX-T is now the default networking stack and NSX-V is no longer used for net new deployments. In fact, we are about to start migrating existing VMC customers who have an NSX-V SDDC and converting them to an NSX-T SDDC. Humair Ahmed who works over in our Networking & Security Business Unit has an excellent blog post here that goes into more details on what NSX-T brings to VMC.

Upon first glance, you might think that this is the exact same version of NSX-T that we have been shipping to our on-premises customers but in fact, it is actually a brand new and improved version. Similar to vSphere (vCenter and ESXi) and VSAN, VMC is always running a newer version of our software than our on-prem customers. One immediate difference that you should be aware of when using NSX-T in VMC is that the current NSX-T API is not available and instead a new NSX-T Policy API has been introduced to help simplify the consumption of NSX-T. All functionality in the current on-prem NSX-T API can be consumed using the new Policy API.
At VMworld, I spoke to a number of current and upcoming customers with NSX-T based SDDCs and they were really interested in using the new NSX-T Policy API and as the title of this blog post suggests, this will be a quick primer on how to do that. Before we get started, confirm that you have an NSX-T based SDDC deployed. If you are not sure, there are a few ways to determine this using either the VMC Console UI or API, instructions can be found here and here.
There are two ways to interact with the NSX-T Policy API on VMC:
- Connecting to the NSX-T Manager
- Connecting to the VMC Console
The first option is pretty straight forward, so I will not go into detail, you simply connect to the NSX-T Manager like you normally would in an on-prem environment. Having said that, the first option is only available after you setup a VPN or Direct Connect and create an initial firewall rule that allows incoming connection from your source network to the NSX-T Manager in VMC. This poses an interesting chicken/egg problem if you want to fully automate the network configuration, since the NSX firewall blocks all access by default, including access to the NSX-T Manager.

This is where the second option comes in and provides a “Reverse Proxy” to the NSX-T Manager using the VMC Console API, this is the exact same way the UI is able to perform networking changes without direct access to NSX manager. This method enables customers to perform the minimum “Day 0” setup of NSX-T such as configuring a Direct Connect or IPSec VPN and then enabling the firewall to allow your source network to connect to the SDDC, including NSX-T Manager. After that, you have the option of either directly connecting to the NSX-T Manager to perform other configurations or you can continue using the reverse proxy method. You are not limited to a subset of functionality as the reverse proxy simply acts as pass-through to the NSX-T Manager and as mentioned earlier, both options are available.
Note: When working with the NSX-T Policy API in VMC, there are certain values that will be hardcoded and this is purely due to the fact that in VMC, the underlying infrastructure is already setup for customers such as the MGW/CGW gateways. When referencing the NSX-T Policy API documentation, for properties such as <vmc-domain>, this should be replaced with either mgw or cgw as the value.
So, what does the workflow look like from a programmatic standpoint?
Step 1 – Using the VMC Console API, you would first perform a GET /api/orgs/<orgId>/sddcs/<sddcId> on the NSX-T SDDC and retrieve a new property called nsx_api_public_endpoint_url (under resource_config) that provides the base NSX-T Reverse Proxy URL. An example of this URL would look like the following: https://nsx-A-B-C-D.rp.vmwarevmc.com/vmc/reverse-proxy/api/orgs/<orgId>/sddcs/<sddcId>/sks-nsxt-manager
Step 2 – To perform an operation using the NSX-T Policy API, you would specify the VMC Console Access Token as your authentication and then append the specific URL to this base NSX-T Reverse Proxy URL. For example, to list all NSX-T Network Segments (Logical Networks) when going directly to NSX-T Manager, you would perform a GET /policy/api/v1/infra/tier-1s/<networkId>/segments Since, we are using the reverse proxy, then full URL would look like the following: https://nsx-A-B-C-D.rp.vmwarevmc.com/vmc/reverse-proxy/api/orgs//sddcs/<sddcId>/sks-nsxt-manager/policy/api/v1/infra/tier-1s/cgw/segments
To help demonstrate the new NSX-T Policy API, I have created two samples, one using PowerShell and the other using cURL.
Using PowerShell with the NSX-T Policy API:
Step 1 – Download and import the new VMware.VMC.NSXT PowerShell module that I have created (I plan to add additional functionality in the future, so stay tuned).
Import-Module ./VMware.VMC.NSXT.psd1
Step 2 – You will also need to download and import the existing VMware.VMC PowerShell module which is also used by the new module I have created.
Import-Module ./VMware.VMC.psd1
Step 3 – You will need to defined a few variables that will be used by the functions and make it easy to test against different NSX-T based SDDCs:
$RefreshToken – This the Refresh Token from the VM Console (for additional instructions on obtaining this, please take a look at this blog post here)
$OrgName – This is the Organization name which can be found within the VM Console UI
$SDDCName – This is the SDDC name which contains an NSX-T deployment which can be found within the VM Console UI
Step 4 – Connect to the VMC service using the Connect-VmcServer cmdlet and providing your $RefreshToken variable:
Connect-VmcServer -RefreshToken $RefreshToken
Step 5 – Connect to the NSX-T Proxy, which simply retrieves your Access Token from the Cloud Services Platform and setups the NSX-T Reverse Proxy URL which will be used by subsequent functions. You will need to provide the $RefreshToken, $OrgName and $SDDCName as input.
Connect-NSXTProxy -RefreshToken $RefreshToken -OrgName $OrgName -SDDCName $SDDCName

If the command was successful, what the function does is setups a global variable called $global:nsxtConnection which contains the NSX-T Proxy URL which can then be easily referenced when working with the NSX-T Policy API along with the required headers including the csp-auth-token for authenticating to the NSX-T Reverse Proxy endpoint as shown in the screenshot below.

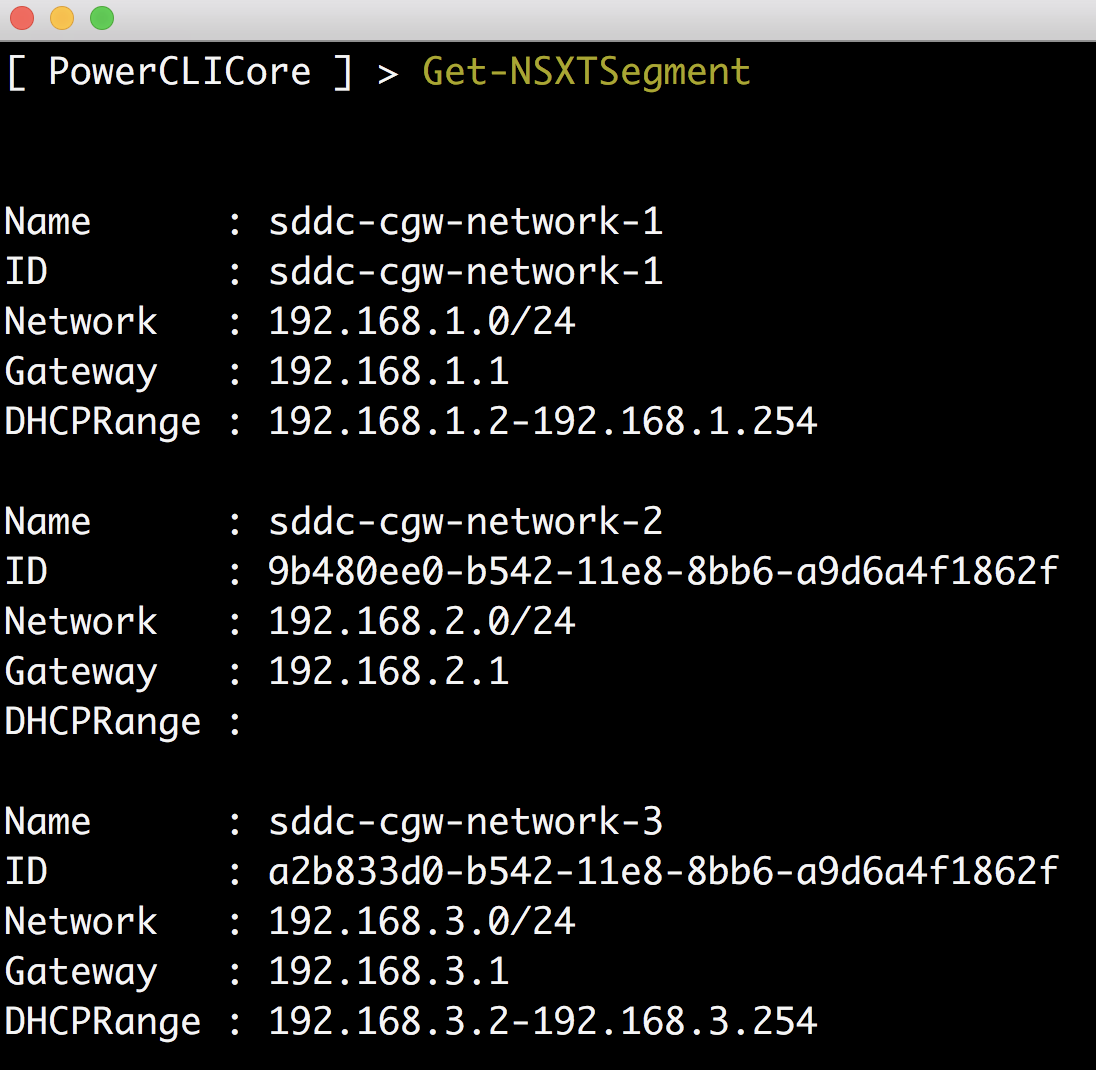
Step 6 – Lastly, lets now make use of this information by running our Get-NSXTSegment function which will return all NSX-T network segments also known as Logical Networks. You can also specify -Name property if you wish to filter a specific segment.

Using cURL with the NSX-T Policy API:
Step 1 – Download the list_vmc_nsxt_network_segments.sh shell script (ensure you have jq utility installed as it uses that to parse the JSON output)
Step 2 – You will need to defined a few variables that will be used by the functions and make it easy to test against different NSX-T based SDDCs:
RefreshToken – This the Refresh Token from the VM Console (for additional instructions on obtaining this, please take a look at this blog post here)
OrgID – This is the ID of your Organization which can be found within the VM Console UI under “Settings” or using the VMC Console API
SDDCId – This is the ID of your SDDC which contains an NSX-T deployment which can be found within theVM Console UI under “Settings” or using the VMC Console API
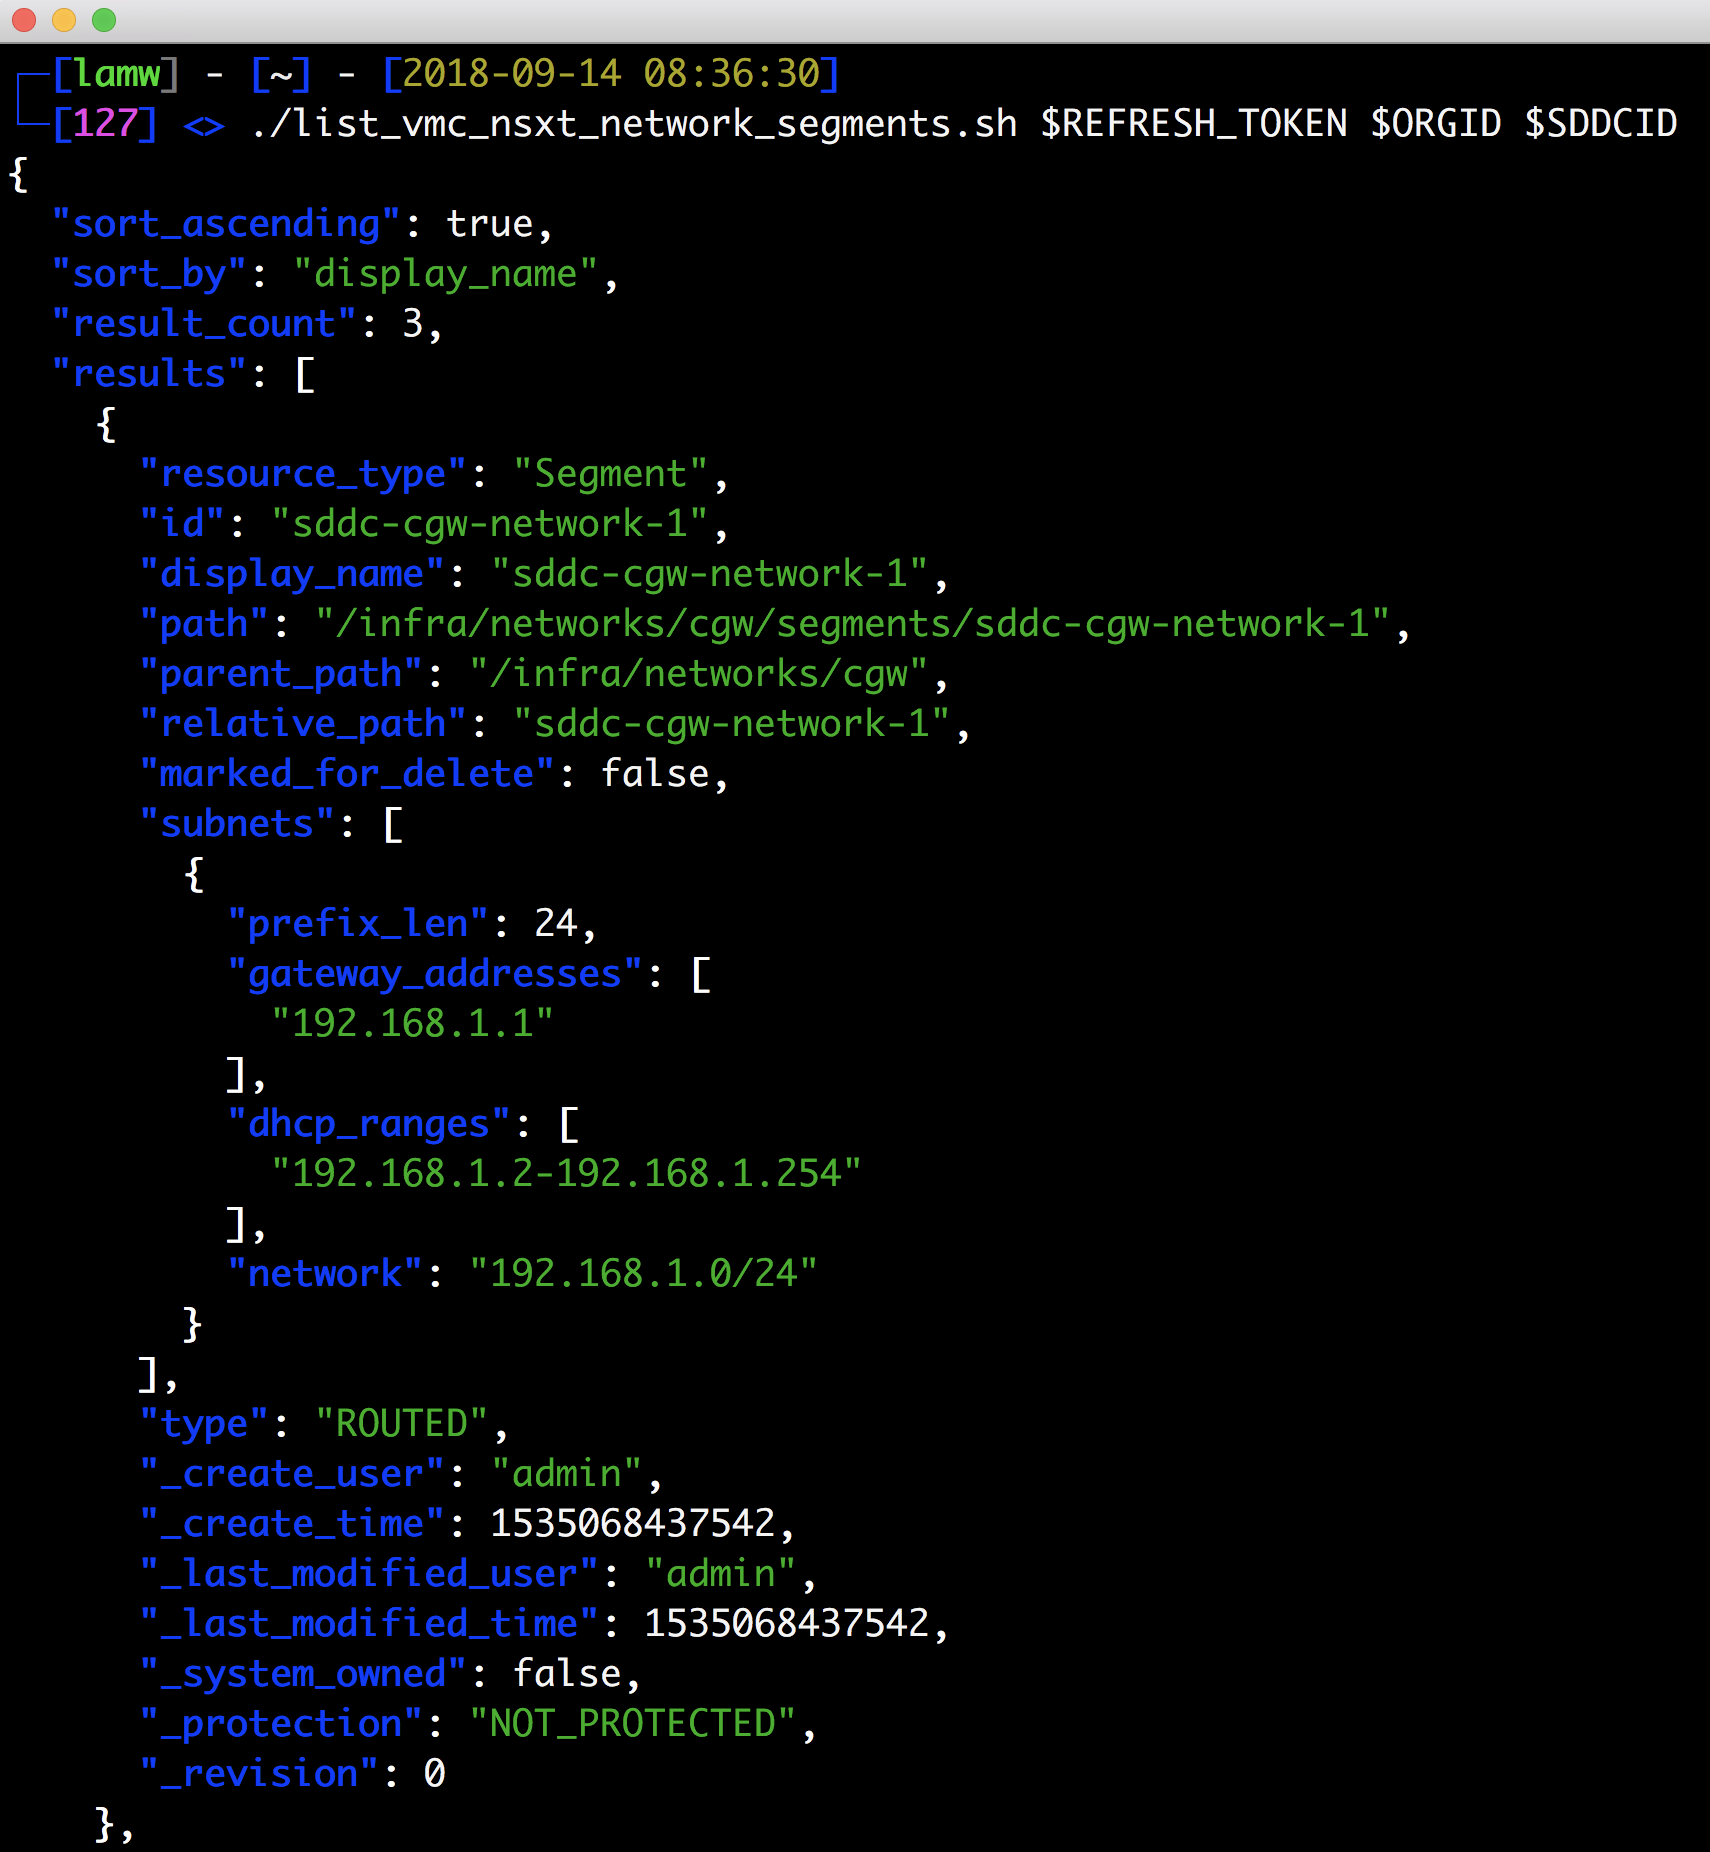
Step 3 – Simply run the following to list all NSX-T network segments:
./list_vmc_nsxt_network_segments.sh $REFRESH_TOKEN $ORGID $SDDCID

Hopefully this gives a good idea of how to start working with the new NSX-T Policy API in VMC. You can find more details about the NSX-T Policy API by referring to the documentation here. As mentioned above, I plan to add some more functions to the NSX-T Policy PowerShell module, so stay tuned for that and hope to see some contributions from the community as well.
Discover more from VMware Cloud Foundation (VCF) Blog
Subscribe to get the latest posts sent to your email.


