

Modern private cloud infrastructure demands enterprise-grade container registry capabilities, particularly in environments where external internet connectivity is restricted or prohibited. Within VMware Cloud Foundation (VCF) 9.0, deploying Supervisor Services in air-gapped environments presents unique technical challenges that require careful planning and precise execution. This guide provides a systematic approach to deploying and managing Harbor as a Supervisor Service in air-gapped VCF deployments, enabling your organization to maintain container image availability while adhering to strict security and compliance requirements.
The critical challenge in air-gapped environments is the “bootstrap problem.” Harbor Supervisor Service requires container images to deploy, but in an air-gapped environment, you have no registry from which to pull those images. This guide addresses this challenge by demonstrating how to establish a bootstrap registry that enables Harbor Supervisor Service deployment, after which Harbor Supervisor Service can become your production container registry.
Understanding Air-Gapped Deployment Challenges
An air-gapped environment is a network security measure that physically or logically isolates a computer network from unsecured networks, including the internet. For organizations operating in regulated industries such as financial services, government agencies, healthcare, and defense, air-gapped infrastructure is not optional; it is a regulatory requirement.
Hence, we provide you here with a solution to deploying the Harbor Supervisor Service in an air-gapped setup that will then become your OCI registry for the air-gapped environment.
Deployment Process
For air-gapped VCF environments, we require a two-phased approach.
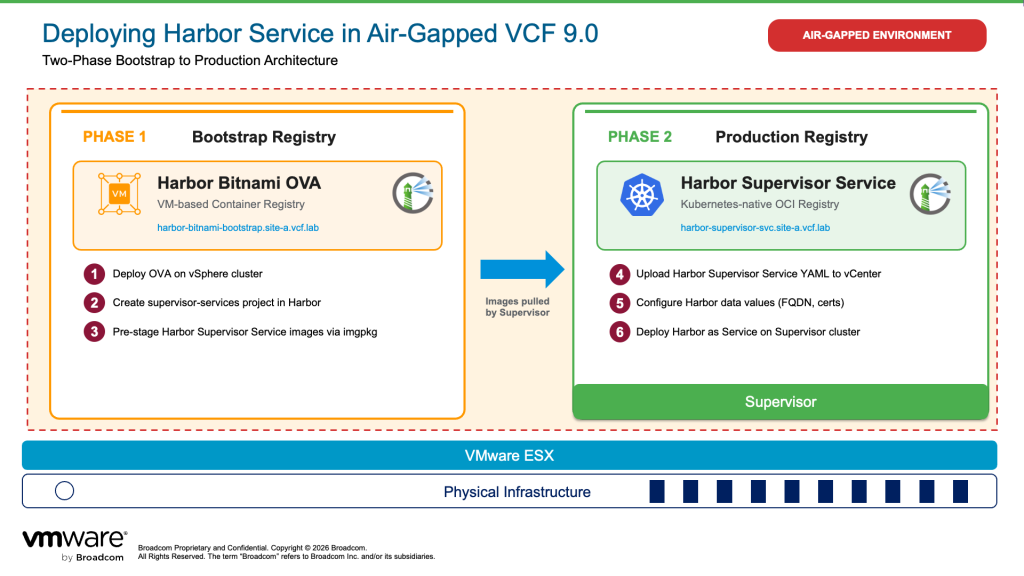
Step 1: Bitnami Harbor OVA Deployment
Deploy the Harbor Open Virtual Appliance (OVA) from Bitnami as a virtual machine as the bootstrap registry for storing the Harbor Supervisor Service images. This approach provides:
- Quick deployment through a preconfigured appliance
- Traditional VM-based management
- Suitable for initial testing or smaller deployments
This bootstrap registry serves a critical purpose: it hosts the Harbor Supervisor Service container images that will be pulled during Harbor Supervisor Service deployment.
Step 2: Harbor Supervisor Service (Production Registry)
Once you have a bootstrap registry operational, you can deploy Harbor as a native Supervisor Service. This becomes your production container registry and provides:
- Native integration with VCF lifecycle management
- Scalability with your Supervisor infrastructure
- Enterprise support through standard Broadcom channels
- Integration with vSphere Namespaces and VKS clusters
Why This Two-Phase Approach?
Harbor Supervisor Service cannot deploy itself without access to its own container images. In internet-connected environments, these images are pulled from external registries automatically. In air-gapped environments, you must first provide an internal bootstrap registry using the Harbor VM that hosts these images. Once Harbor Supervisor Service is deployed and operational, it becomes the production registry for all your workloads.
This guide covers the complete workflow: setting up a bootstrap Harbor registry, populating it with required images, deploying Harbor Supervisor Service using the bootstrap registry, and using Harbor Supervisor Service as the production registry for workload deployment.
Prerequisites
Before beginning deployment, verify your environment meets these requirements:
- VMware Cloud Foundation 9.0 with Supervisor enabled in an air-gapped environment
- Harbor Supervisor Service package YAML
Step 1: Bitnami Harbor OVA Deployment
- Download the latest Harbor OVA from the Bitnami portal and ensure the OVA is available in a location from where it can be uploaded to the air-gapped vCenter.
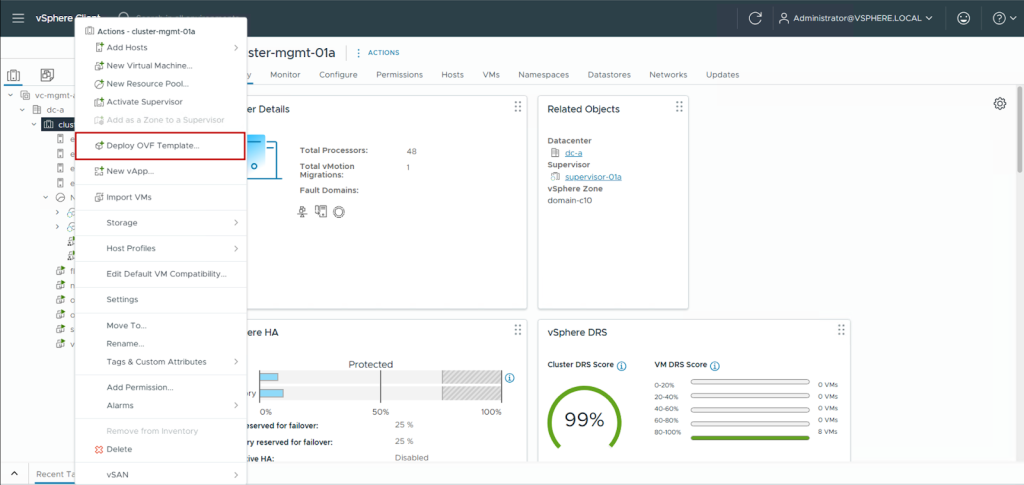
- Log in to your air-gapped vCenter, right-click on your cluster, and select Deploy OVF Template.
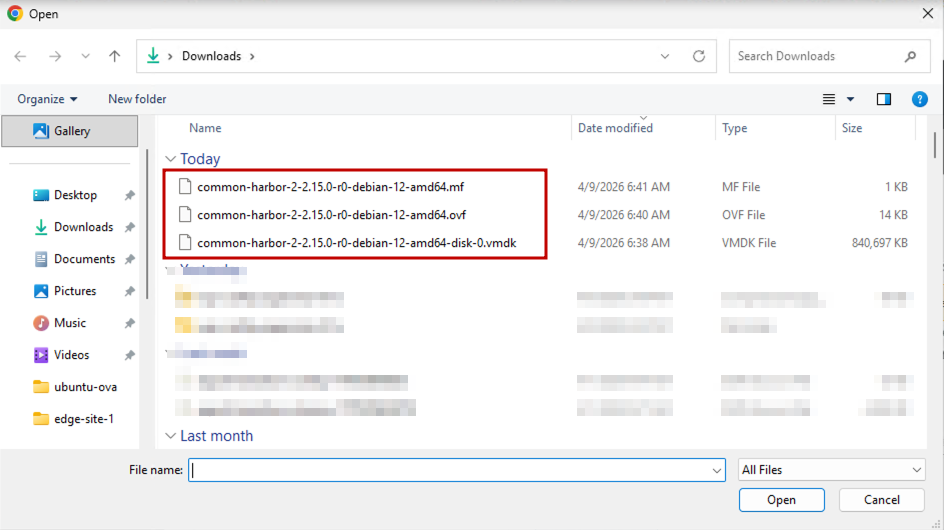
- Select the Bitnami Harbor OVF-related files.
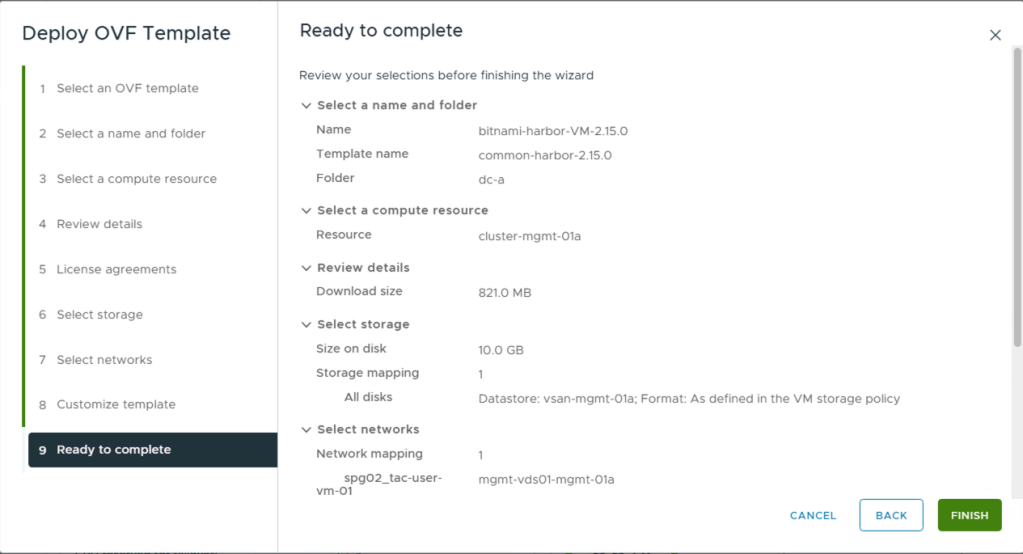
- Follow the wizard and deploy the OVF template.
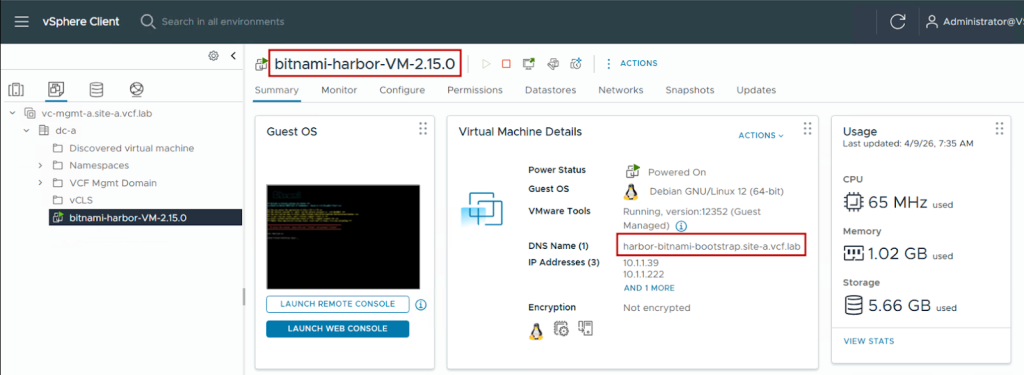
- Power on the Harbor VM and let the initial bootstrap of the VM complete and you will be able to see the IP and FQDN provided to it in vCenter.
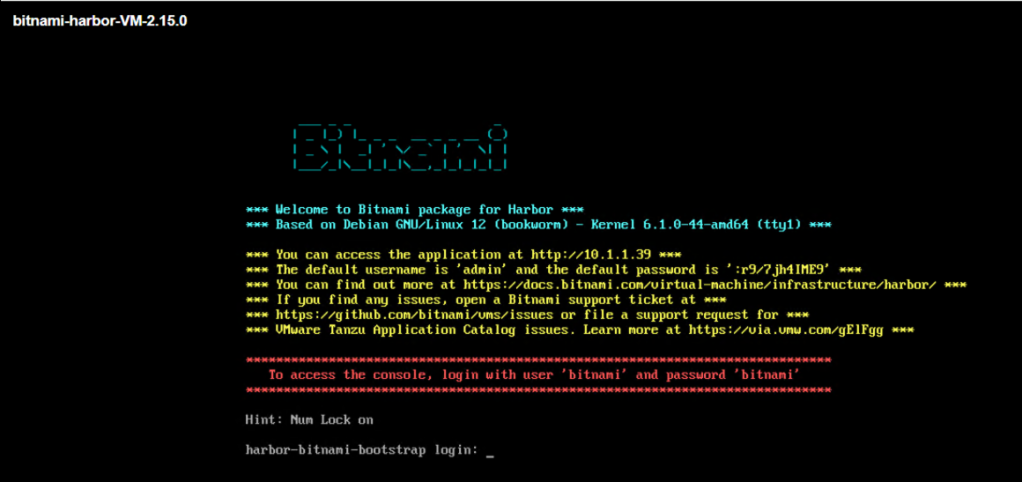
- Logging in to the console, we can see the bootstrap of Harbor has been completed and the credentials for logging in to the Harbor UI are available here.
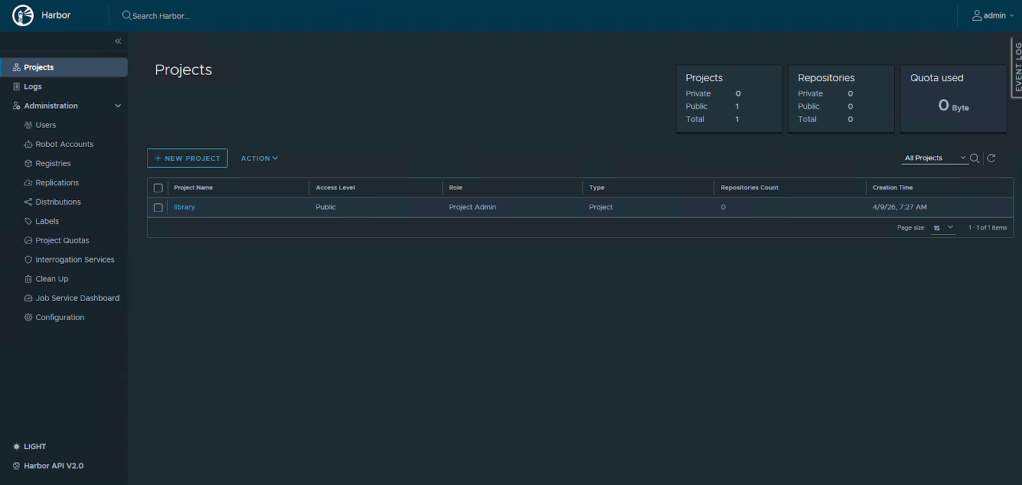
- We can now log in to the Bitnami Harbor instance. This will act as our bootstrap registry for storing the Harbor Supervisor Service images.
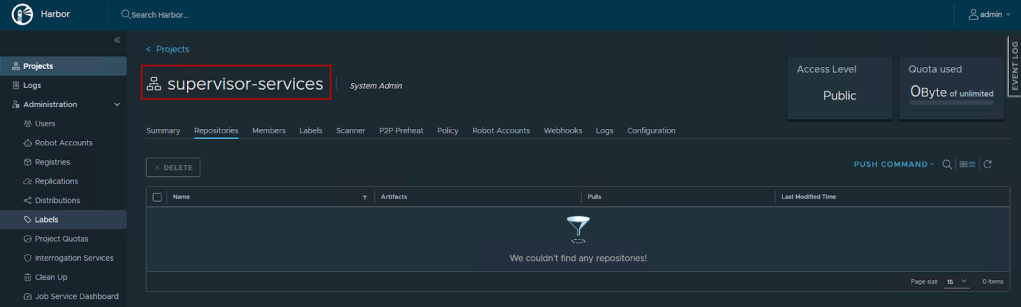
- We create a new project called supervisor-services, which will be used to store the Harbor Supervisor Service images.
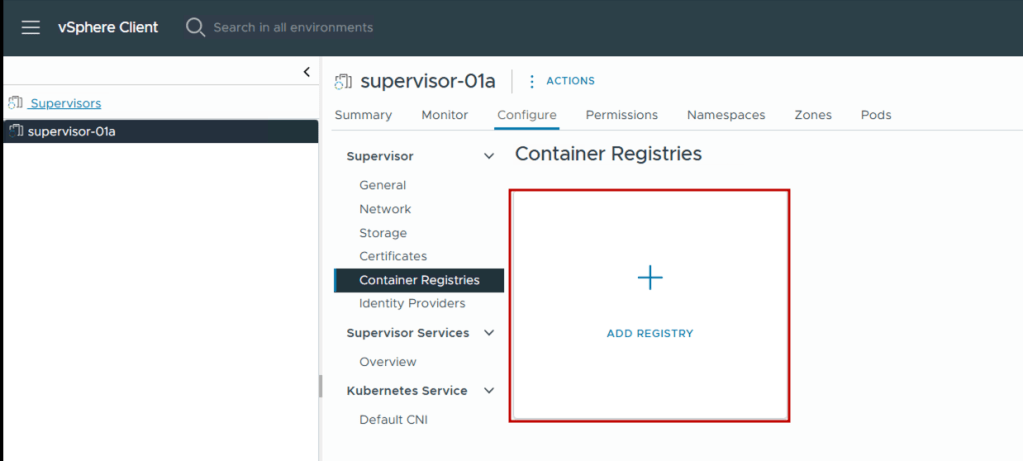
- Since we are using an instance of Harbor that is not signed by a trusted CA, we will add it as a container registry in supervisor. For this, we log in to vCenter > Menu > Supervisor Management > <supervisor> > Configure > Container Registries and click on Add Registry.
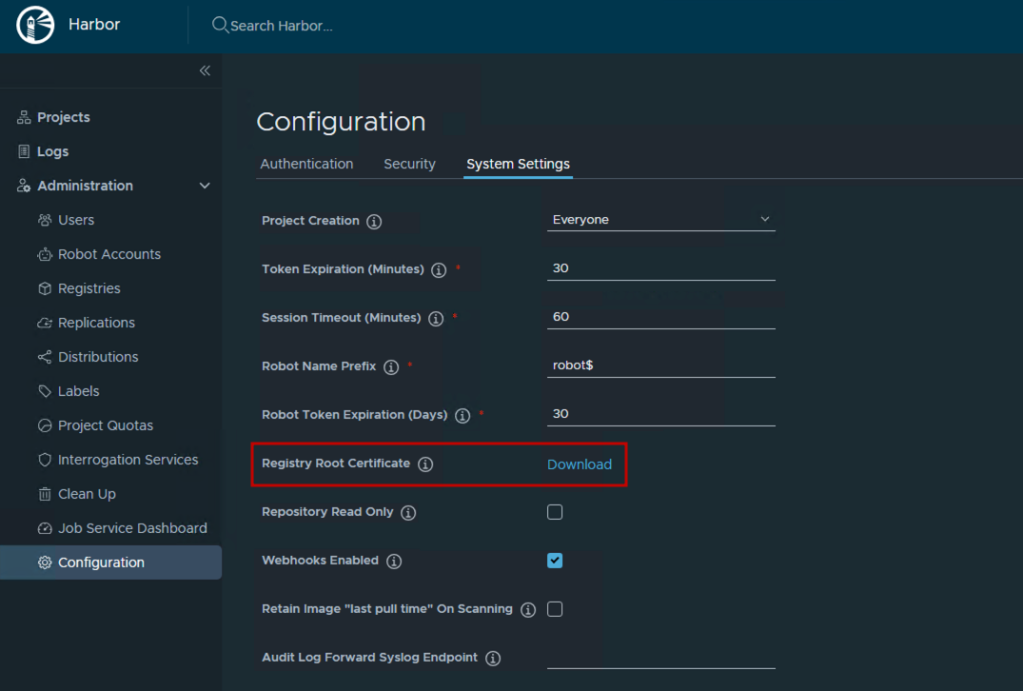
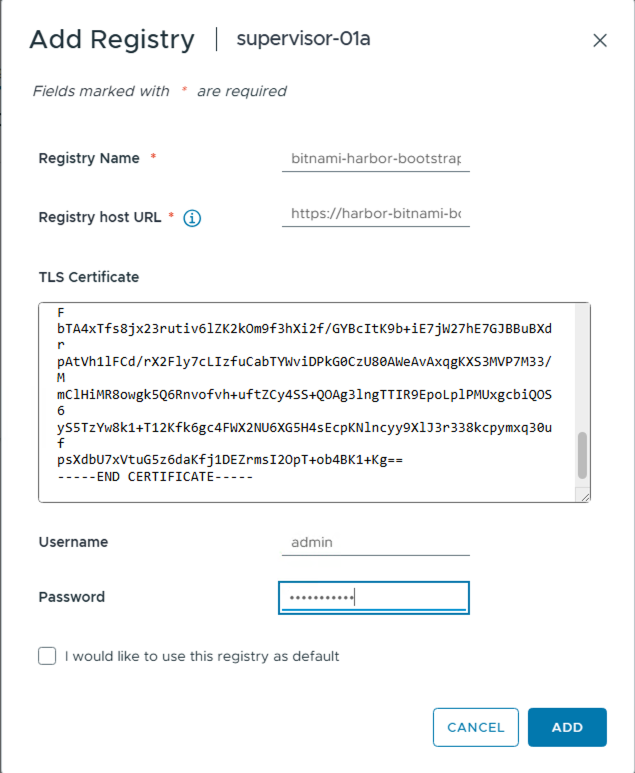
- Provide the bootstrap Harbor VM detail. We get the TLS certificate details by logging in to the bootstrap Harbor VM > Administration > Configuration > System Settings, clicking on the Download button next to Registry Root Certificate, and pasting the contents of the file into the input in the UI shown below.
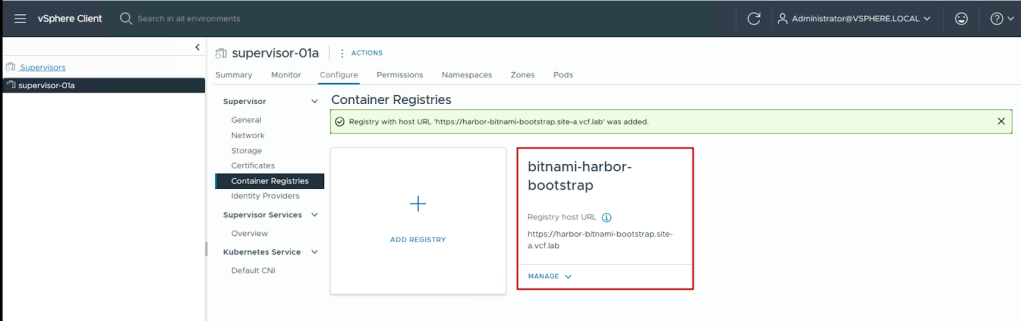
- We can see the registry gets added successfully. This will allow Supervisor to use this registry for pulling the Harbor-related Supervisor Service images without additional trust establishment.
Step 2: Image Pre-Staging
Now that the bootstrap registry is available, we must pre-stage all required container images by the Harbor Supervisor Service. This section describes the process.
Pre-requisites:
- Carvel imgpkg
At the time of writing this blog, the latest Carvel Imgpkg available is 0.47.2. For information on the latest version available, refer to the Carvel imgpkg documentation. Since we are using a Windows jumphost with internet connectivity, we download the imgpkg.exe file from GitHub and add it to the Windows Environment Variables list.
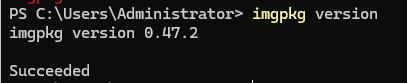
Image Collection and Pre-Staging Process:
- We open the Harbor Supervisor Service yaml file and identify the carvel packages it pulls during installation to pre-stage them. In this case, we are using Harbor 2.14.3.

- Now we copy the bundle on to our Windows jumphost using imgpkg:
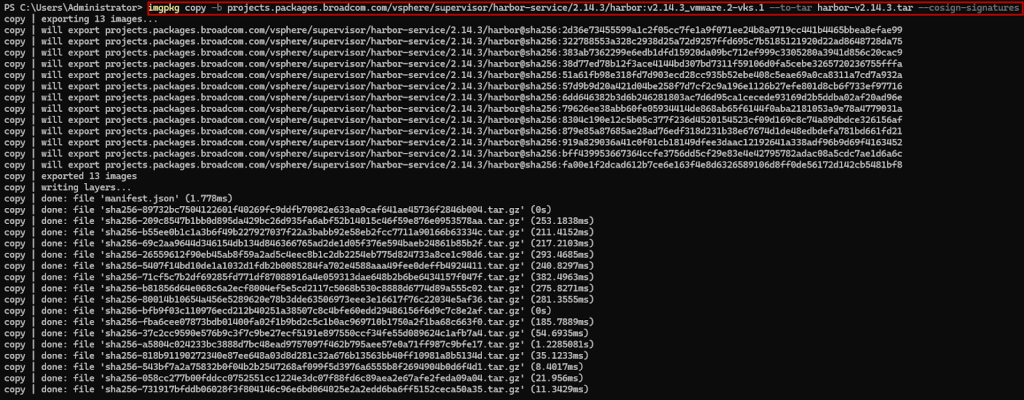
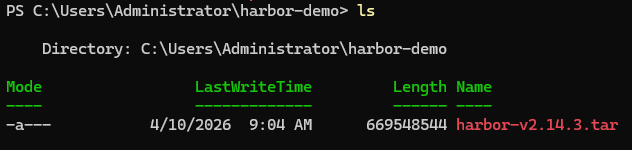
- We can see that the Harbor Supervisor Service carvel package is now available as a tar file on our jumphost.
- Now we copy the tar file from our jumphost to our bootstrap Harbor registry.

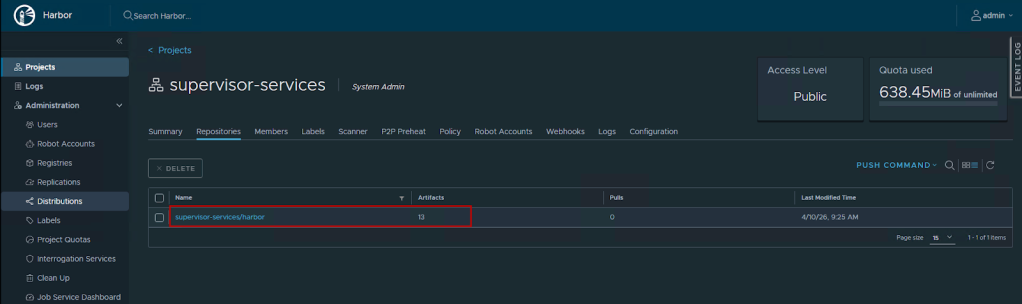
- We can now see that the Harbor Supervisor Services-related images are now available in the bootstrap Harbor VM registry.
- Finally, we update the image URL in the harbor supervisor service YAML from the internet-based location to point it to the air-gapped bootstrap Harbor VM.

Step 3: Install Harbor Supervisor Service
Add the Harbor Service to vCenter
- Log in to vSphere Client.
- Navigate to Menu > Supervisor Management > Services > Add New Service.
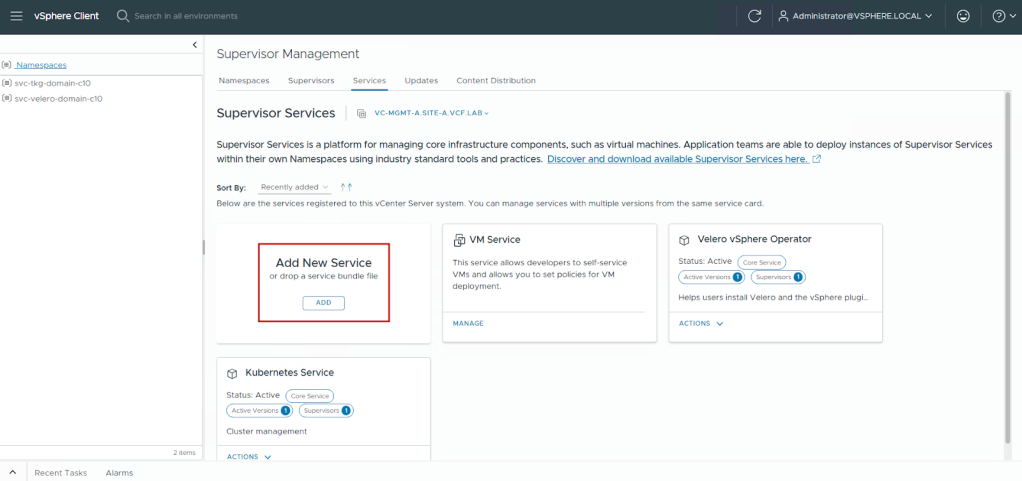
- Select Upload.
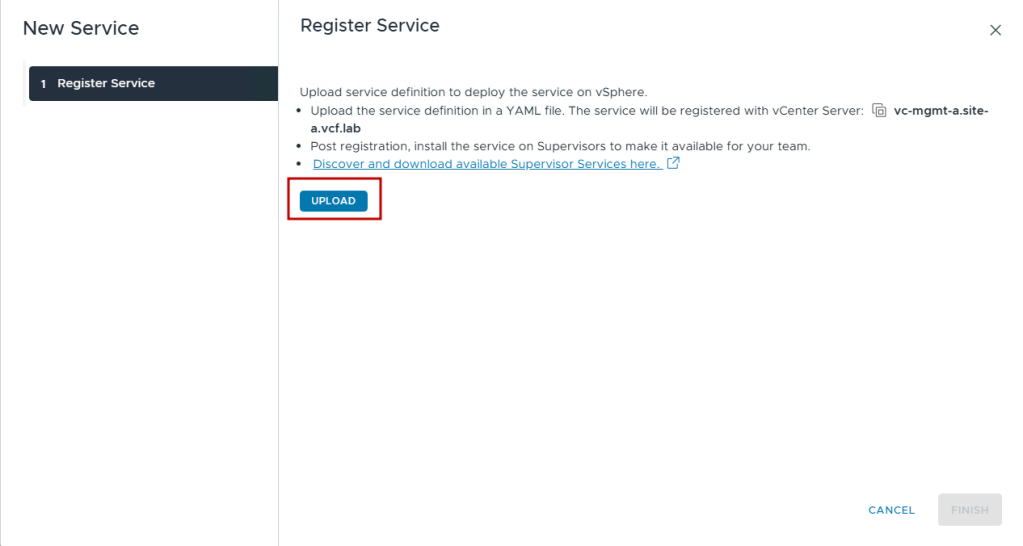
- Upload the harbor-service-x.xx.x.yml file.
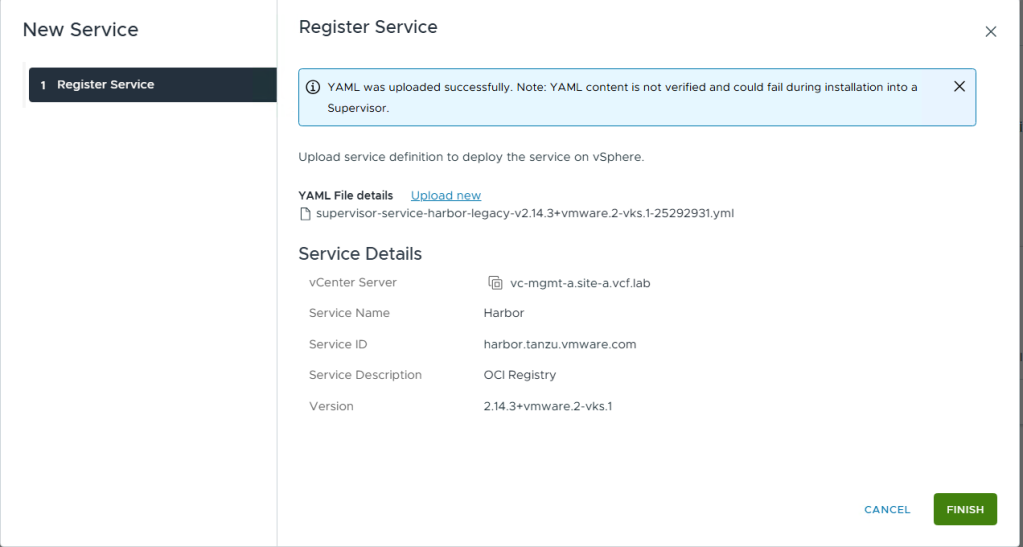
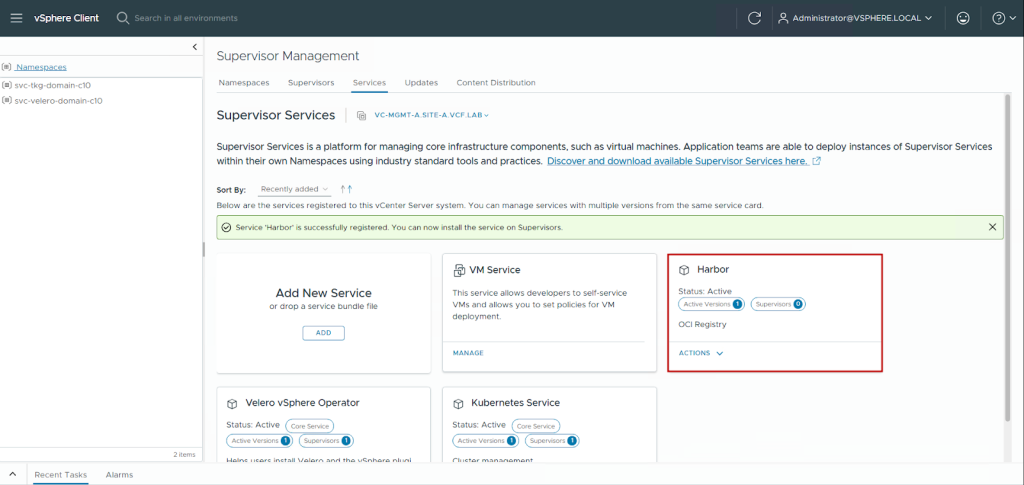
- Click on Finish.
Update Harbor Supervisor Service Data Values File
- Configure Harbor Data Values: Edit the harbor-data-values-x.xx.x.yml file to configure Harbor for your air-gapped environment. Details on how to set the values can be found in the Reducing Harbor Deployment Complexity on Kubernetes blog and the Making harbor production-ready: Essential considerations for deployment blog.
Deploy Harbor Supervisor Service
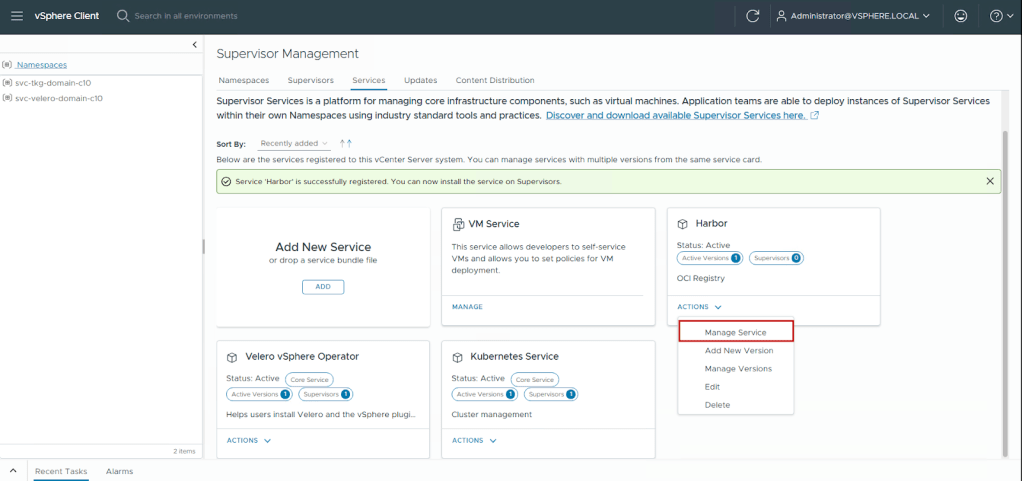
- In the vSphere Client, locate the Harbor service card.
- Click Actions > Manage Service.
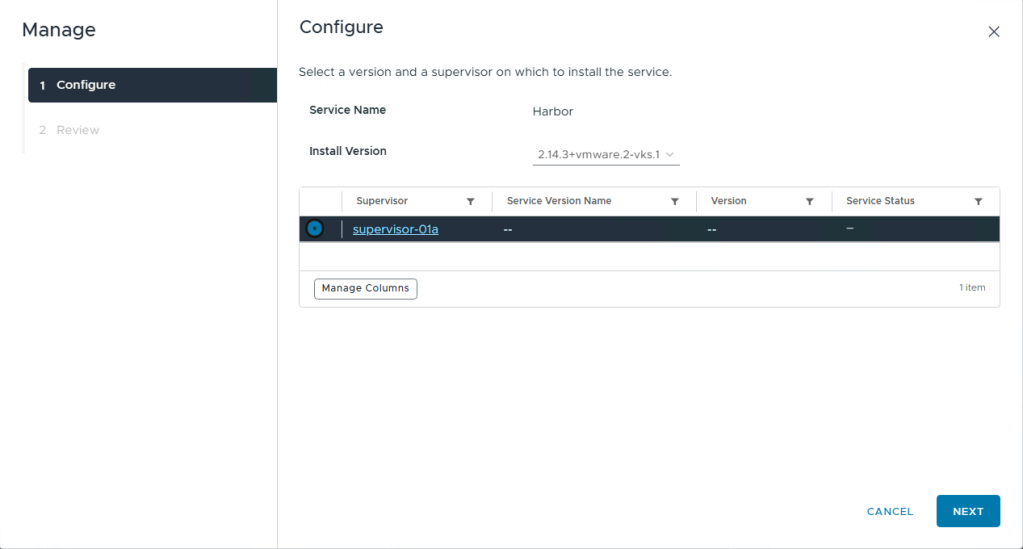
- Select your supervisor cluster and click Next.
- Paste the modified harbor-data-values-x.xx.x.yml content.

- Click Finish.
- Monitor the installation progress.
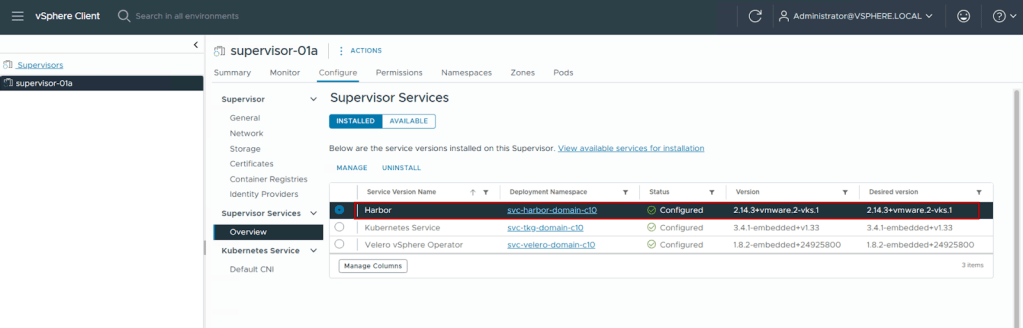
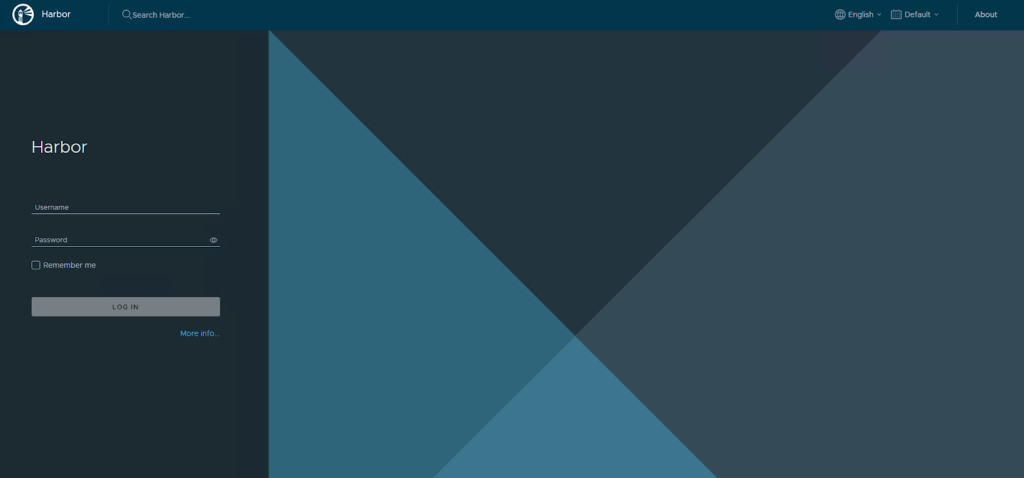
The installation creates a namespace (e.g., svc-harbor-<unique-id>) and deploys all Harbor components. Once the deployment completes, we can access the Harbor Supervisor Service UI using the FQDN provided in the data values yaml file.
From this point, we have an air-gapped, production-grade enterprise registry that can be used to deploy other Supervisor Services as well as applications.
Conclusion
Deploying Supervisor Services in an air-gapped VCF 9.0 environment requires careful planning, precise execution, and ongoing operational discipline. The Harbor Supervisor Service provides a robust foundation for container registry operations without external internet connectivity.
Key takeaways:
- Architecture decisions: The Harbor Supervisor Service approach offers superior integration with VCF lifecycle management compared to standalone VM deployments. It scales with your infrastructure and receives enterprise support.
- Pre-staging is critical: Success in air-gapped environments depends entirely on comprehensive image pre-staging. Maintain detailed image inventories and establish reliable transfer procedures.
- Certificate management: Internal PKI and certificate trust relationships are fundamental. Implement automated certificate rotation and maintain complete certificate chains.
- Security first: Air-gapped environments exist for security reasons. Implement content trust, vulnerability scanning, and RBAC from day one.
By following this guide, you establish a production-ready container registry infrastructure that meets the stringent requirements of air-gapped operations while maintaining the flexibility and scalability expected from modern private cloud platforms.
For additional resources and updates, refer to the Broadcom TechDocs for VCF Supervisor Services.
If you are looking for more information on Harbor, follow our Harbor blog series:
- Blog 1 – Harbor: Your Enterprise-Ready Container Registry for a Modern Private Cloud
- Blog 2 – Reducing Harbor Deployment Complexity on Kubernetes
- Blog 3 – Making Harbor Production-Ready: Essential Considerations for Deployment
- Blog 4 – Integrating VMware Data Services Manager with Harbor for a Production-Ready Registry
- Blog 5 – Using Harbor as a Proxy Cache for Cloud-Based Registries
- Blog 6 – Securing Your Software Supply Chain with Harbor
- Blog 7 – Implementing Cross-Region Replication with Harbor in VMware Cloud Foundation
- Blog 8 – Using Harbor as an AI Model Registry
Discover more from VMware Cloud Foundation (VCF) Blog
Subscribe to get the latest posts sent to your email.


