

In the world of containerization, pulling images from public registries is a daily task for development teams, CI/CD pipelines, and production deployments. But what happens when your team scales? What starts as a simple docker pull nginx command can quickly become a bottleneck.
The Problem: Public Registry Challenges
Picture this scenario: Your organization has 50 developers, each running builds multiple times a day. Your CI/CD system spins up fresh containers for every pipeline run. Each environment such as development, staging, and production pulls the same base images repeatedly. All of these pulls hit the public registry directly.
Soon, you start experiencing:
- Rate Limiting Issues: Some public registries limit anonymous users to a specific number pulls per hour. With multiple teams and automated systems, you’ll hit these limits quickly, causing builds to fail with cryptic “too many requests” errors.
- Slow Build Times: Every pull traverses the internet, adding latency. A 500MB image that could be retrieved from your local network in seconds takes minutes from a public registry.
- Network Costs: Cloud providers charge for egress traffic. Repeatedly pulling multi-gigabyte images from external registries can result in significant monthly bills.
- Availability Risks: If the public registry experiences downtime or network issues, your entire development and deployment pipeline grinds to a halt.
This blog post explains how Harbor’s proxy cache feature solves these problems by acting as an intelligent intermediary between your infrastructure and public registries.
Why Use a Proxy Cache?
A proxy cache transforms how your organization consumes container images. Instead of every system reaching out to the public registry independently, Harbor acts as a smart middleman.
How it works:
When you configure Harbor as a proxy cache, it sits between your users/systems and external public registries. Here’s what happens:
First Request: A developer or CI/CD system requests an image through Harbor. Harbor pulls the image from the public registry, stores a complete copy locally, and serves it to the requester.
Subsequent Requests: Harbor serves the image directly from its local cache. The external registry isn’t contacted at all (unless checking for updates).
The Benefits:
- Faster Pulls: Images are retrieved from your local network at LAN speeds instead of crossing the internet. An image that took minutes now takes seconds.
- Reduced Costs: Dramatically lower egress costs since most pulls are served internally. One external pull serves hundreds of internal requests.
- Rate Limit Protection: Your entire organization appears as a single user to the external registry. Instead of 500 individual pulls hitting rate limits, Harbor makes one pull and serves it 500 times internally.
- Increased Reliability: Cached images remain accessible even during external registry outages. Your builds don’t fail because the external registry is down.
- Automatic Updates: Harbor intelligently checks for newer image versions while serving cached content, ensuring you get updates without sacrificing speed.
Setting Up Harbor as a Proxy Cache
Now that you understand the value, let’s walk through the setup process.
Step 1: Deploy and Access Harbor
Ensure you have a running instance of Harbor. If you need help with deployment, refer to the official documentation, or check out our previous blogs on Harbor listed at the end of this blog.
Log into the Harbor UI as an administrator or a user with project creation privileges.
Step 2: Configure the Proxy Target (External Registry)
This step defines the connection details for the external registry (e.g., Docker Hub, Quay.io). This configuration is known as a ‘Registry Endpoint’ in Harbor.
- Navigate to Administration > Registries.
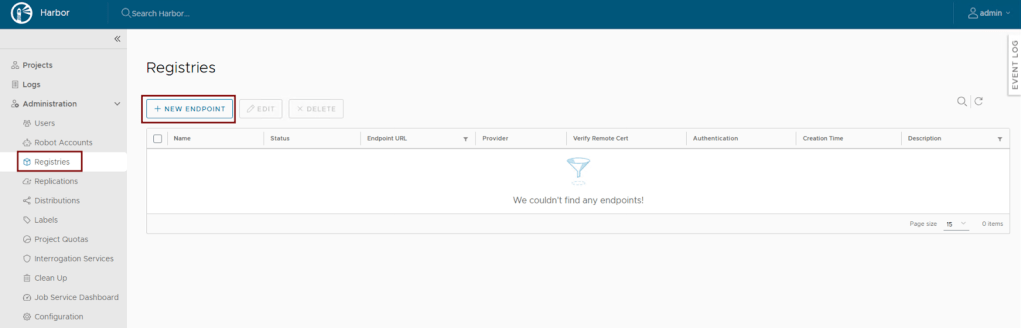
- Click + New Endpoint.
- Fill in the following details, using Docker Hub as an example:
| Field | Value (Example: Docker Hub) |
|---|---|
| Name | DockerHub-Official |
| Provider | Docker Hub |
| Endpoint URL | https://hub.docker.com (Default) |
| Access ID | (Optional, but recommended to avoid anonymous pulls) |
| Access Secret | (Optional, but recommended) |
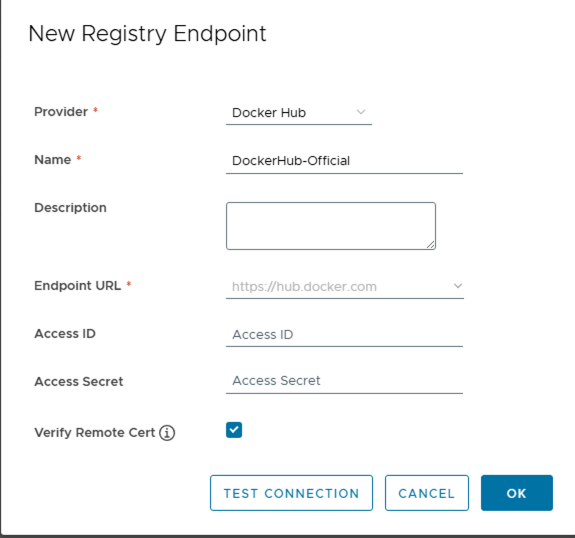
- Click Test Connection to ensure Harbor can reach the external registry.

- Click OK to save the endpoint.
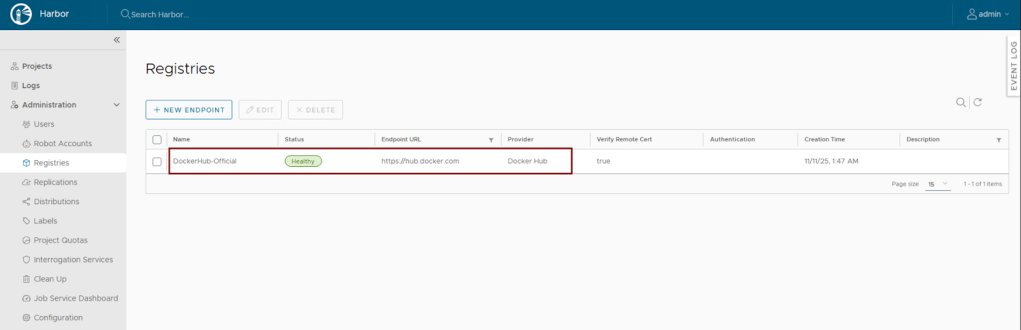
The registry endpoint is now created successfully and ready for use in the proxy-cache project.
Step 3: Create a New Project for the Proxy
Best practice is to dedicate a dedicated project in Harbor for each proxy-cached registry.
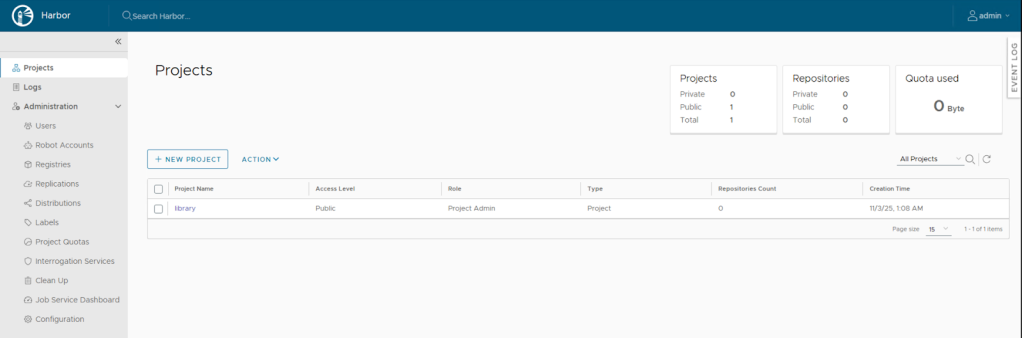
- Navigate to Projects and click + New Project.
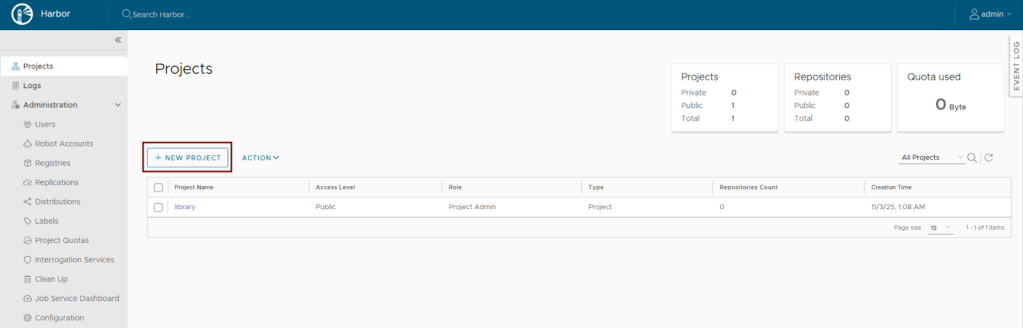
- Give the project a meaningful name, for example, dockerhub-proxy.
- Set the Access Level to Public if you want all users to pull from it easily, or Private if you require authentication.
- Enable the Proxy Cache option and select the DockerHub registry endpoint created in the second step.
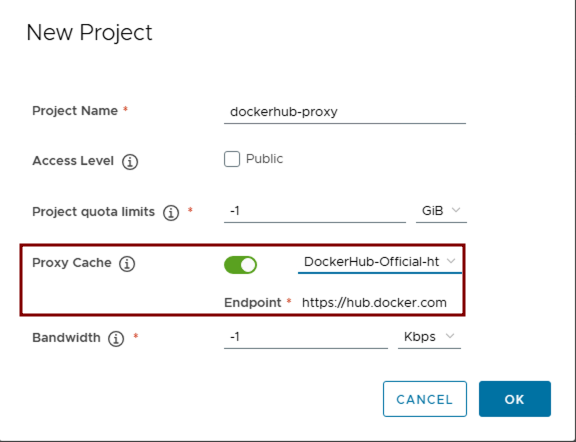
- Click OK.
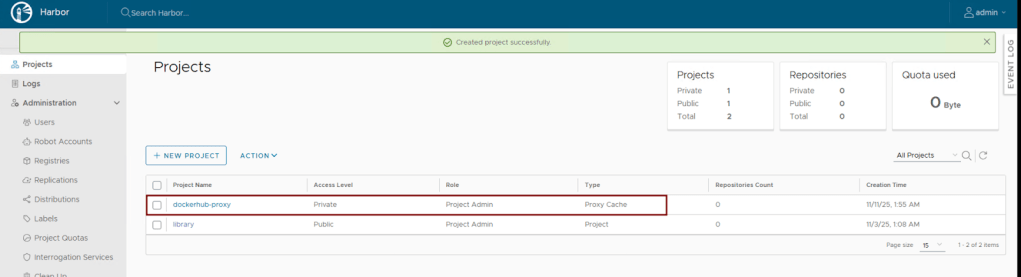
The proxy-cache project is now ready for use by end users.
Using the Proxy Cache
Now that the proxy cache is set up, let’s see how end users interact with it.
How it Works in Practice
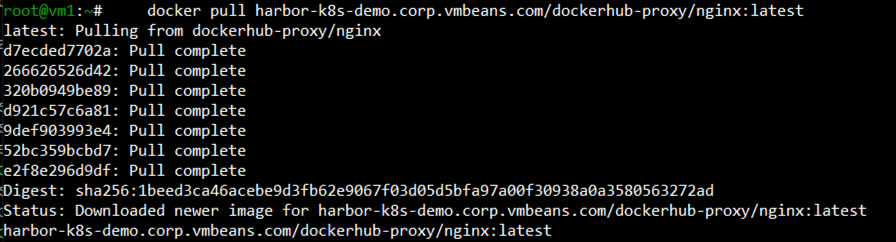
When a user or a CI/CD pipeline requests an image like nginx:latest, instead of pulling directly from Docker Hub, they pull through your Harbor instance.
Traditional Command:
|
1 |
docker pull nginx:latest |
Updated Command (via Harbor Proxy):
|
1 |
docker pull Harbor-URL/dockerhub-proxy/nginx:latest |
Note: If this is the first time a user is accessing Harbor, they need to login to Harbor using:
|
1 |
docker login Harbor-URL --username <username> |
What happens behind the scenes:
| Scenario | Harbor Action | Result for User |
|---|---|---|
| Initial Pull | Harbor pulls the image from Docker Hub, stores it in the dockerhub-proxy project, and then serves it to the user. | Pull is successful; image is now cached locally. |
| Subsequent Pull | Harbor serves the image directly from the local cache in the dockerhub-proxy project. | Pull is significantly faster. |
Visual Walkthrough
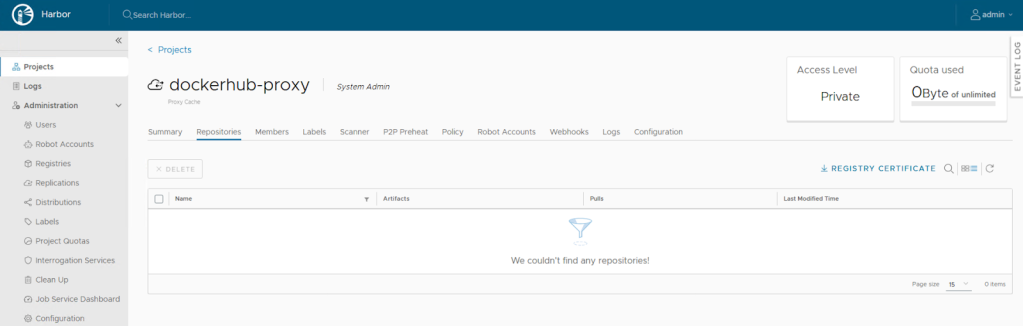
- Project Initial state: As you can see, the project is currently empty with no cached images.
- During Initial pull: When the first user runs the
docker pullcommand, Harbor:- Detects the image isn’t cached
- Pulls the nginx image from Docker Hub
- Stores it in the project
- Serves it to the suser
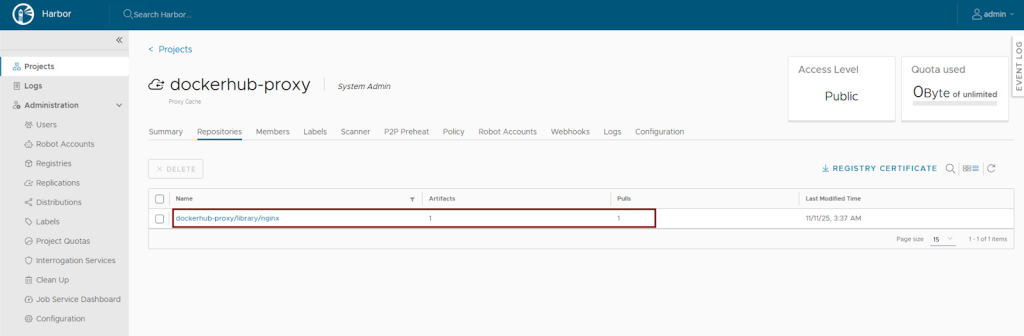
The proxy cache project now caches the nginx image for a future request.
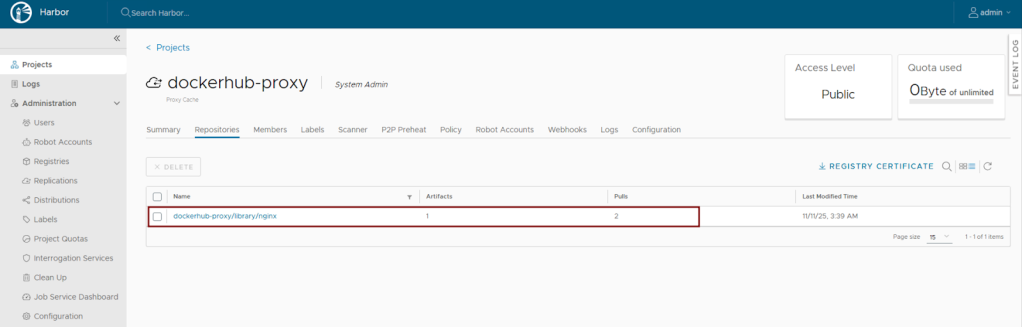
- Subsequent pulls: When additional users pull the same image, Harbor:
- Checks the image manifest with Docker Hub to see if a newer version exists
- If no update is available, serves the cached version instantly
- If an update is available, pulls the new version and updates the cache
- Edge cases:
- In case a newer version of the image becomes available in DockerHub, the new image is updated on Harbor and served from the proxy-cache project.
- If DockerHub is not reachable, the proxy cache project serves the cached image.
- If the image is no longer in DockerHub, no image is served.
Cache Invalidation and Retention
Harbor’s proxy cache automatically checks for newer versions of images on subsequent pulls. If a newer image is detected in the upstream registry, Harbor updates its cache. For manual cache refreshing or to configure retention policies, administrators can refer to Harbor’s official documentation for advanced settings, which include options for scheduled garbage collection and defining retention rules based on tags or age.
Other Supported Registries
The process is identical for other supported registries:
- Harbor
- Docker Hub
- Docker registry
- AWS Elastic Container Registry
- Azure Container Registry
- Google Container Registry
- Quay
- Github Container Registry
- JFrog Artifactory Registry
Simply select the appropriate provider when creating your registry endpoint in step 2 and follow the same workflow.
Conclusion
By adopting Harbor as a proxy cache, you are solving real operational pain points: eliminating rate limit errors, dramatically speeding up builds, reducing cloud egress costs, and protecting against external registry outages.
To learn more about advanced features, refer to the official Harbor documentation.
Follow our Harbor blog series:
- Blog 1 – Harbor: Your Enterprise-Ready Container Registry for a Modern Private Cloud
- Blog 2 – Reducing Harbor Deployment Complexity on Kubernetes
- Blog 3 – Making Harbor Production-Ready: Essential Considerations for Deployment
- Blog 4 – Integrating VMware Data Services Manager with Harbor for a Production-Ready Registry
Discover more from VMware Cloud Foundation (VCF) Blog
Subscribe to get the latest posts sent to your email.


