
This is part three of six in a multi-blog series providing a practitioner’s guide to VMware Private AI Foundation with NVIDIA.
Overview
Most customers will want to customize the provided blueprints to meet their specific business requirements. This could be as simple as swapping out a specific NIM for a newer one, or maybe updating the LLM being deployed. It could also mean creating something significantly different. The possibilities are endless, but to get you started, here are some basics to consider.
Editing a Blueprint in VCF Automation
You will edit a blueprint under the Build & Deploy | Content Hub | Blueprint Design area in VCF Automation. This will display a basic UI of the blueprint’s major components. Clicking one takes you to that section and is helpful for navigation, especially when working with more complex templates. The right side shows the code for the template. This will be a combination of settings, variables, and code that will be executed in the Deep Learning VM (DLVM) once it is deployed. There are numerous developments in this area, so let us break down a few key areas and concepts for you.
Blueprint Layout
The blueprint canvas visualizes your resources and connections. You can also use the canvas to navigate to sections of the code on the right side. You can drag to resize, or click the icon to maximize the window.
cloudInit and the dl_app.sh script
One key area to add your capabilities is in the cloudInit section. This is the area that will run once when the VM is first powered on. In the default blueprints, a script called dl_app.sh is created and executes several default processes. For instance, this script checks if you want to install the Jupyter Notebook option and, if so, installs it for you.
Our recommendation for the quickest way to start editing a template is to work within the existing dl_app.sh file. In the code section, the default software option to install is PyTorch. To edit the cloud init for that, the section will start like this:
It is recommended to remove %{raw} from the beginning and %{endraw} at the end to make it easier to work with. This will enable you to pass variables into the Python script seamlessly.
Working with variables
In the code editor, you can pull variables from the input form to use in the script. To do this, enter the variable as ${input.<variable>}. For instance, the variable for the Namespace Name is namespaceName, so you would enter it as ${input.namespaceName} where you want to use it. The variable will appear as such in the assembler, but when you view the script in the deployment, the variables will be replaced with their values at runtime. To check the available variables, you can look at the Inputs tab while in a template in assembler.
Testing a template
When you are ready to test your template, click Deploy in the bottom left. This will deploy the template as it currently exists in the draft form, without requiring a publish to the catalog. This helps prevent other users from accidentally deploying until you are happy with the updates.
Working in the deployed DLVM
When starting to edit blueprints, it is common for the deployment to fail. Don’t get discouraged! Here are a few key tips to help work through it.
To troubleshoot further, you will want to SSH into the Deep Learning VM that was deployed. To do this, we will need to get the IP of the Load Balancer (LB) used in this deployment. Switch to (or duplicate) your tab so you can easily return to the editor, then navigate to Service Broker. Click on Supervisor Namespaces in the bottom left and then click on the deployment name you just deployed. Click on the Network tab, and you will be prompted to SSH to the external IP address displayed.
The username for the Deep Learning VM is vmware.
Once connected, there are two key files you want to review.
\var\log\dl.log shows the output from the dl_app.sh script from the first time it was run. This will help you understand why it didn’t complete successfully.
\opt\dlvm\dl_app.sh is the script generated from the template. Nano and vi are installed as options to edit the script. To reduce the time spent waiting for a new deployment, we recommend editing the dl_app.sh file in the VM and run it locally to expedite the process. When you run the script locally, it displays the output live in the SSH session. REMEMBER to keep track of any changes and replicate them in the Assembler editor. Edits made directly to the DLVM will be lost when the deployment is removed.
Editing a Form
Depending on the level of changes you have made to the template, you may want to consider editing the form. Some form fields will require updating to get the most up-to-date options. You may want to change the layout and flow to suit your specific use case. You can edit the form within the blueprint design page by clicking on the Edit Custom Form. Select the Customize form and make the desired changes. Click Save when done. If you’d like, you can click on the version to save it as a new version, allowing you to roll back if necessary.
Publishing to the Catalog
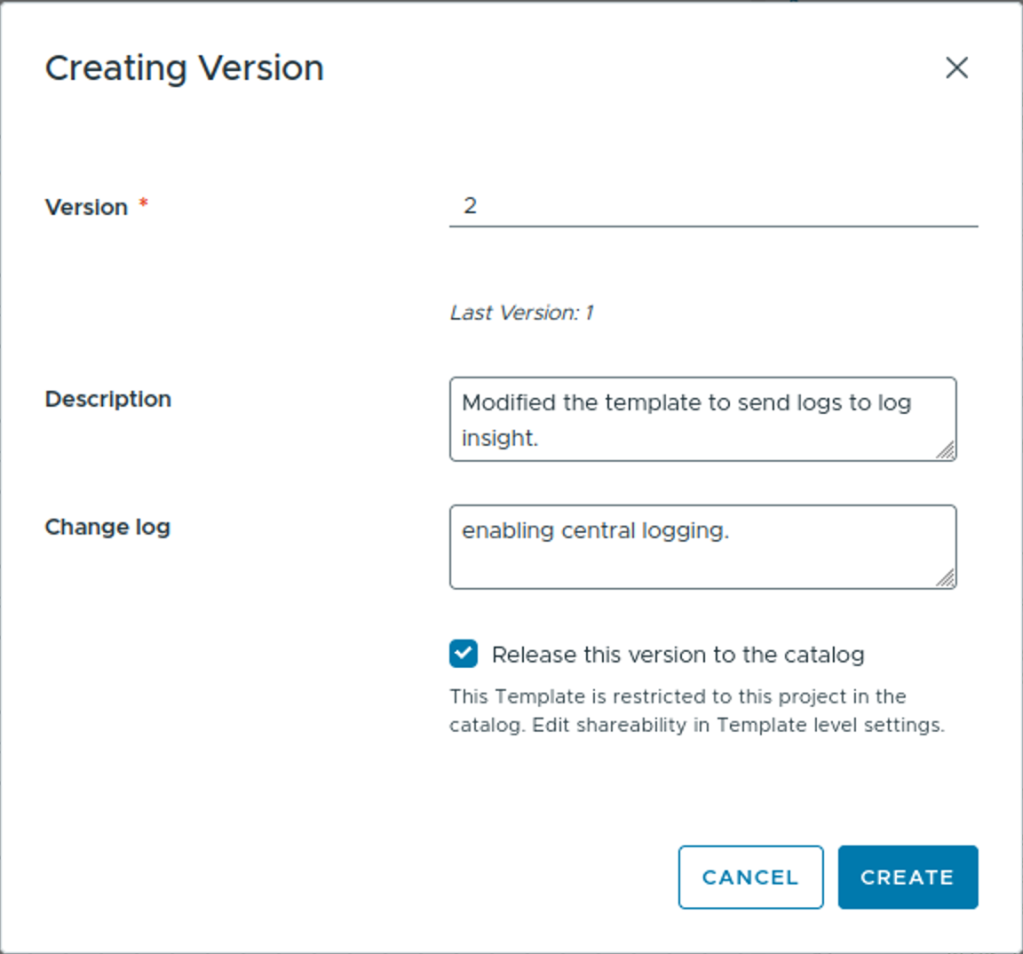
Once you are happy with the blueprint and have tested it, you can publish it to the catalog. When working in the blueprint editor, click the version icon in the bottom left. This will open a dialog that automatically increments the version number, provides a space to enter a description and a change log, and lets you check a box to release to the catalog.
Overall Recommendations
While working with the code in the template, consider the following recommendations.
Limit the number of changes you make at one time. If you make too many changes at once and encounter an issue, it will increase the time required to troubleshoot. If you make one change and test, you know exactly where the issue is!
Resources
Want to learn more about VMware Private AI Foundation with NVIDIA?
Discover more from VMware Cloud Foundation (VCF) Blog
Subscribe to get the latest posts sent to your email.


