

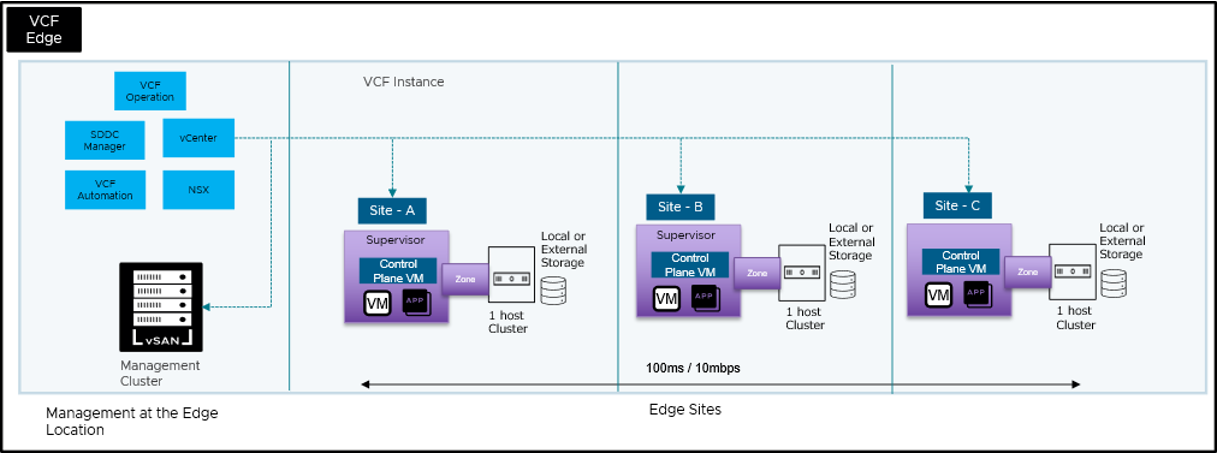
The landscape of edge computing is rapidly evolving and so is VMware by Broadcom. Customers are demanding flexible and cost-effective deployment options for their edge workloads. VMware Cloud Foundation Edge 9.0 marks a significant leap forward in this domain, introducing the capability to deploy a single-host edge site that supports both Virtual Machine (VM) and container workloads out of the box. This allows customers ranging from industries such as retail branches, smart factories in manufacturing and remote healthcare facilities to drastically reduce their edge footprint and optimize their capital expenditure (CAPEX).
Traditionally, deploying edge infrastructure often required multiple hosts to accommodate diverse workload types. This led to increased CAPEX, management overhead, and a larger physical footprint – challenges that are amplified in resource-constrained edge environments. VCF Edge 9.0 addresses these issues head-on by enabling a robust single-host deployment.
Let’s take a look at how customers can deploy single host edge sites.
As a prerequisite, administrators can either deploy VCF Edge 9.0 Management and Workload Domain in the primary data center or deploy a VCF Operations and vCenter manually.
Cluster creation on vCenter
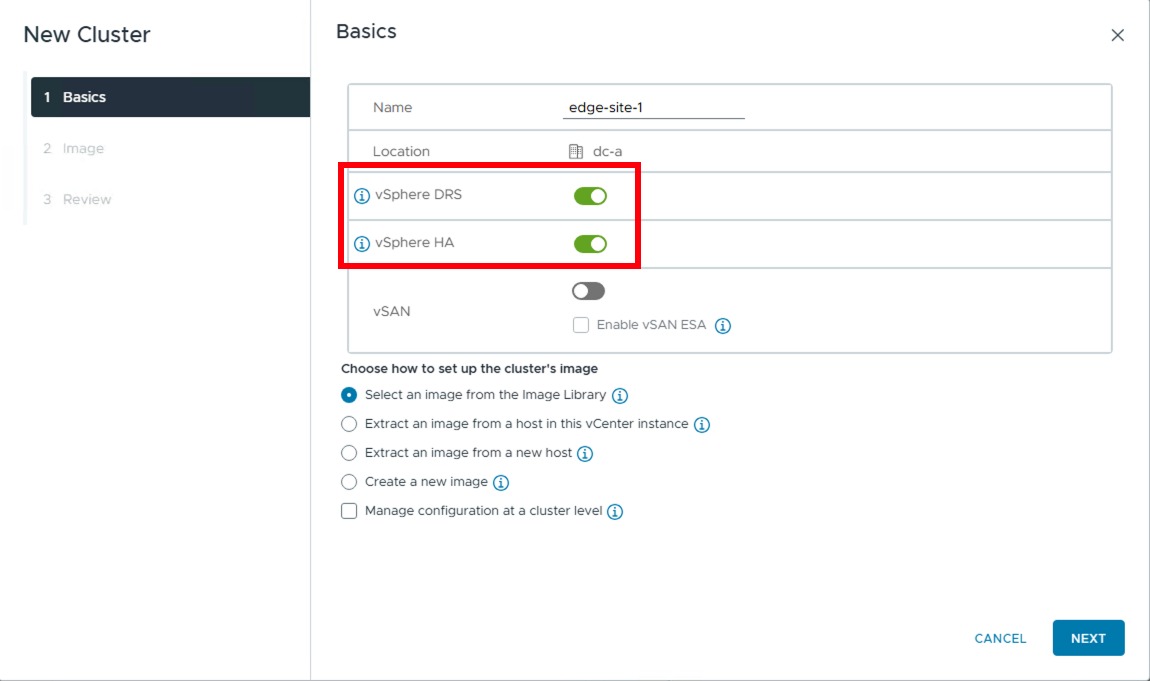
1. Login to the workload domain vCenter and create a new cluster for the edge site.

2. Enable DRS and HA, select the ESX image and complete the cluster creation.
3. Edge cluster gets created successfully.
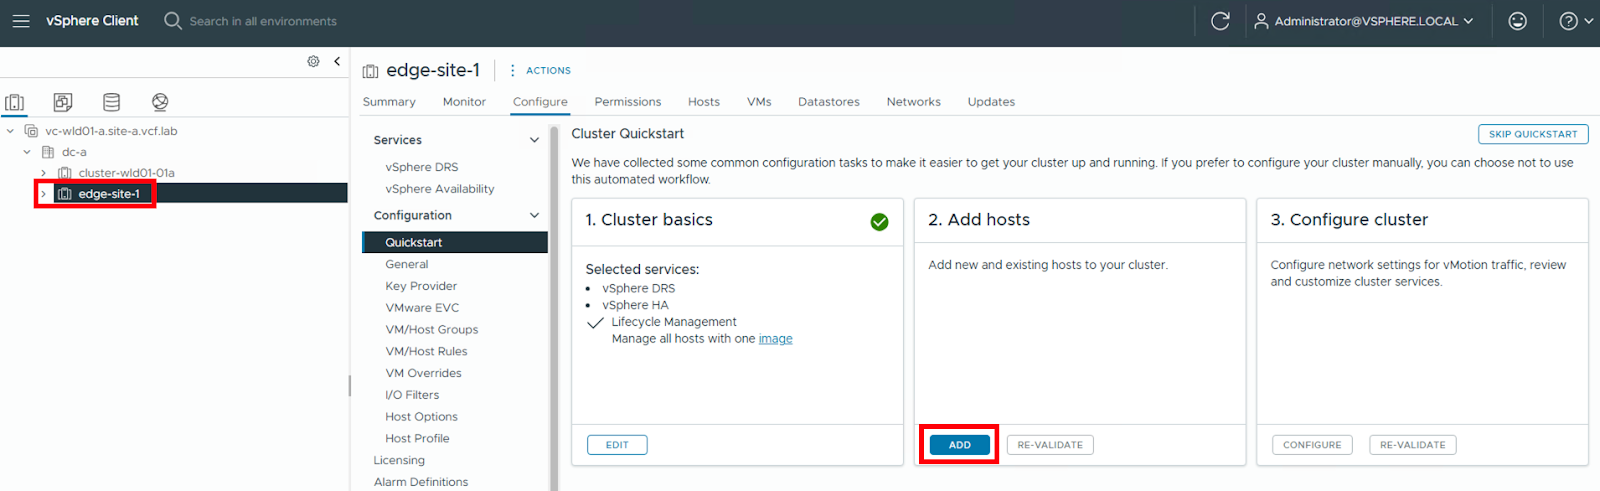
4. Add a new host to the edge cluster.
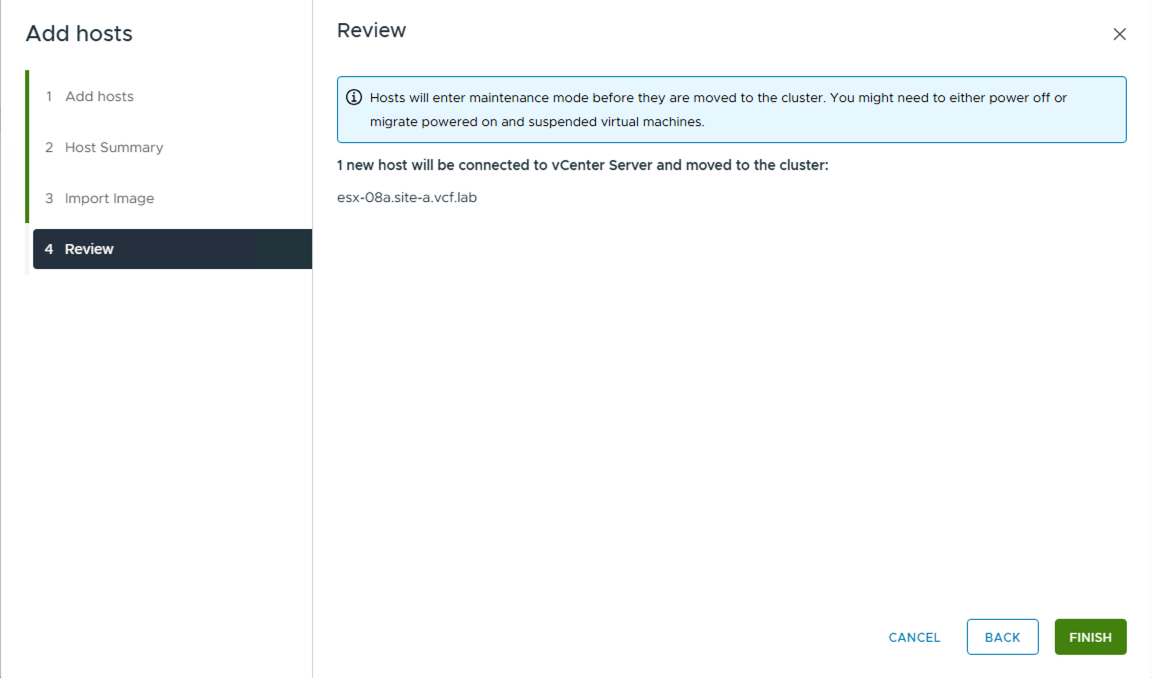
5. Host added to the cluster successfully. Now configure the cluster.

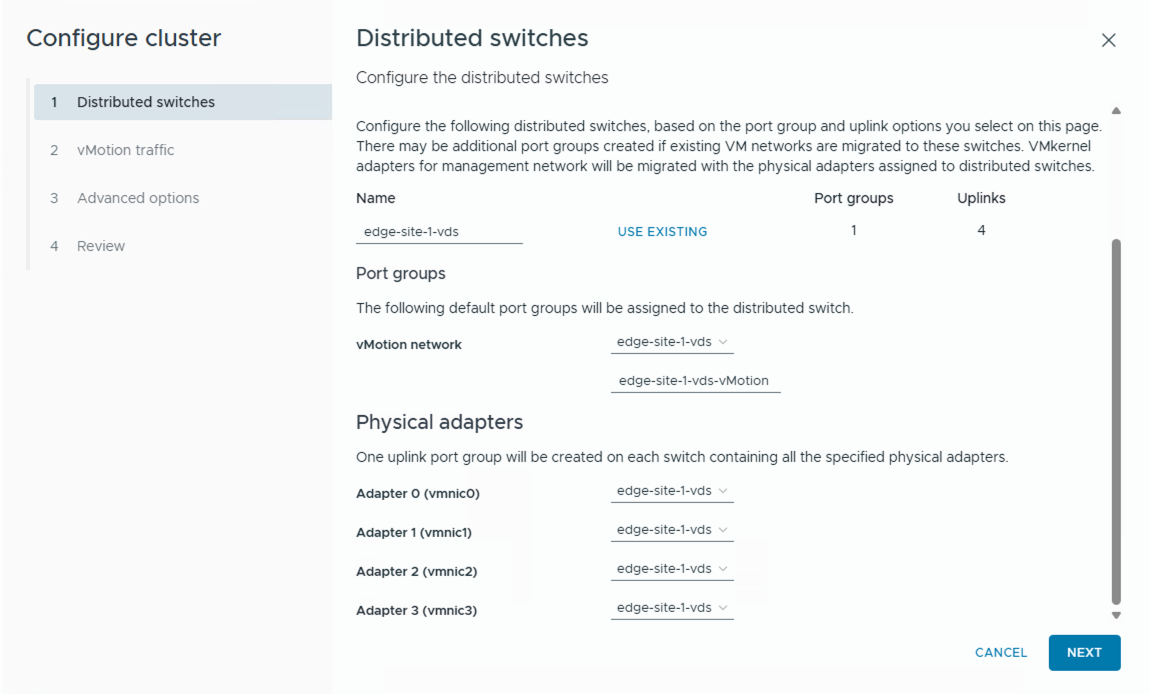
6. Provide the name for vDS and configure the adapter.
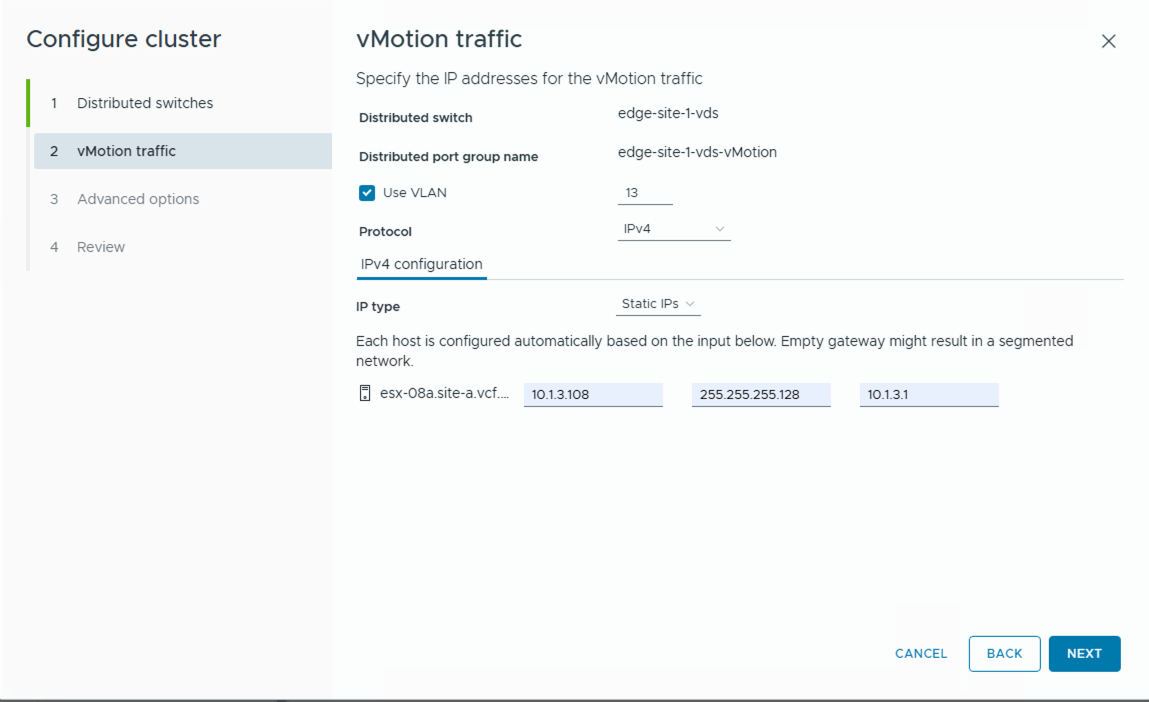
7. Specify vMotion IP details.
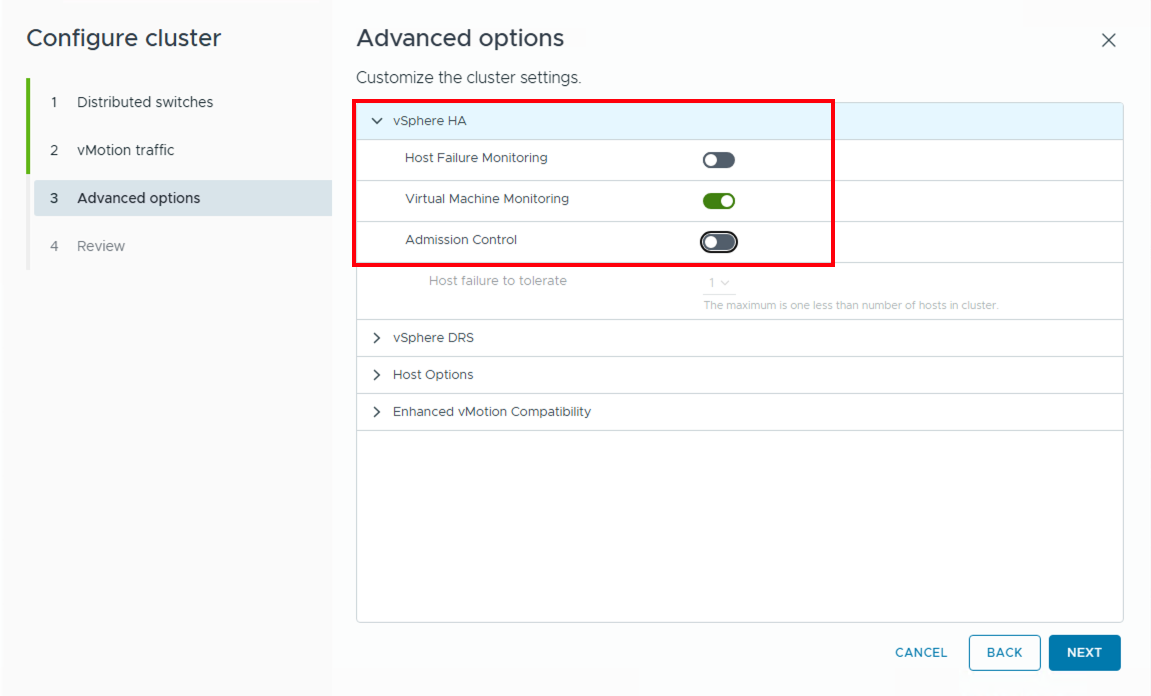
8. Under Advanced Options, disable HA Admission Control.
HA Admission Control ensures sufficient resources are available to restart VMs in case of a host failure. Since we are using a single host cluster, HA Admission Control does not apply and hence you must disable it. This setting is designed for multi-host clusters to ensure redundancy, which isn’t applicable in a single-host setup.
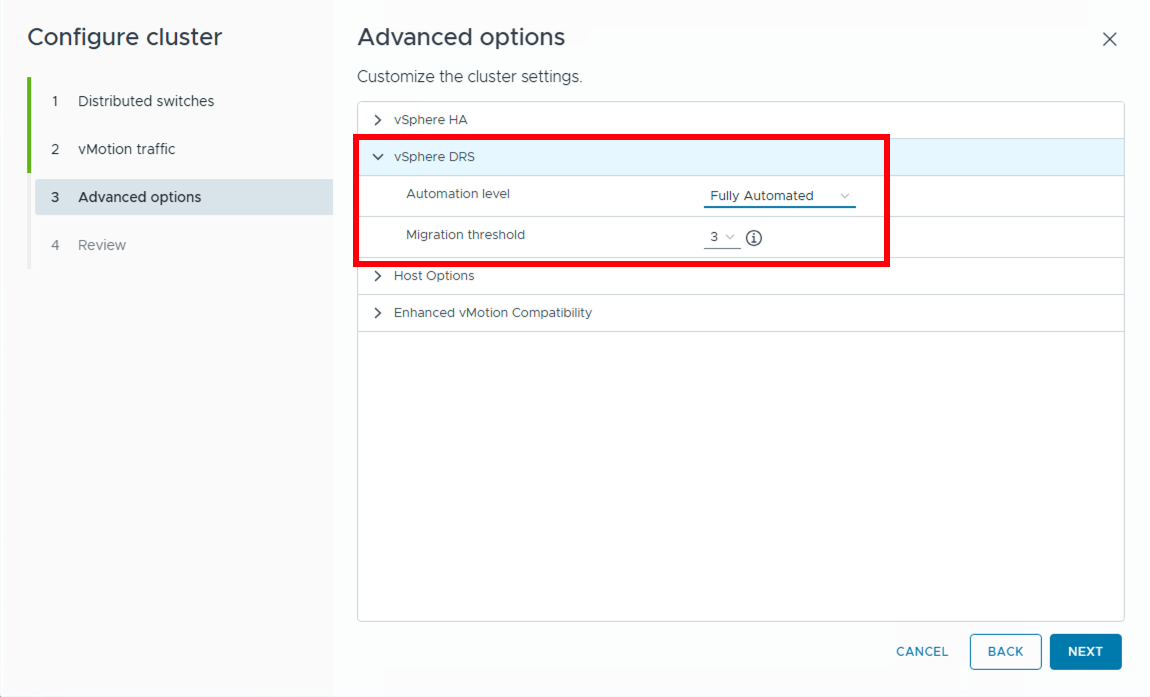
9. Enable DRS and set it to Fully Automated.
Cluster deployment is completed. But there are some errors and warnings because we do not have a datastore.

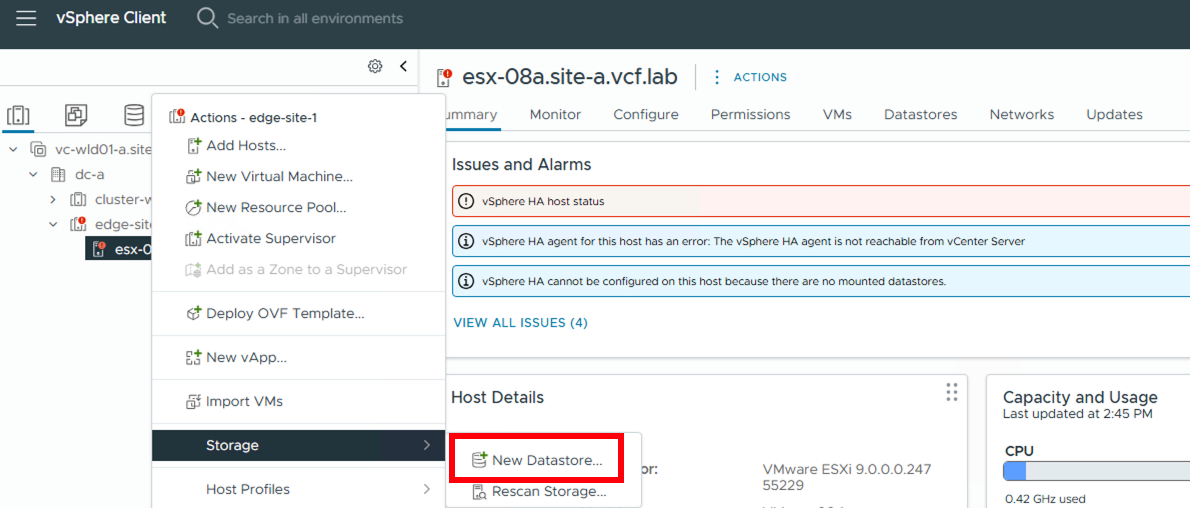
Datastore creation on edge site cluster
1. We configure a VMFS datastore using the local disk available on the ESX host in the edge site cluster.
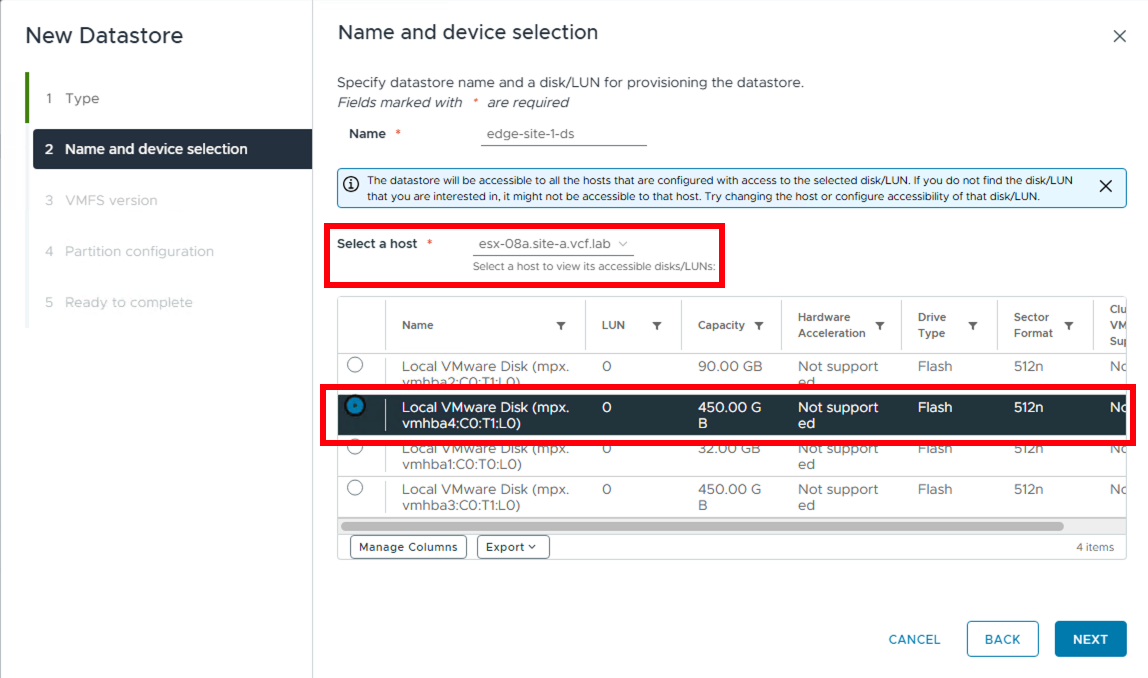
2. After choosing VMFS as datastore type, select the ESX host and a local disk on it to create the datastore.
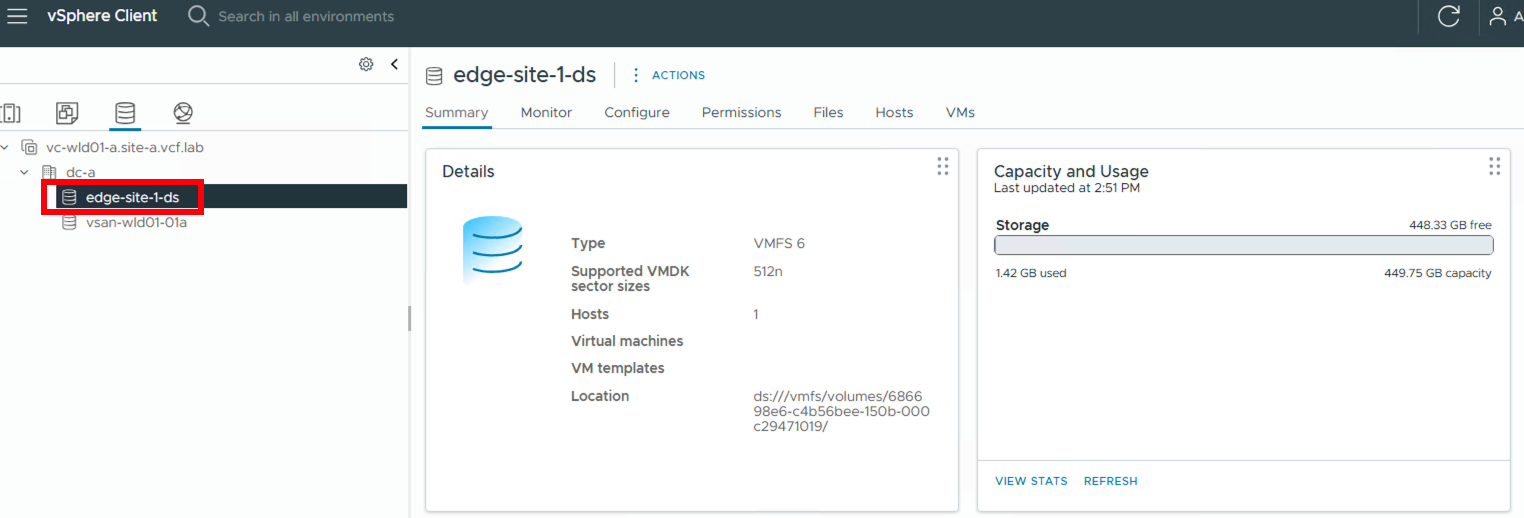
3. Datastore created successfully.
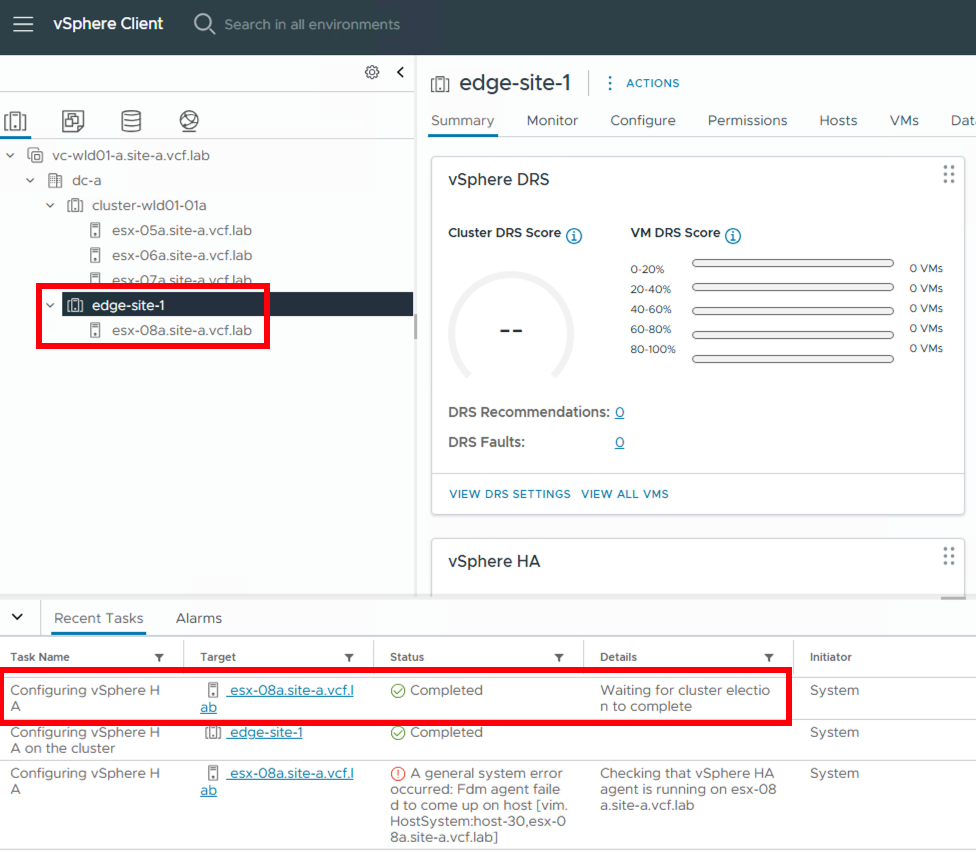
After a few minutes, HA gets configured and the alerts go away.
Now the single host cluster is ready to deploy VM workloads. To support deploying Kubernetes or container workloads on this single host cluster along with VMs, we will now enable supervisor on this edge site cluster.
Pre-requisite setup for supervisor
Create Storage Policy
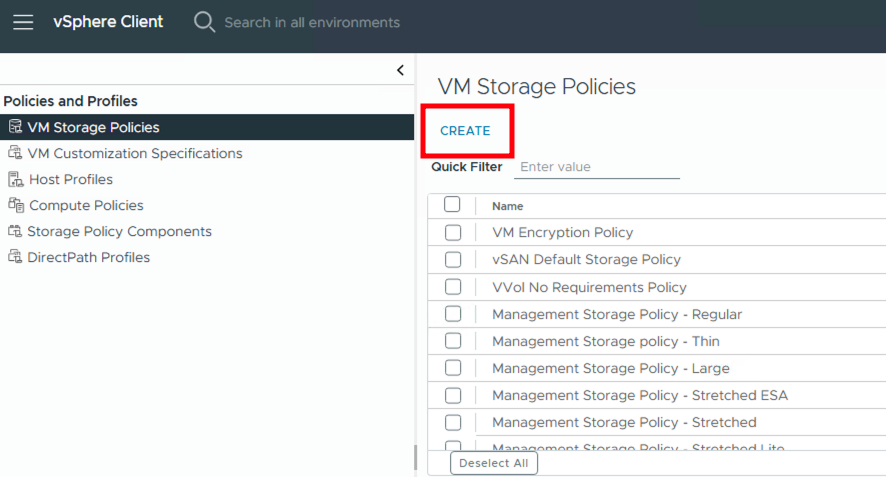
1. For that, we first create a storage policy for the supervisor to use. Navigate to Policies and Profiles in the workload domain vCenter and click on Create.
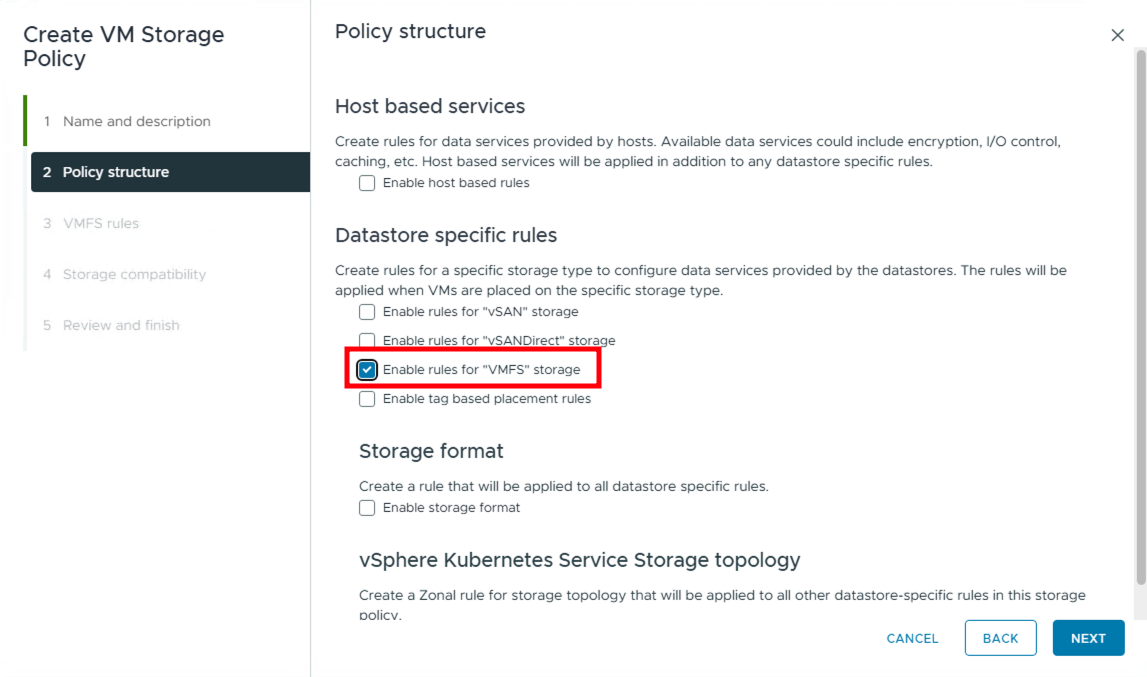
2. Provide a name and description for the policy. In this case, we are selecting the Enable rule for “VMFS” storage option. However, you can create a policy that suits your requirements.
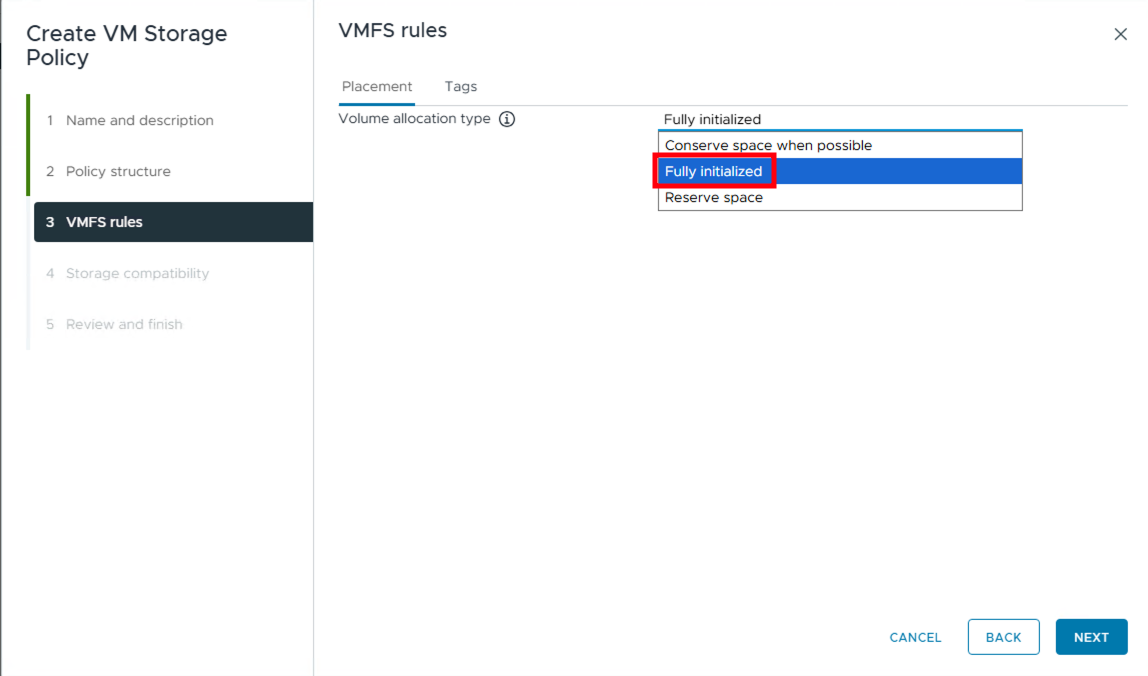
3. Select the Fully Initialized option. “Conserve space when possible” does not allow creating volumes on the supervisor.
Selecting “Fully initialized” will guarantee that the system reserves the desired space on the datastore and zeroes all the disk blocks. This option gives the best runtime IO performance but the provisioning time is proportional to the size of the disk. Selecting “Reserve space” will only guarantee that the system reserves the desired space on the datastore. The blocks of the disk are not zeroed, so there are no guarantees on the runtime IO performance. Selecting “Conserve space when possible” will neither guarantee space reservation nor runtime IO performance. This option gives fast provisioning time but the space is allocated on demand and the blocks are also initialized on demand.
We see our edge site cluster datastore is compatible with this policy. We complete the policy creation.
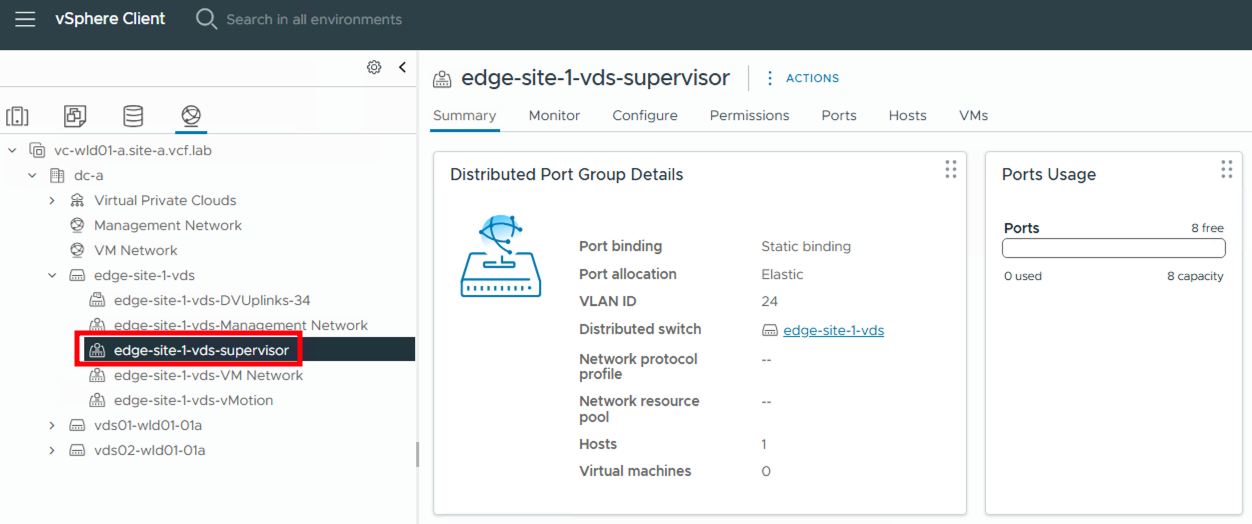
Create new Port Group for Supervisor
Create a new port group on the edge site cluster vDS to be used for the supervisor workload network.
Supervisor setup
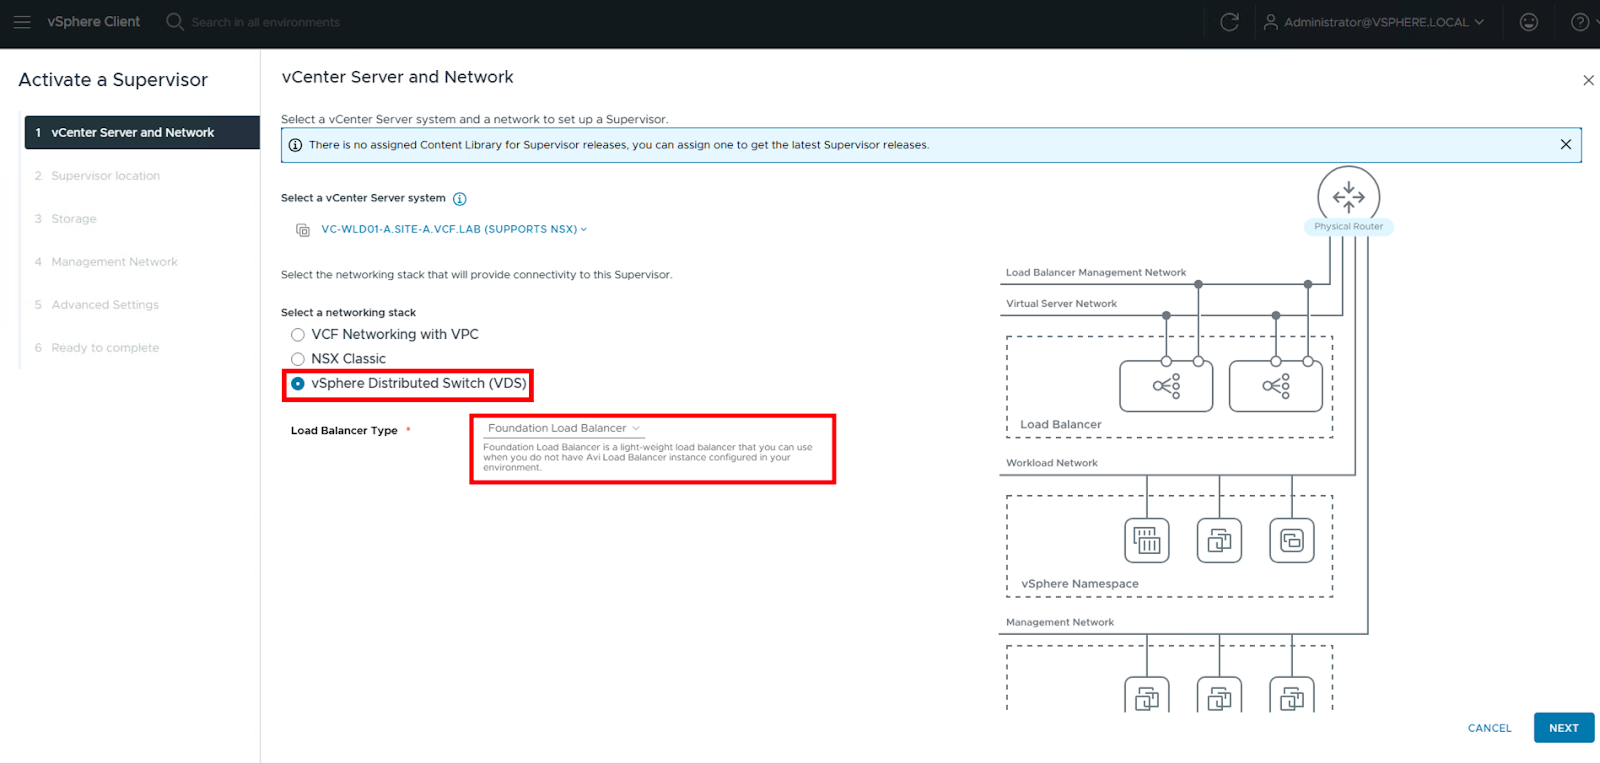
1. Navigate to Supervisor Management and click on Get Started. Select vSphere Distributed Switch (vDS) as the networking stack and Foundation Load Balancer as the Load Balancer Type. You can even choose other networking and load balancer types if you have NSX/AVI deployed for more advanced networking features, larger scale deployments or integrating with existing NSX and AVI environments.
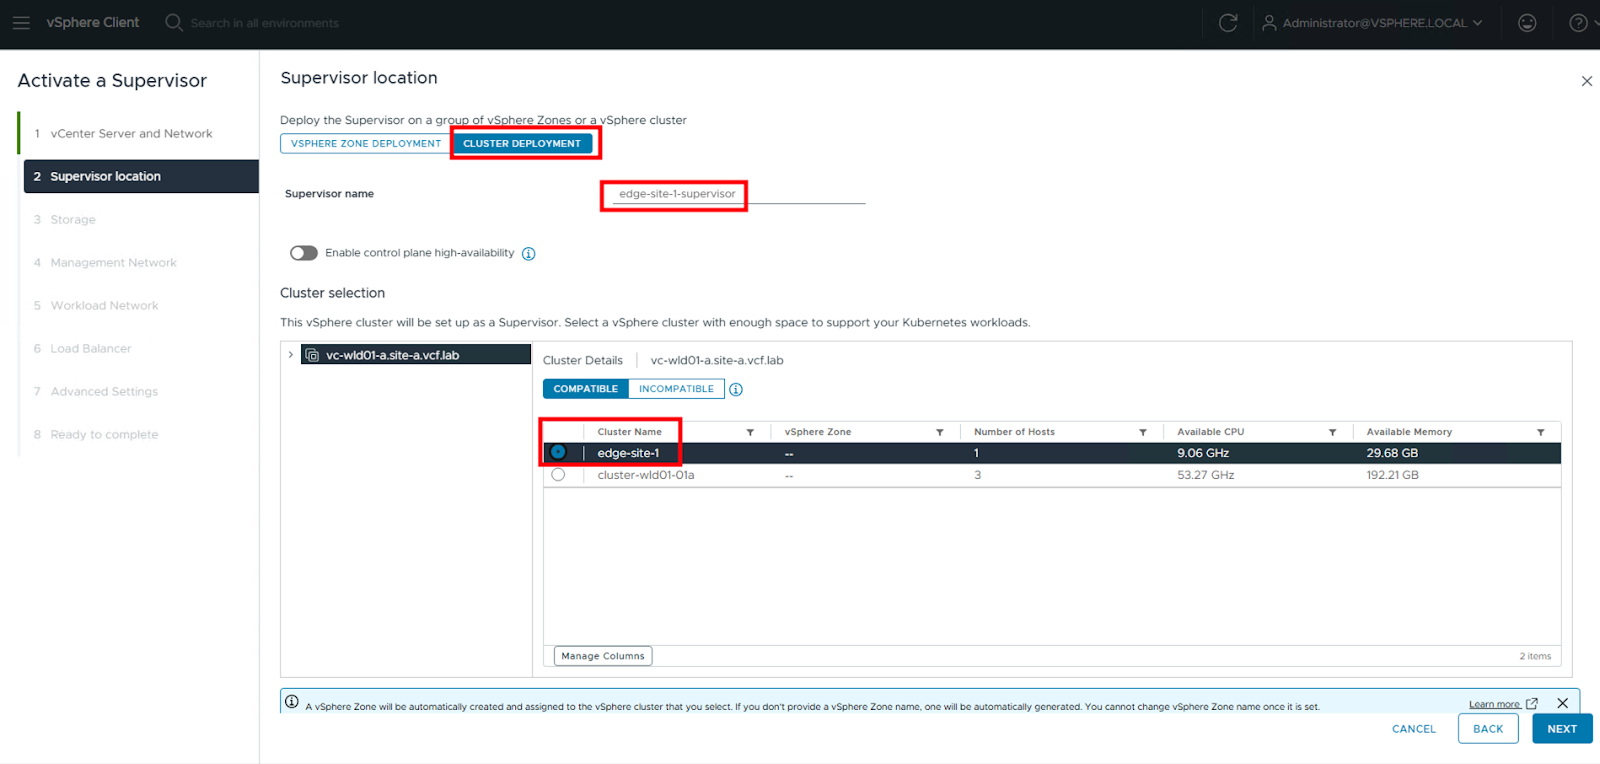
2. Choose Cluster Deployment, provide a name for the supervisor and select the newly created edge site cluster. While you can pre-create a vSphere zone, selecting ‘Cluster Deployment’ here will automatically create a vSphere zone for your edge site cluster.
3. Choose the newly created storage policy.

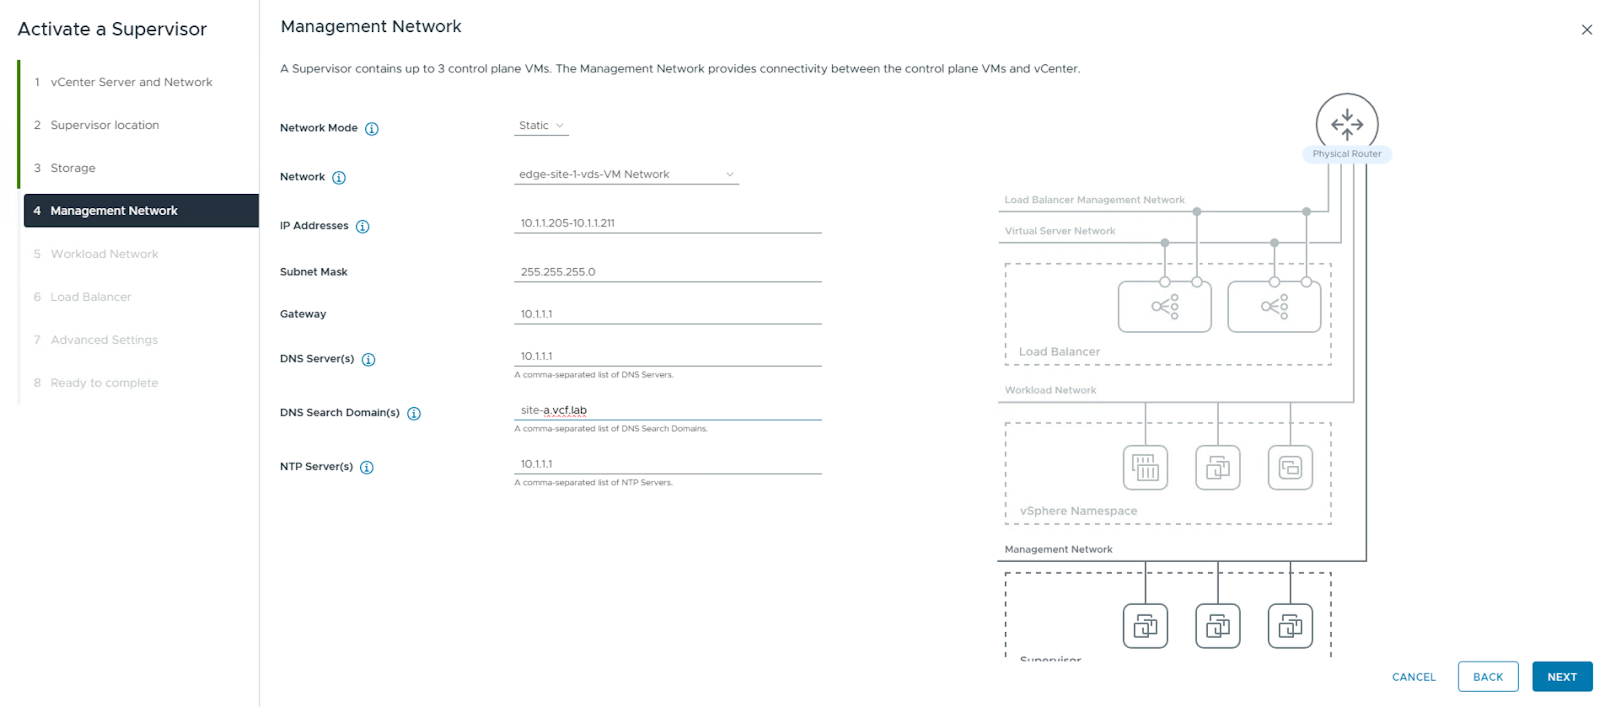
4. Provide the management network details.
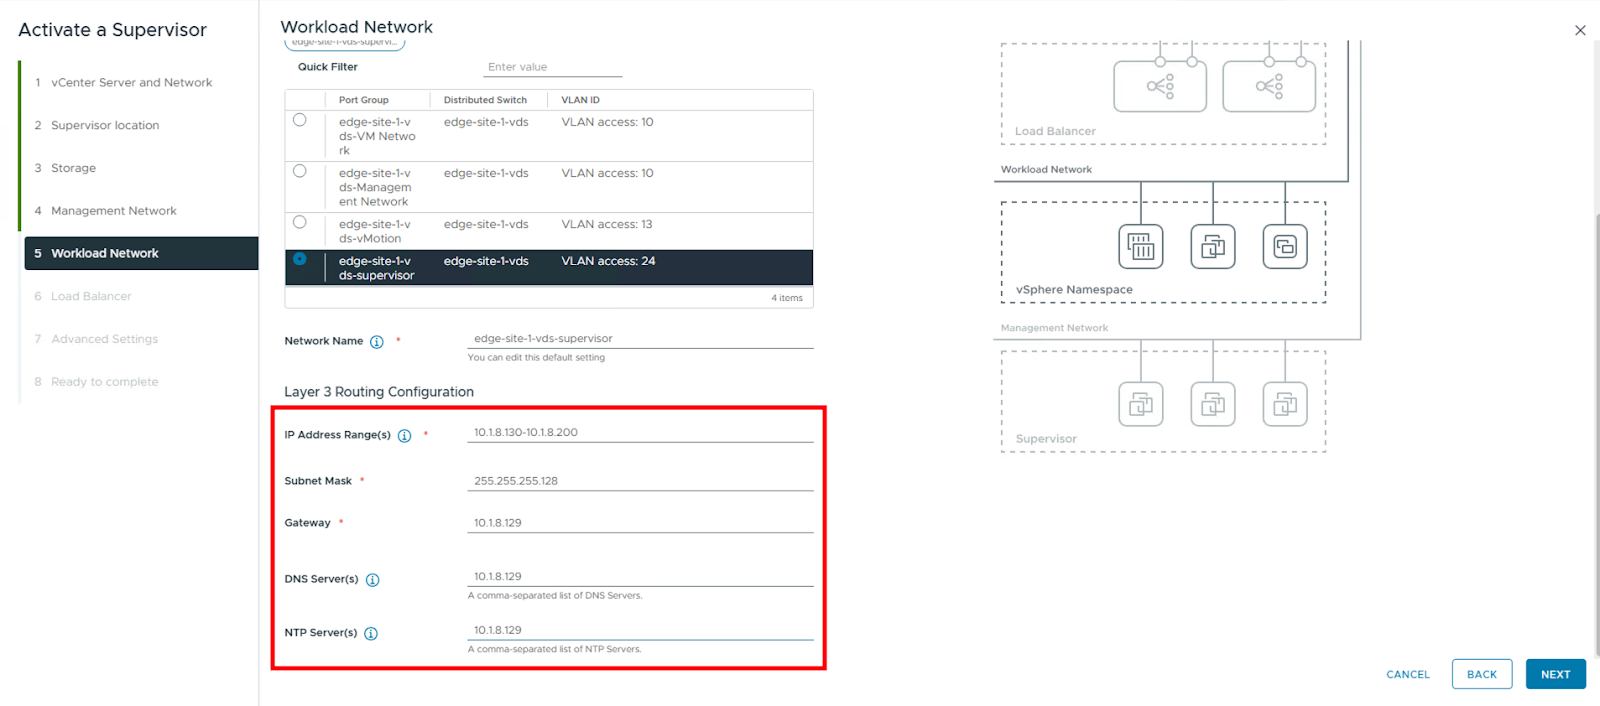
5. Select the newly created port group for the workload network.
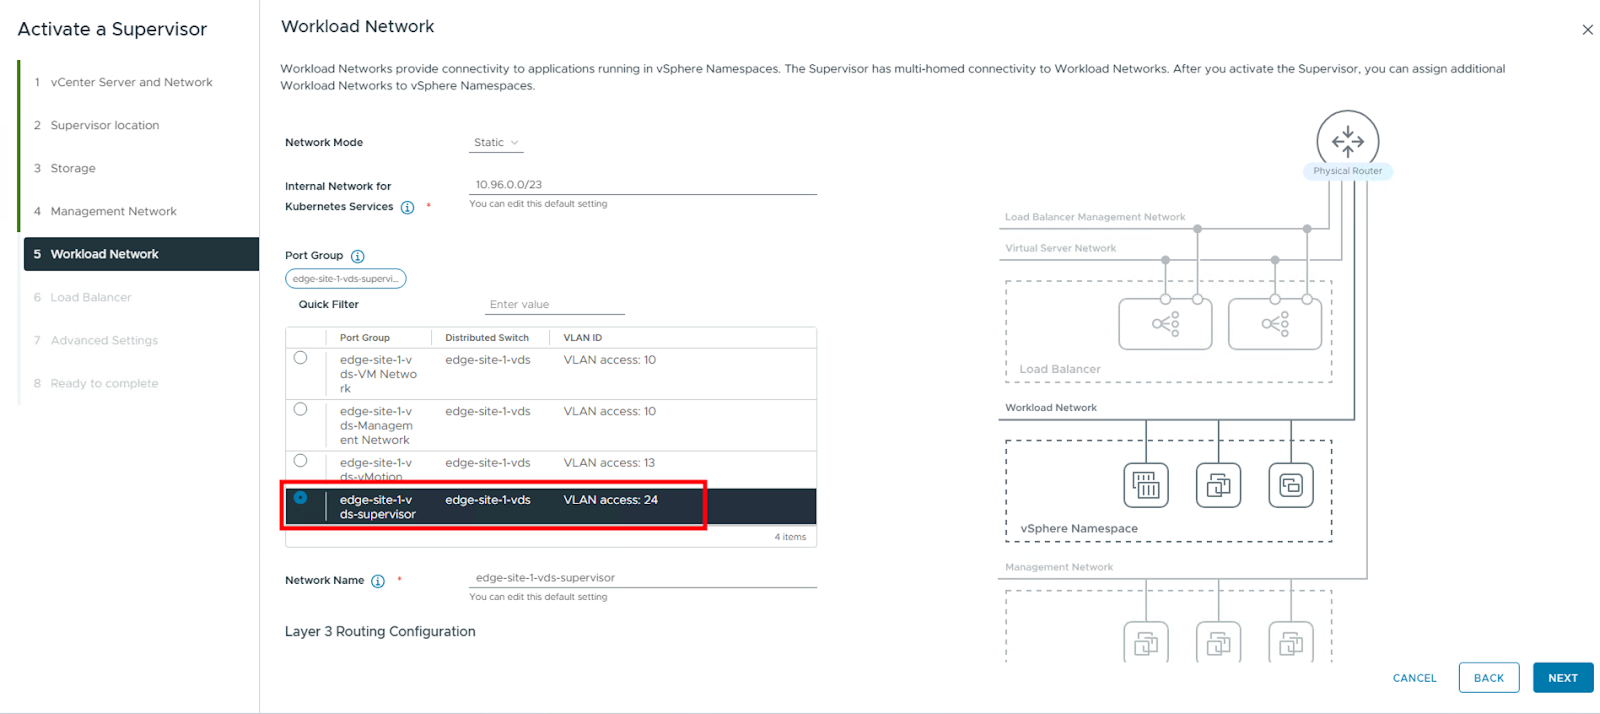
6. Fill in the rest of the networking details.
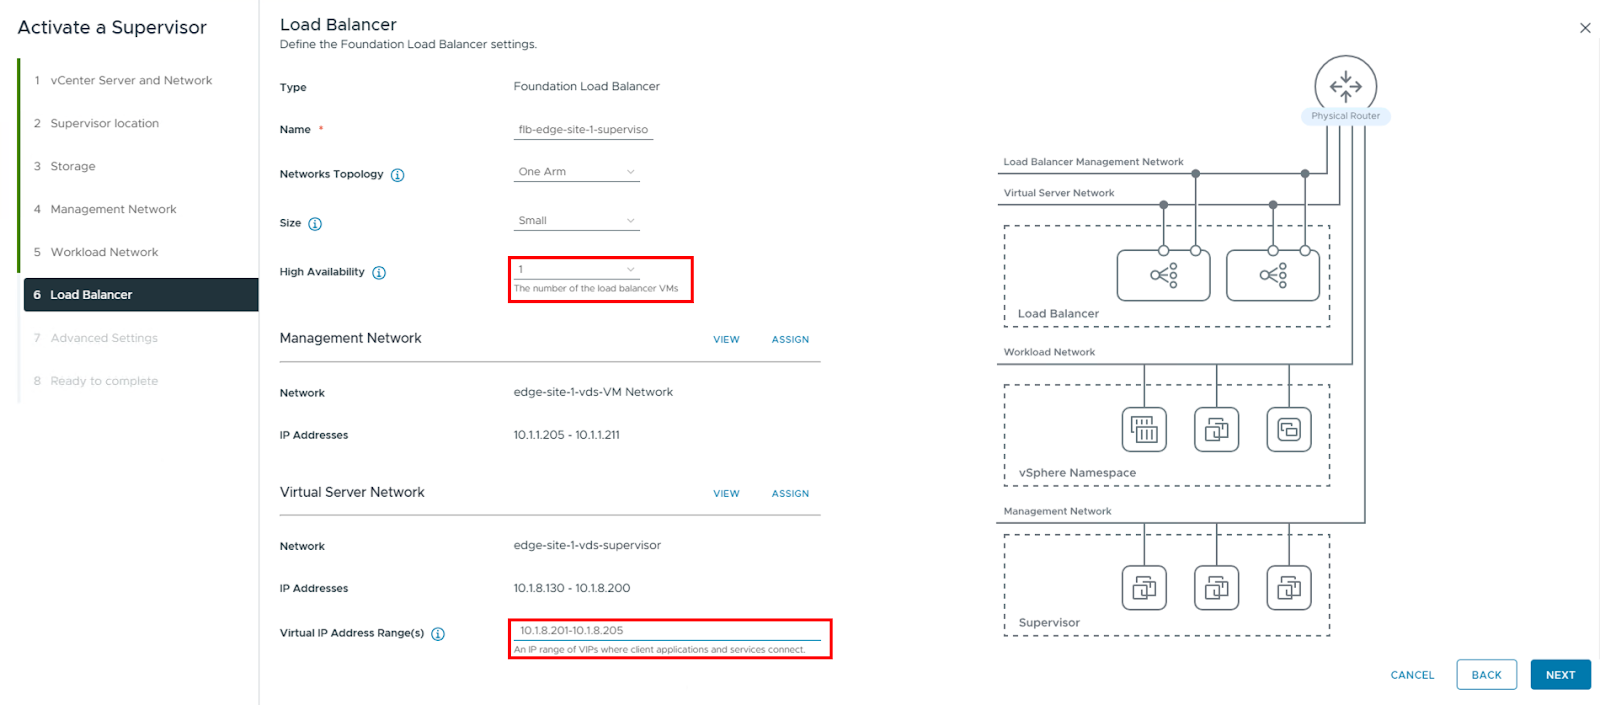
7. Change Load Balancer High Availability from “2” to “1” to create a single VM and provide the Virtual IP (VIP) range. As this is a single-host deployment, a single Load Balancer VM is sufficient and avoids unnecessary resource consumption.
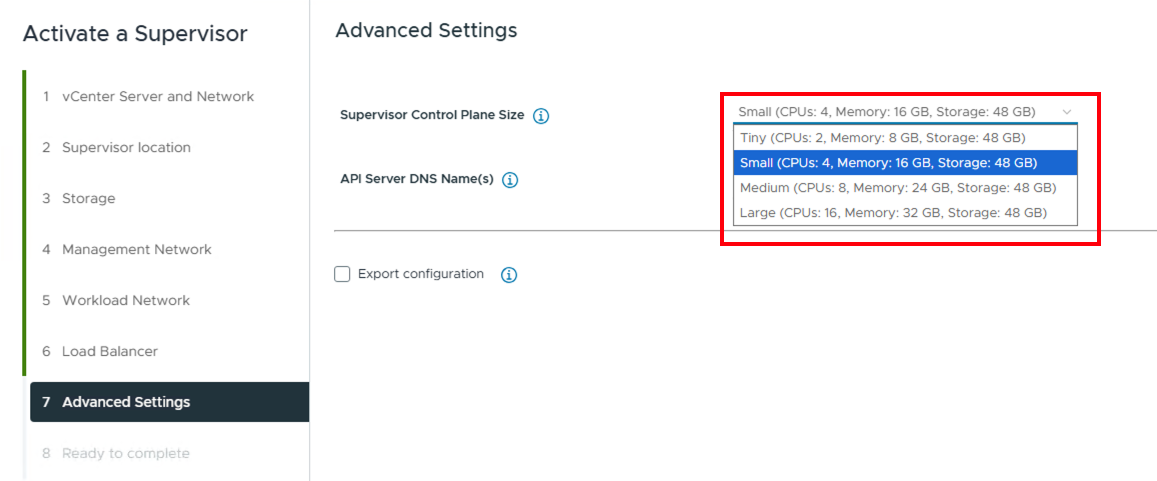
8. Based on your physical host capacity, choose the supervisor control plane VM size. We will choose Tiny. Choosing ‘Tiny’ is suitable for basic container workloads on a single host. Consider larger sizes for more demanding workloads or future expansion.
After completing the wizard, the supervisor gets deployed.
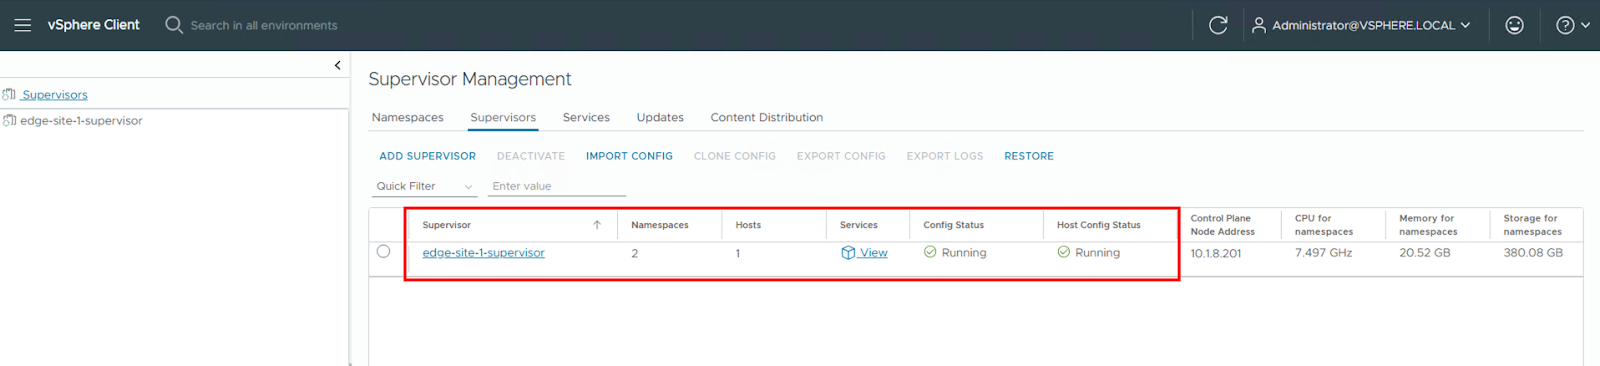
Finally, we have a single host edge site cluster that can support both VMs and container workloads out of the box.
Conclusion
Customers can then go on to deploy VM and container applications manually on the single host edge site or deploy Argo CD and use CI/CD to manage their applications
Thus we showcased how customers can leverage VCF Edge 9.0 to transform their edge infrastructure by enabling single-host deployments that seamlessly support both VM and container workloads. This significantly reduces CAPEX and operational overhead for industries with distributed operations like retail, manufacturing, and healthcare.
Resources:
- Please refer to the VCF Edge Detailed Design for various other design patterns.
- Modernizing Your Edge with Single-Node vSphere Supervisor in VMware Cloud Foundation 9.0
- GitOps for VCF: Broadcom Argo CD Operator Now Available
- What is vSphere Supervisor
- VMware Configuration Maximums
Discover more from VMware Cloud Foundation (VCF) Blog
Subscribe to get the latest posts sent to your email.


