
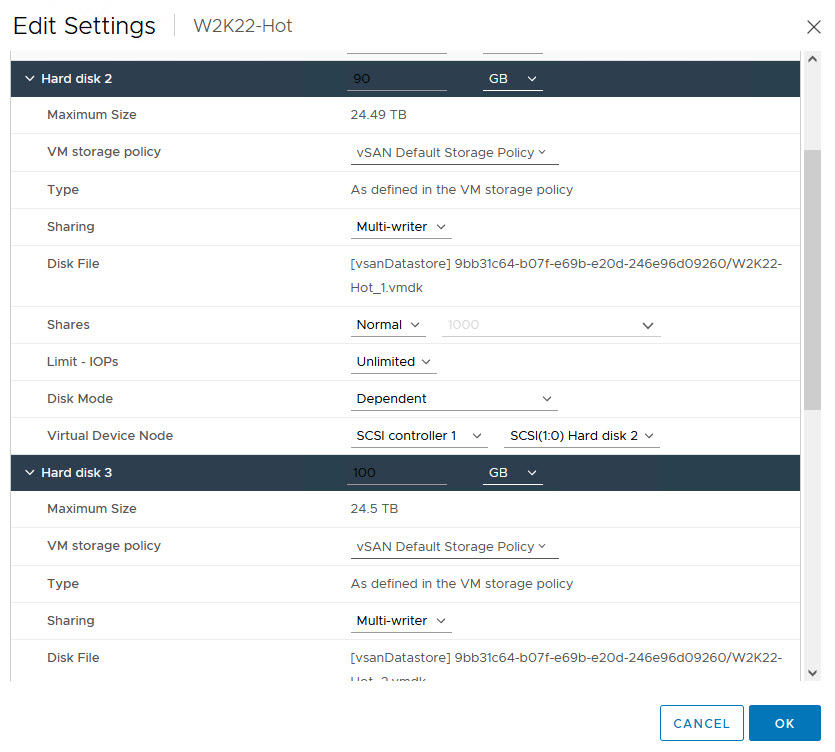
In spite of our best efforts to amplify the negative implications of (and actively trying to discourage them from) doing so, it turns out that a lot of VMware Customers have been getting very “creative” and configuring their production Microsoft SQL Server instances for shared-disk clustering (aka Always On Failover Cluster Instance – “FCI”) on vSphere by leveraging what appears to be a “work-around” feature – the Multi-Writer Flag.
The Multi-writer flag option was created specifically to support the shared disk requirements of virtualized Oracle RAC instances on the vSphere platform, and although it has since been extended to support other use cases, it has never been recommended nor supported for use with Windows Server Failover Cluster (previously known as Microsoft Cluster Service (MSCS)). Unfortunately, there are publications out there demonstrating how to achieve this unsupported and dangerous configuration, and some Customers have followed these recommendations. These reccomendations not only expose Customers’ systems to the possibility of data corruption, it also leaves their workloads in unsupported state, meaning that, should these Customers require technical support from VMware, the unsupported configuration severely constrains how much assistance can be rendered to the Customers in their time of needs.
It is important to stress again:
The only supported ways to use VMDKs as shared-disks for Windows VMs in a vSphere environment is when the VMDKs are stored in a Clustered VMDK-enabled Datastore, as described in Clustered VMDK support for WSFC, or in the “Storage Configuration” section of this Article
The rest of this Post is focused on documenting how Customers who have mistakenly followed some of the erroneous guidance previously mentioned can correct the error and move their workloads into an optimal and supported configuration.
First, the warnings and caveats:
Before attempting any of the steps deocumented in this post, it is very important for the Operator to understand and accept that VMware does not warrant nor guarantee that these configuration willl not result in data loss or corruption. These steps, when carefully performed, have been known to achieve the stated objectives of:
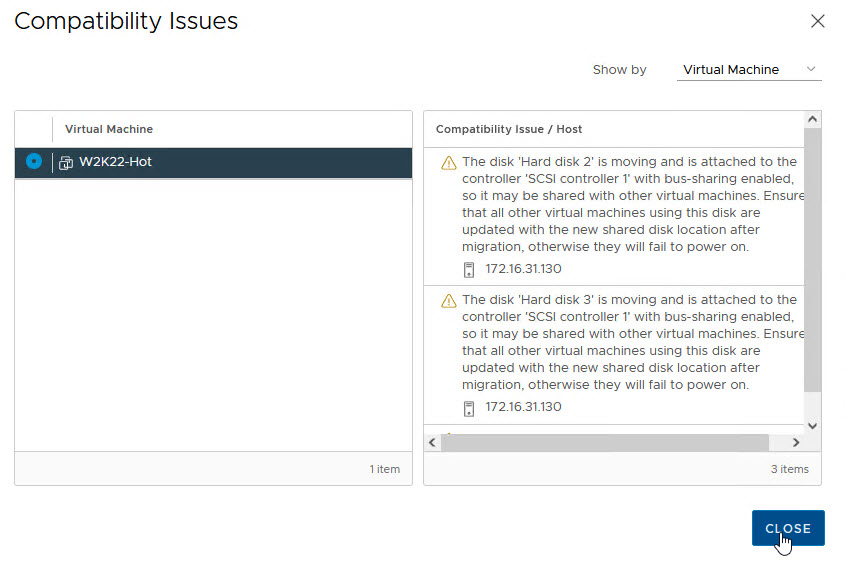
- Reconfiguring VMDK-backed shared disks for clustered Windows VMs which have been configured to use the multi-writer flag option
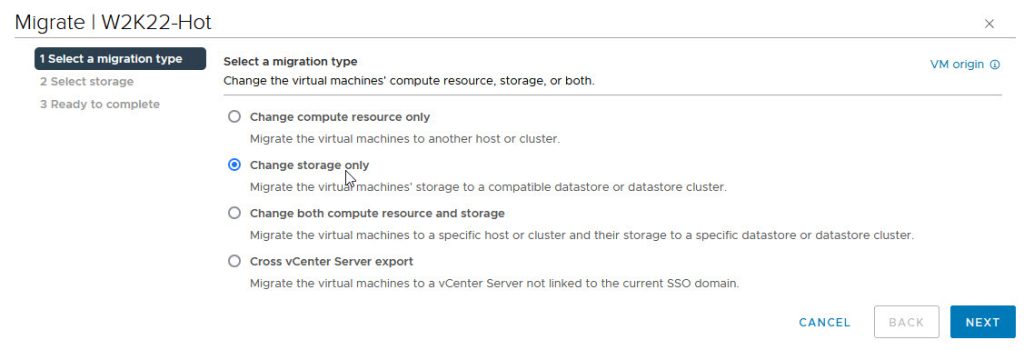
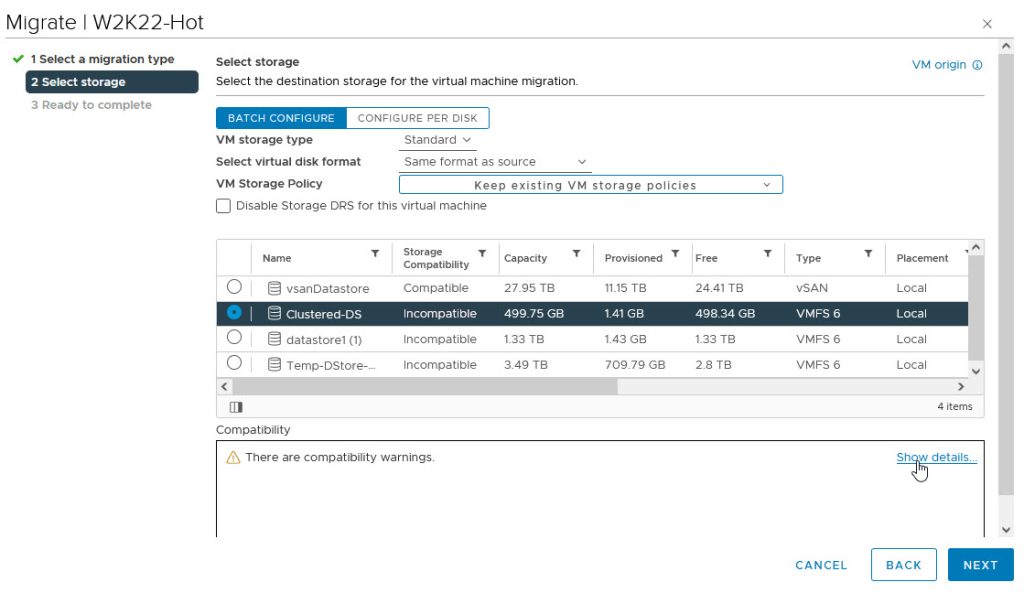
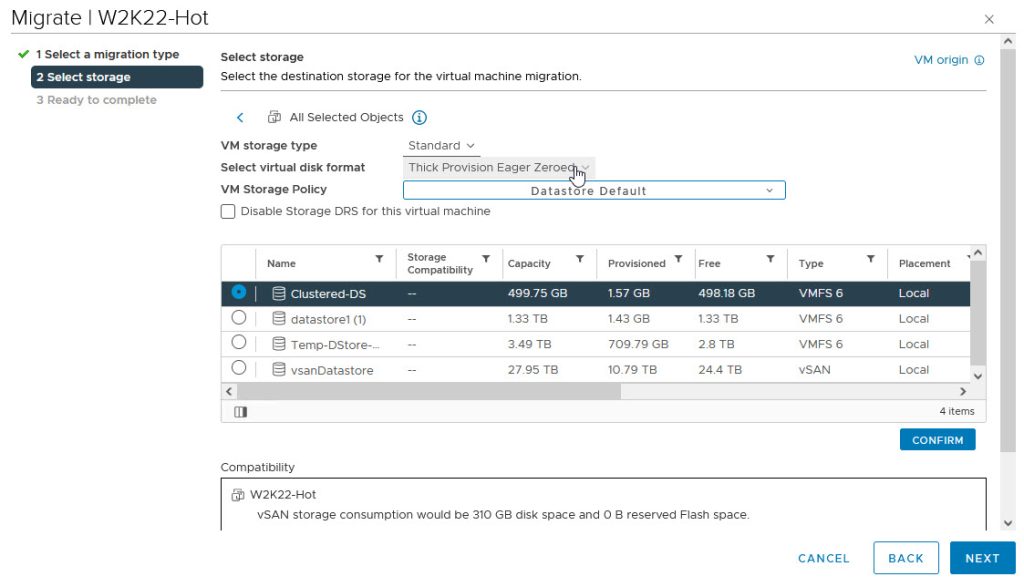
- Relocating the VMDKs into one or more officially supported “Clustered VMDK”-backed datastore(s)
- Presenting the VMDKs back to the VMs in a controlled manner to minimize or avoid the need for in-Guest or application-level reconfiguration
VMware strongly recommends that Customers performing these tasks ensure that they have a proven, repeatable roll-back plan to restore service and establish continuity in case of failure during the performance of these exercises.
It is assumed and expected that Customers have known good backup copies of all the data and configuration information of all the VMs which will be part of this reconfiguration exercise.
At a minimum, Customers should perform (or note) the following before starting these procedures:
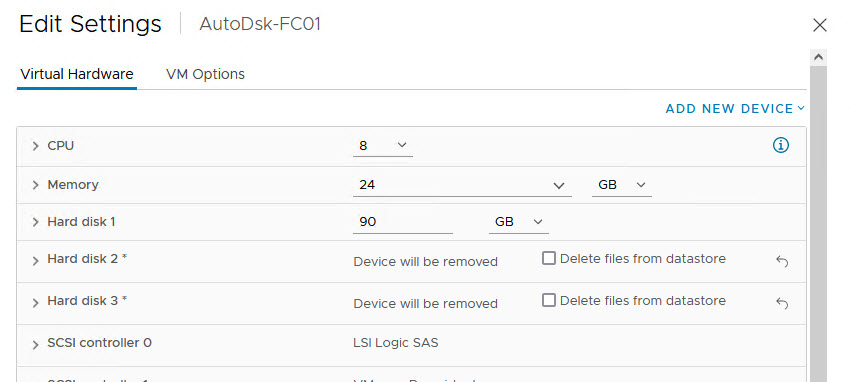
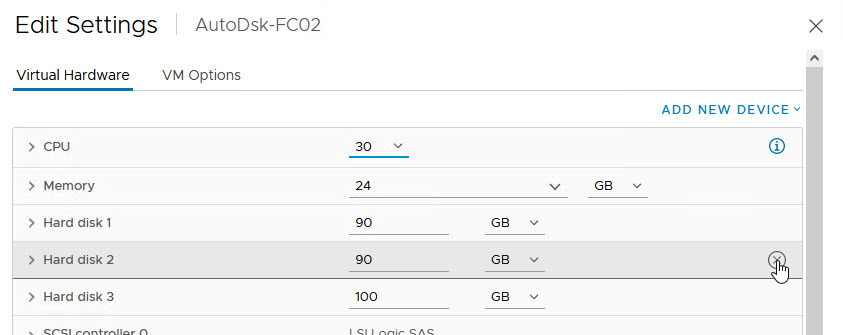
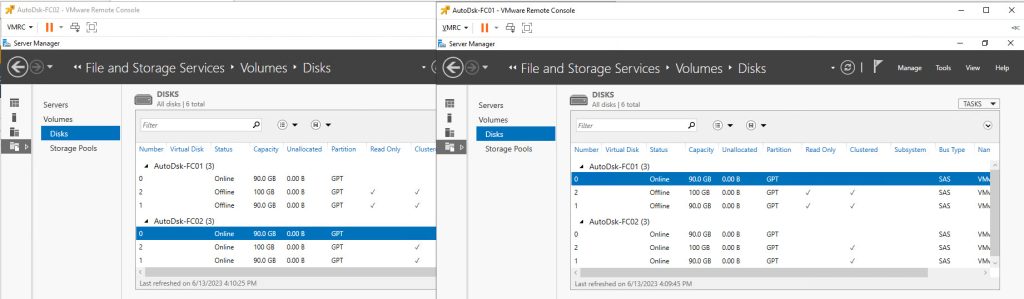
- The CURRENT configurations of the VMs, especially:
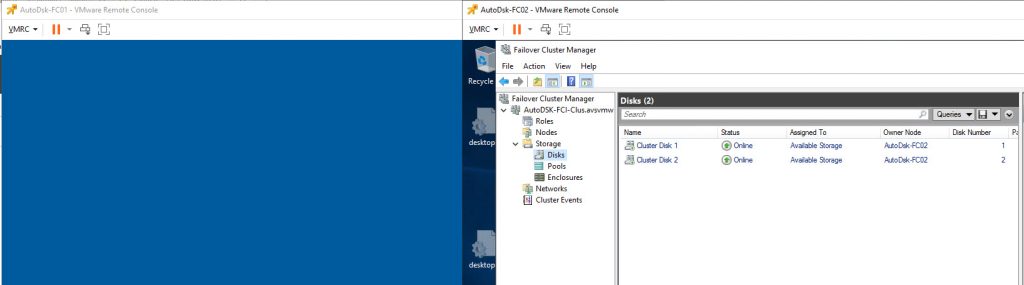
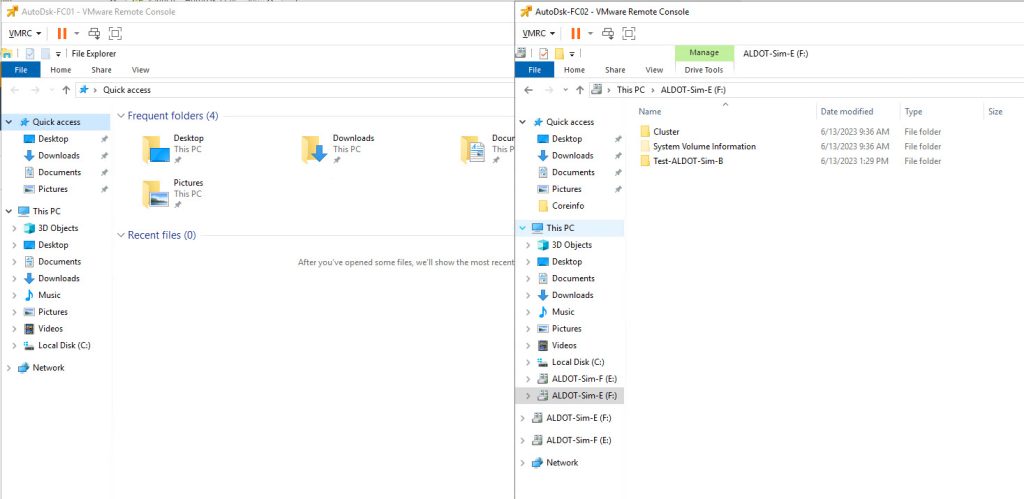
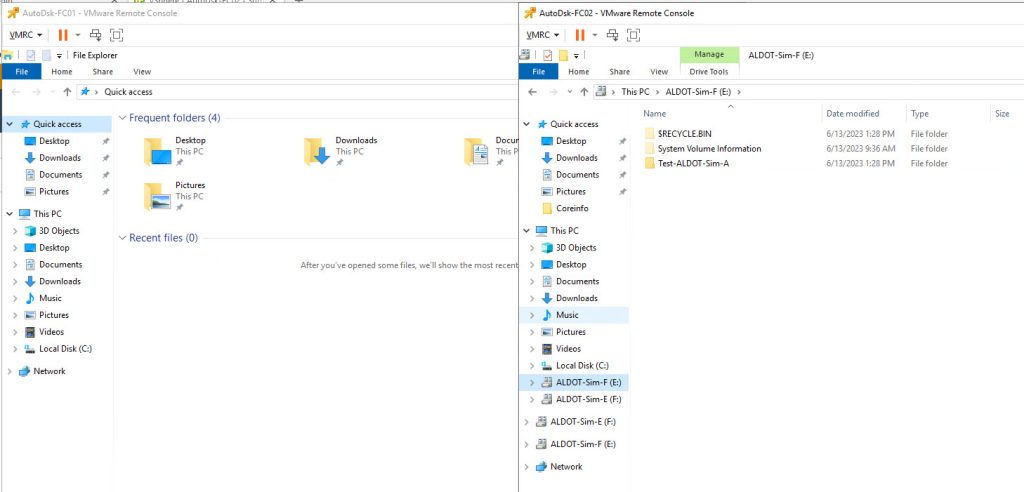
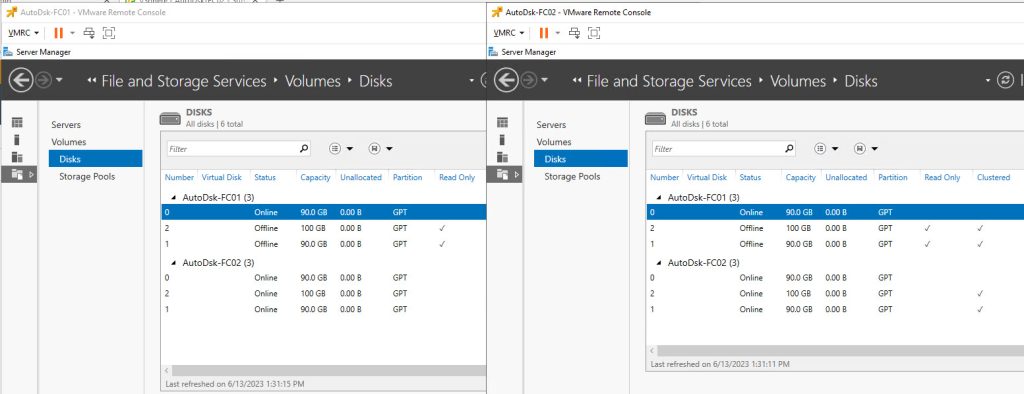
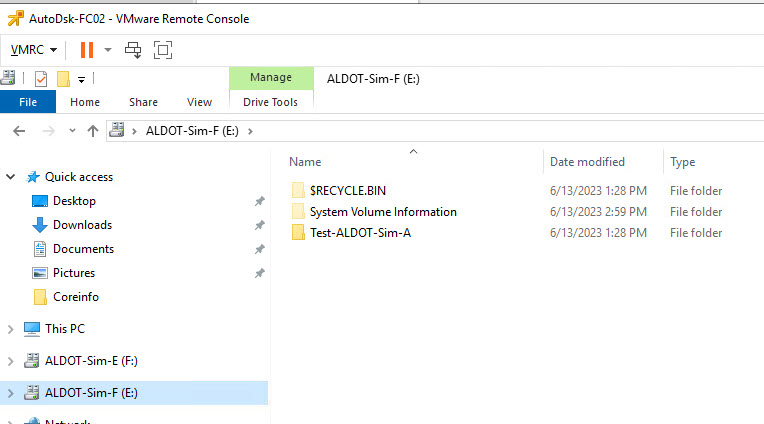
- The Disks – which VMDKs corresponds to which volumes in the guest operating system
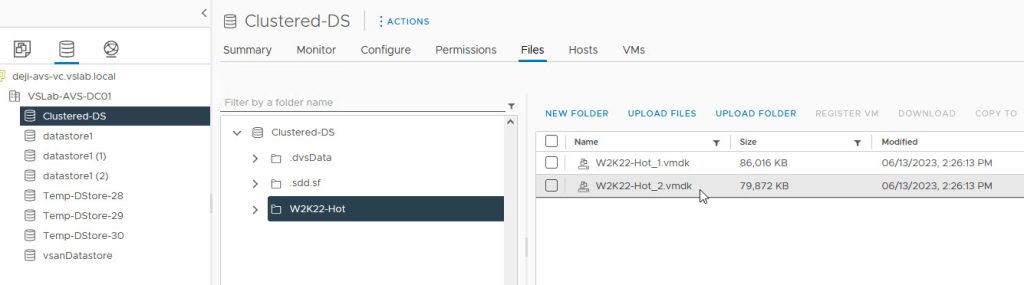
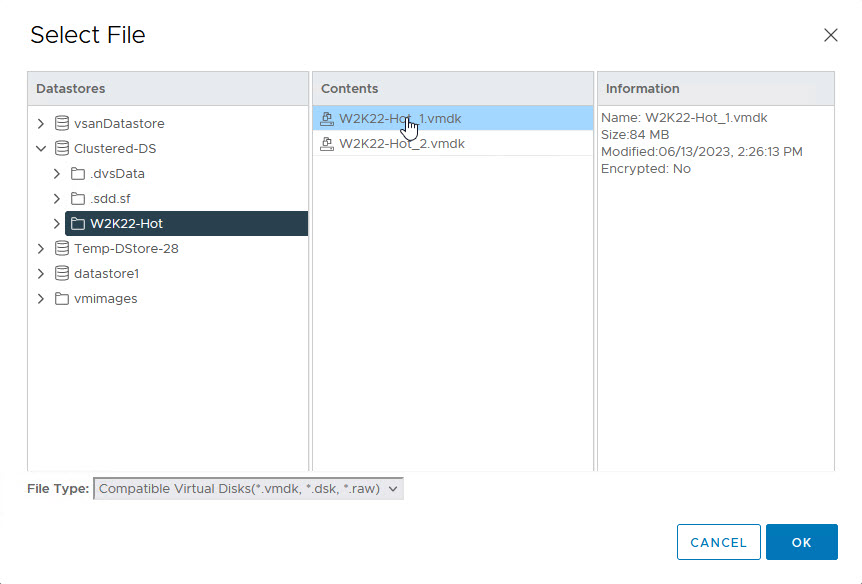
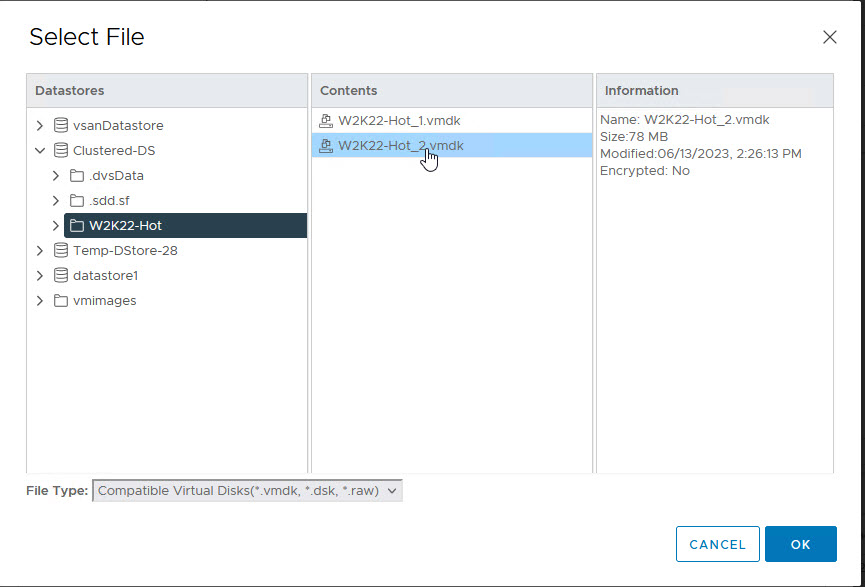
- The names and location of the files backing EACH VMDK
- The SCSI number and SCSI ID to which EACH Disk is connected. We will need to attach the disk to the SAME SCSI ID when we re-attach it
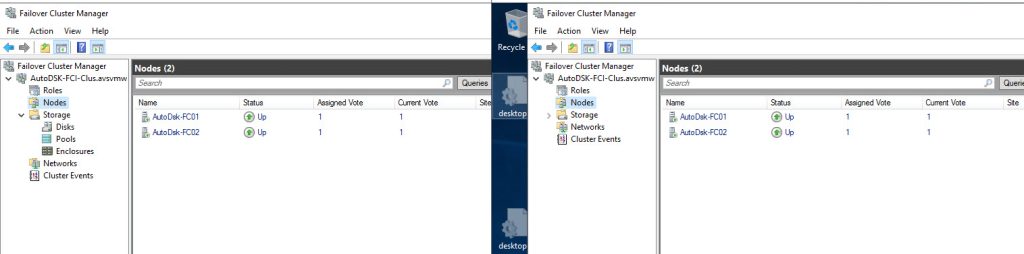
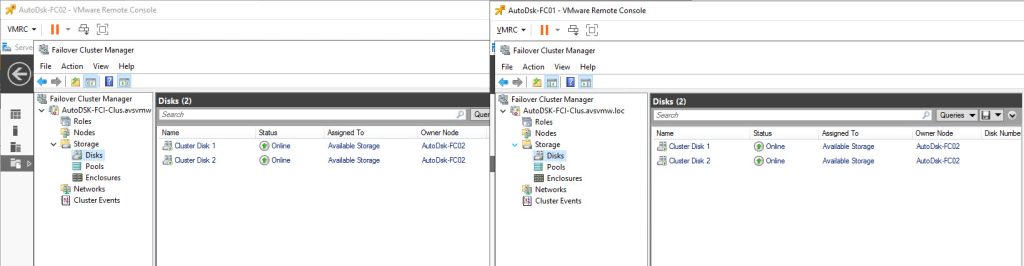
- In Windows, the CURRENT Owner of the Disk Resources (verify this in WSFC)
- If the WSFC Resource ownership is split among/between Nodes, FAILOVER ALL THE RESOURCES to one Node. This simplifies the reconfiguration process and is very helpful in avoiding confusions and mix-ups.
- Power off all Passive Nodes BEFORE you power off the Active Node.
- After you are done, you will need to power on the Active Node FIRST before powering on the other Nodes
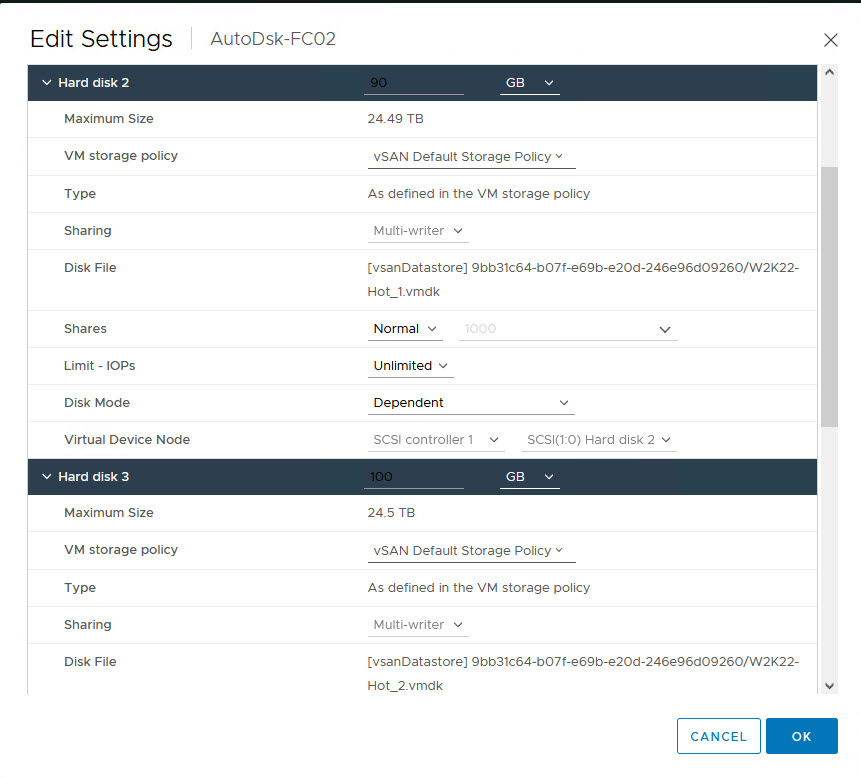
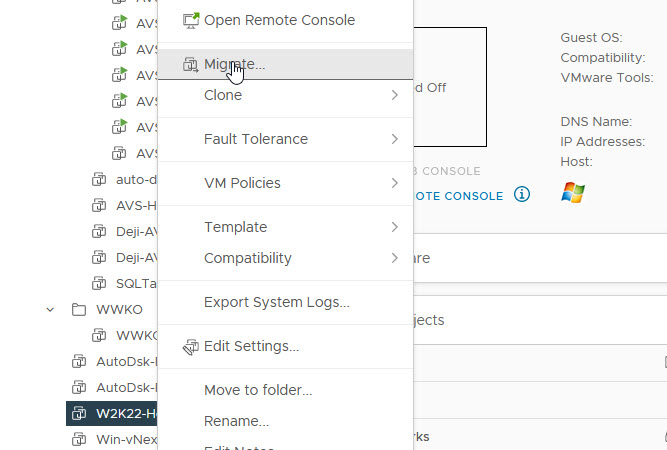
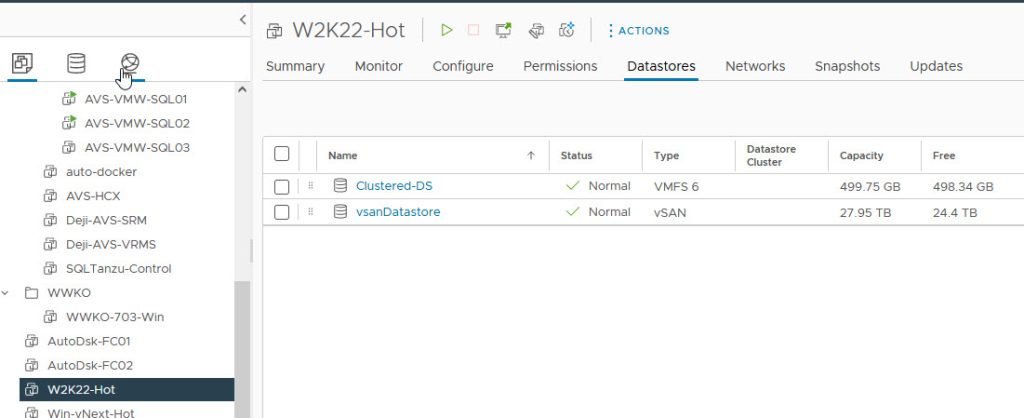
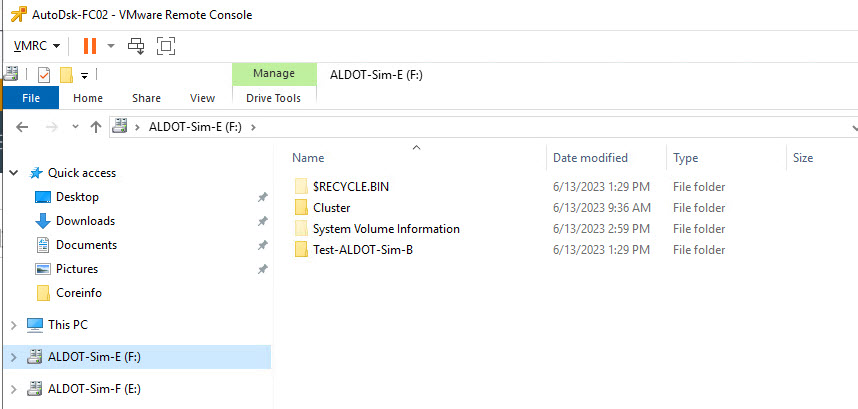
Let’s begin by taking a look at our current configuration:

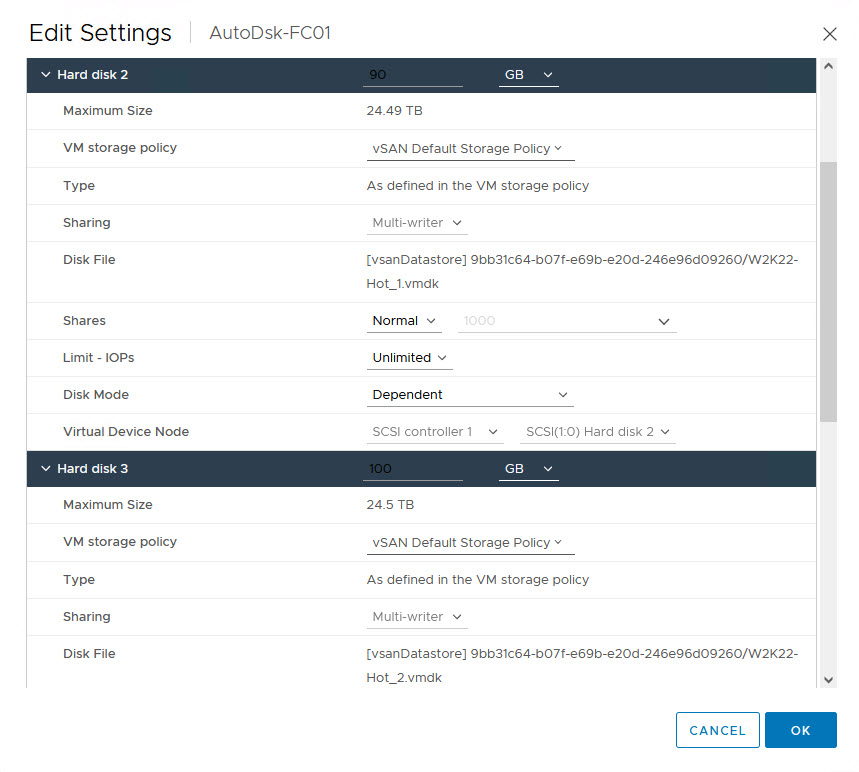
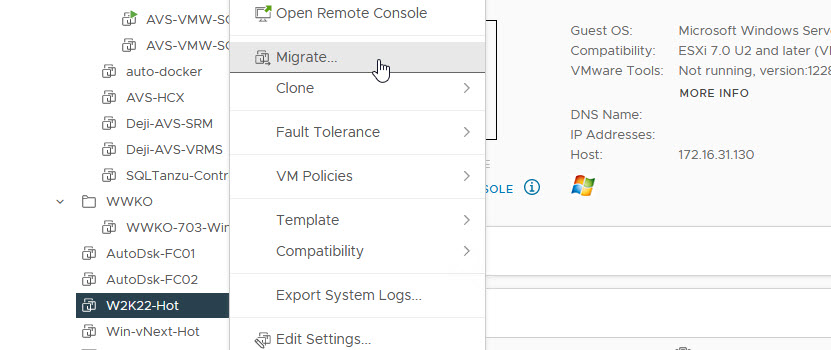
Now, we are ready to perform disk reconfiguration in vCenter. We need to power off the VMs BEFORE proceeding with these steps
Let’s demonstrate this anyway, for academic purposes.
End of academic curiosity exercise. Let’s move on.
Note: Please do NOT DELETE the disk(s). If you do, they are gone. We want to DETACH instead.
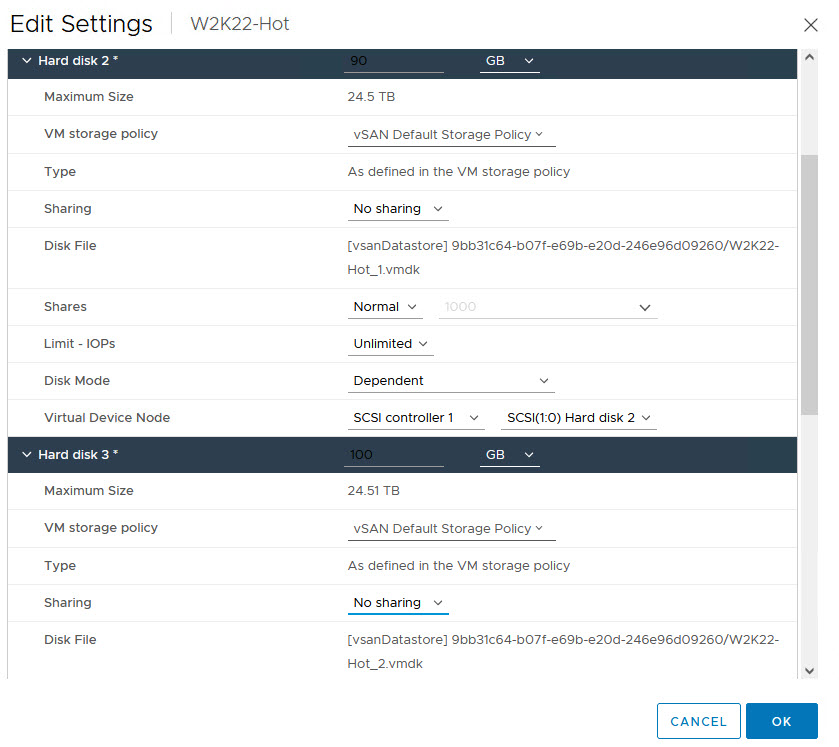

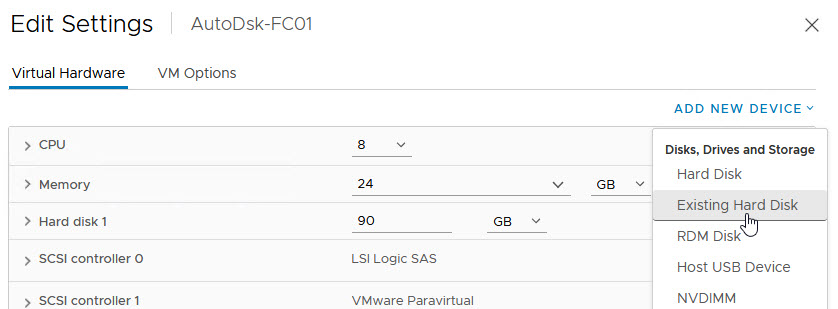
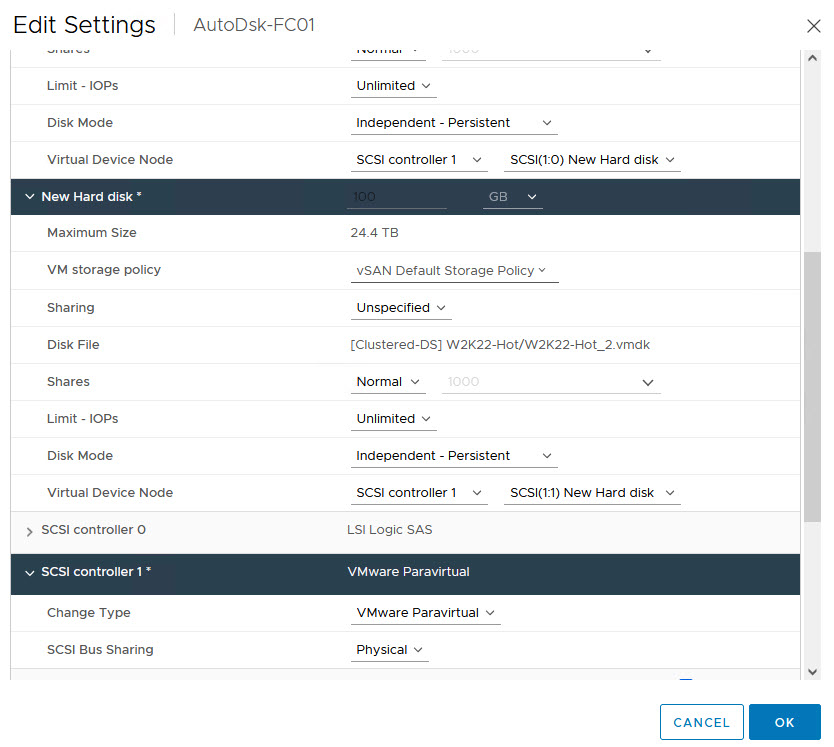
We are now ready to re-attach the disks to the WSFC Node VMs
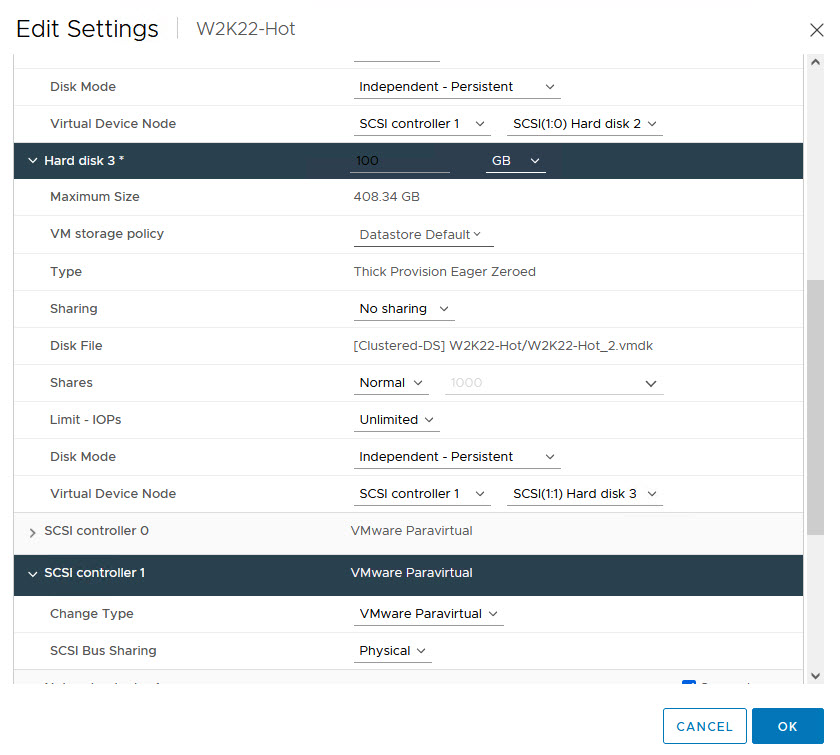
Notes:
- Sharing: No sharing
- Disk Mode: Independent Persistent
- Note The Virtual Device Node SCSI ID
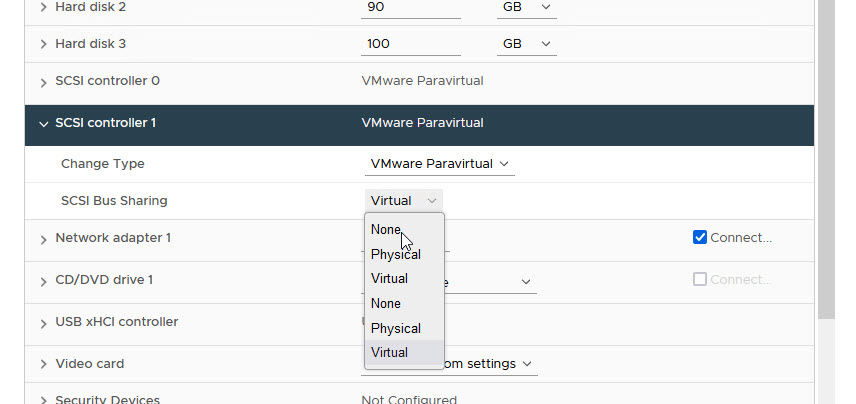
- SCSI Bus Sharing: Physical
- These Settings MUST be identical on the WSFC Nodes when we attach the Disks
Repeat the process for the other WSFC Node VMs

That’s it. Now, we power on the VM that used to be the ACTIVE node. Then, we log into Windows and wait for everything to start up. You can now power on the other Node VM(s)
That’s it. This concludes our demonstration. We have reconfigured our misconfigured Windows Server Failover Cluster shared-disk configuration. We have removed its dependence on the unsupported “Multi-Writer Flag” band aid and moved the disks into the supported “Clustered VMDK” datastore option. We have done this without causing a major reconfiguration of Windows, WSFC or the clustered workloads.
Of course, we wished that we didn’t have to do all of this to begin with. However, we are glad that we are now in a happy (desired) place.
Discover more from VMware Cloud Foundation (VCF) Blog
Subscribe to get the latest posts sent to your email.


